2-121
3
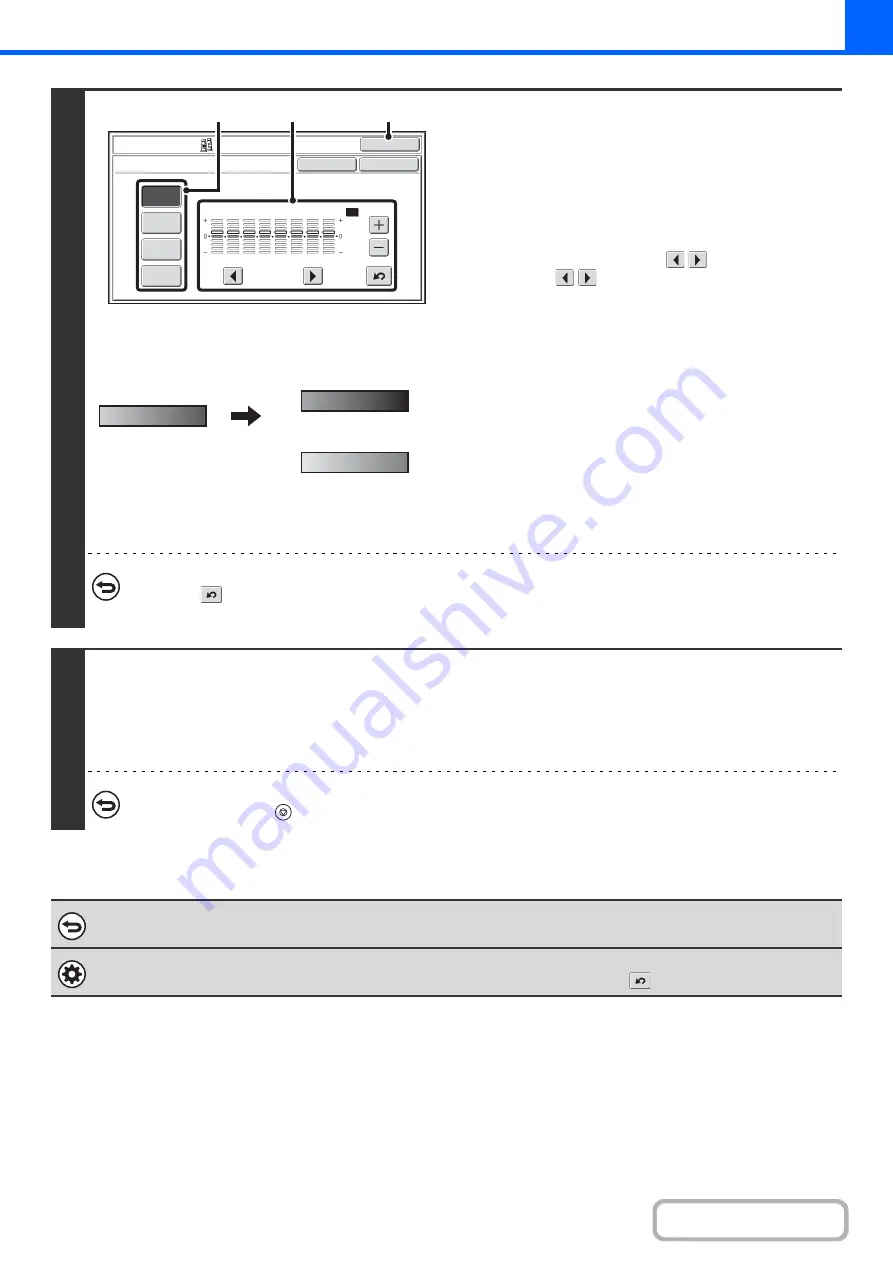
Examples of colour balance adjustment
Adjust the colour balance.
(1) Select the colour to be adjusted.
Select [Y] (yellow), [M] (magenta), [C] (cyan), or [Bk] (black).
If only the rectangular area around the letter in a key is
highlighted, the settings have been changed from the
factory default settings.
(2) Select the gradation to be adjusted.
Select the gradation with the
keys.
Touch the
keys to move the highlighting to one of
gradations "1" to "8" or "All".
To adjust all eight gradations at once, move the
highlighting to "All".
(3) Adjust the density.
To darken the density of the selected gradation, touch the
[+] key. To lighten the density, touch the [-] key. Each time
one of the keys is touched, the indicator frame moves up
or down one level.
(4) To adjust other colours, repeat steps (1) to
(3).
(5) Touch the [OK] key.
You will return to the special modes screen. Touch the
[OK] key to return to the base screen of copy mode.
To return the colour balance values to the default settings...
Touch the
key. The values of all eight gradations will return to the default colour balance values.
The default colour balance values are set in "Initial Colour Balance Setting" in the system settings (administrator).
4
Press the [COLOUR START] key.
Copying will begin.
If you are using the document glass to copy multiple original pages, copying will take place as you scan each original. If you
have selected sort mode, change originals and press the [COLOUR START] key. Repeat until all pages have been scanned
and then touch the [Read-End] key.
To cancel scanning and copying...
Press the [STOP] key (
).
To cancel a colour balance setting...
Touch the [Cancel] key in the screen of step 3.
System Settings (Administrator): Initial Colour Balance Setting
This is used to set the default values to which the colour balance values return when the
key is pressed.
Y
M
C
Bk
1
2
3
4
5
6
7
8
OK
OK
Cancel
Colour Adjustments
Colour Balance
All
(1)
(2), (3)
(5)
The settings of all gradations
are moved
The settings of all gradations
are moved toward -
Содержание MX-2314N
Страница 11: ...Conserve Print on both sides of the paper Print multiple pages on one side of the paper ...
Страница 34: ...Search for a file abc Search for a file using a keyword Search by checking the contents of files ...
Страница 35: ...Organize my files Delete a file Delete all files Periodically delete files Change the folder ...
Страница 284: ...3 19 PRINTER Contents 4 Click the Print button Printing begins ...
Страница 293: ...3 28 PRINTER Contents 1 Select Layout 2 Select Long edged binding or Short edged binding Macintosh 1 2 ...
Страница 836: ...MX2314 GB ZZ Operation Guide MX 2314N MX 2614N MX 3114N MODEL ...


