7
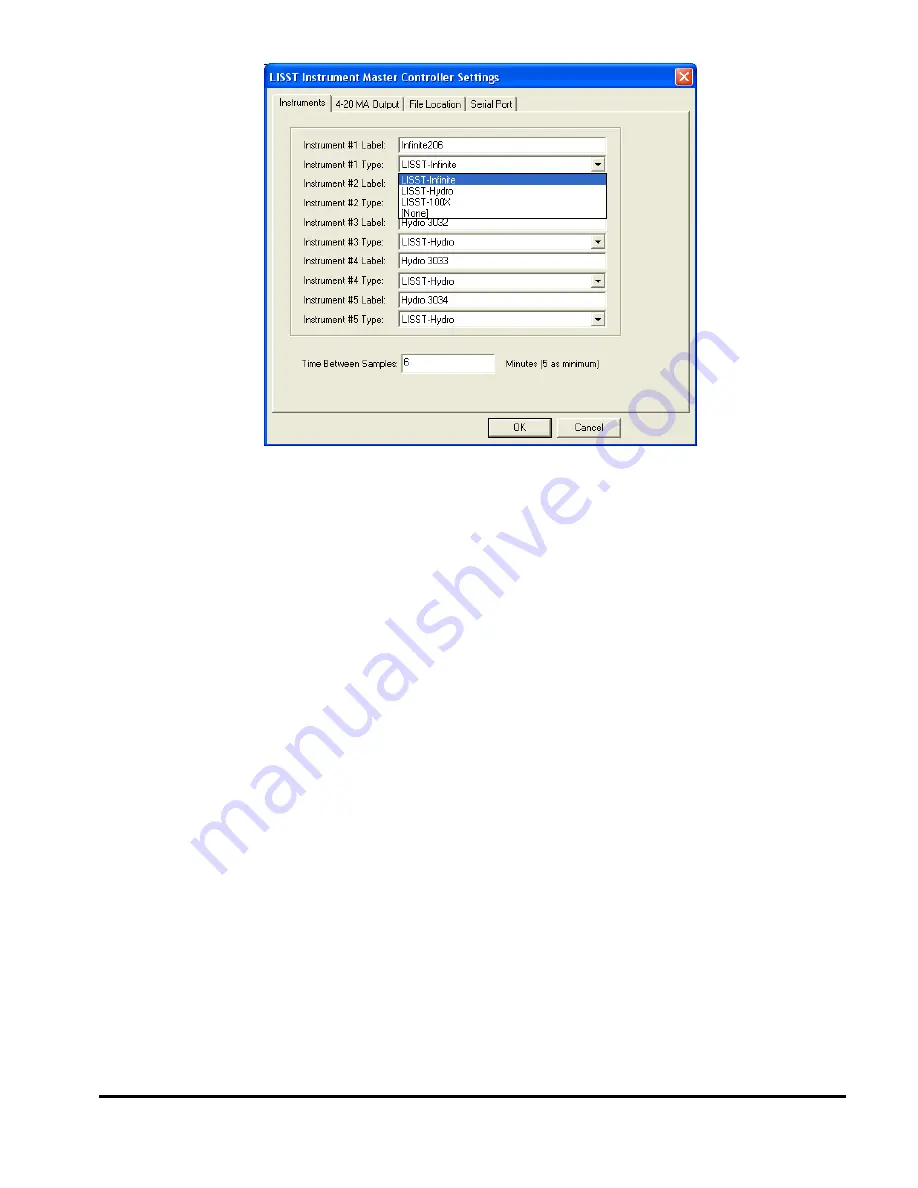
In the text box that reads ‘Instrument #1 Label’, enter a descriptive label
for Instrument number 1. In this example ‘Infinite206’ has been entered,
but the text could be more descriptive, e.g. ‘Siltation Basin, Entrance’,
or ‘Turbine # 1’.
However, it is recommended that you always
include the instrument serial number in the label, as this makes
troubleshooting easier.
Then use the drop down menu to select the instrument type for
Instrument #1. Your choices are LISST-Infinite, LISST-HYDRO, LISST-
100X, or None. Select the appropriate instrument. If you select ‘[None]’,
no instrument will be displayed in the space for that instrument in the
Current Values Display. Continue labeling as necessary for the
remaining instruments.
Step 4: Set Time
Between
Samples
Next, on the Instruments tab you need to select the time between
samples. This cannot be less than 5 minutes. In the example above,
the time between samples has been set to 6 minutes.
The instruments do NOT all sample at the same time. They are
sampled sequentially. When Instrument #1 has completed its sampling,
Instrument #2 will begin and so on. The time between Samples is the
desired time between the start of sampling for instrument #1.
If several instruments are connected, the time to actually obtain a
sample for all instruments may be
longer
than the Time Between
Samples. In this case Instrument#1 will start sampling as soon as the
last instrument (in this case Instrument #5) has completed its sampling.
Click the OK button when you are satisfied with the Instrument Labels
and the Time Between Samples.
Содержание LISST-Hydro
Страница 2: ......
Страница 4: ......
Страница 6: ......
Страница 21: ...15...
Страница 41: ...35 Notes...
Страница 43: ...37 Monitor mode display is very similar to the Master Controller mode display Notes...
Страница 51: ...45...


