36
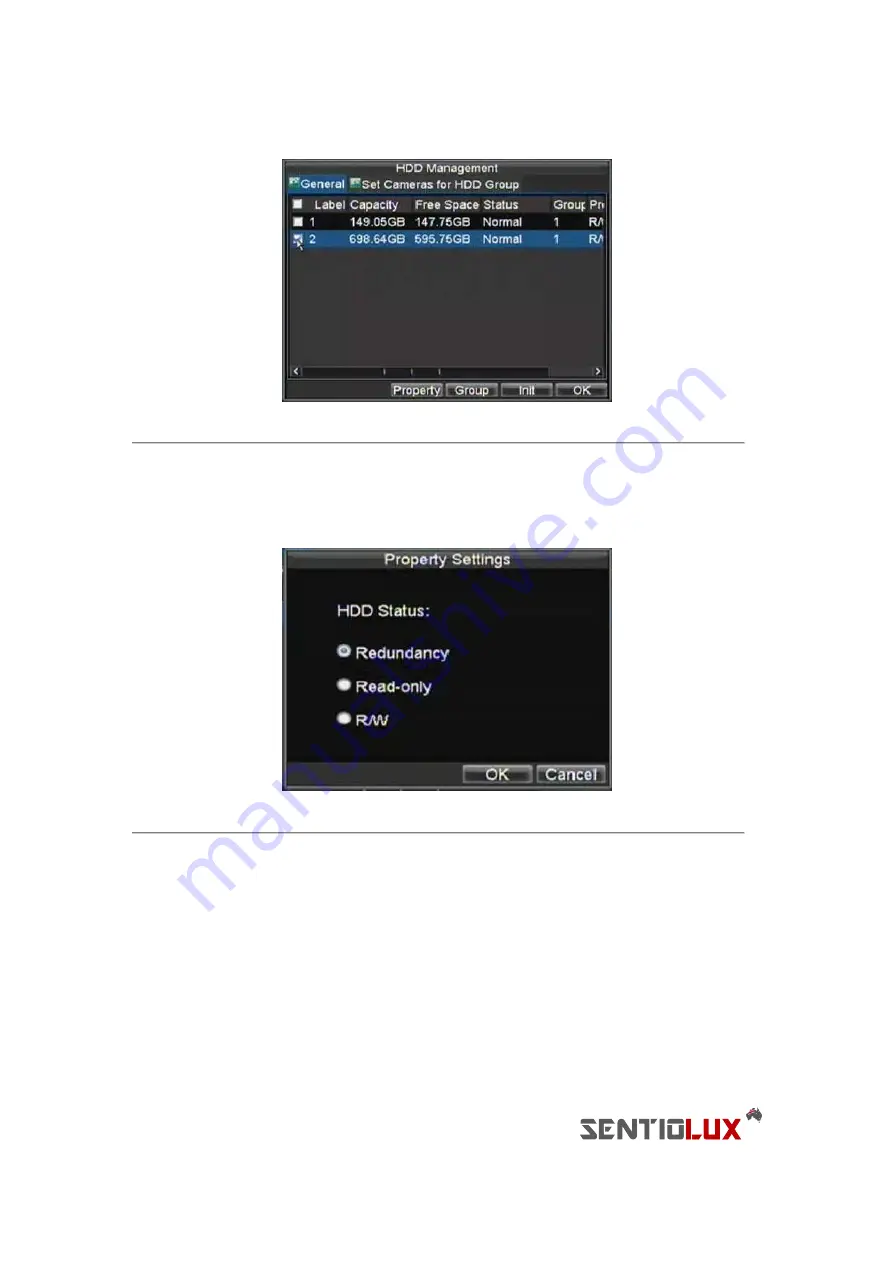
Figure 10. HDD Management Menu
4.
Click the Property button. This will take you to the Property Settings menu.
5.
Set
HDD Status
to Redundancy, shown in Figure 11. Verify at least one other HDD is set to R/W
(read/write).
6.
Click the OK button to save settings and return to the previous menu.
Figure 11. HDD Property Settings
7.
Navigate to the Record Settings menu by clicking Menu > Setting > Record Setting.
8.
Click on the General tab.
9.
Select the Camera to be used for redundancy.
10.
Next to More Settings, click on the Set button. This will bring up additional settings for the selected
camera (shown in Figure 12).
Содержание RTDVD-8100-4CIF Series
Страница 1: ...RTDVR 8100 4CIF Series DVR USER S MANUAL Version3 1 0...
Страница 7: ...6 C H A P T E R 1 Introduction...
Страница 17: ...16 C H A P T E R 2 Getting Started...
Страница 24: ...23 C H A P T E R 3 Live Preview...
Страница 30: ...29 C H A P T E R 4 Record Settings...
Страница 39: ...38 C H A P T E R 5 Playback...
Страница 44: ...43 Figure 7 Digital Zoom Area Selection...
Страница 45: ...44 C H A P T E R 6 Backup...
Страница 50: ...49 C H A P T E R 7 Alarm Settings...
Страница 61: ...60 C H A P T E R 8 Network Settings...
Страница 70: ...69 C H A P T E R 9 PTZ Controls...
Страница 77: ...76 C H A P T E R 1 0 Camera Management...
Страница 81: ...80 C H A P T E R 1 1 HDD Management...
Страница 87: ...86 C H A P T E R 1 2 DVR Management...
Страница 98: ...97 Figure 17 Log Search Export Menu 7 Click Cancel to exit out of menu...
Страница 99: ...98 C H A P T E R 1 3 Appendix...


