


SECURAM Systems Inc.
ScanLogic D66 Operation Guide
Page 7
Step 5: Press “▲” or “▼” to select the desired user ID to be disabled.
Step 6: Press “
Menu/Ok
”
ID No.3’s code disabled.
Note: This function only disables the user’s code, not the user. The user can still unlock the door
by fingerprint.
7.0 Disable User (Security Level 3)
Step 1: Press “
Menu/OK
”. The screen will show “
Select Menu
”.
Step 2: Press “▲” or “▼” to select “
System Menu
”. Press “
Menu/OK
” again.
Step 3: Place an enrolled administrator’s finger (ID No. 01 or 02) on the scanner and hold.
Step 4: After the fingerprint is verified successfully, press “▲” or “▼” to select “
Disable User
”.
Step 5: Press “▲” or “▼” to select the desired ID No. to disable (e.g. ID 03).
Step 6: Press “
Menu/OK
”.
The LCD screen displays: “
ID:03 Disabled
”, confirming that ID 03 has been successfully disabled.
This User’s fingerprint and code have now been disabled. If the User attempts to access the lock,
the screen will display “
ID:03 Disabled
”.
Note:
Administrators cannot be disabled.
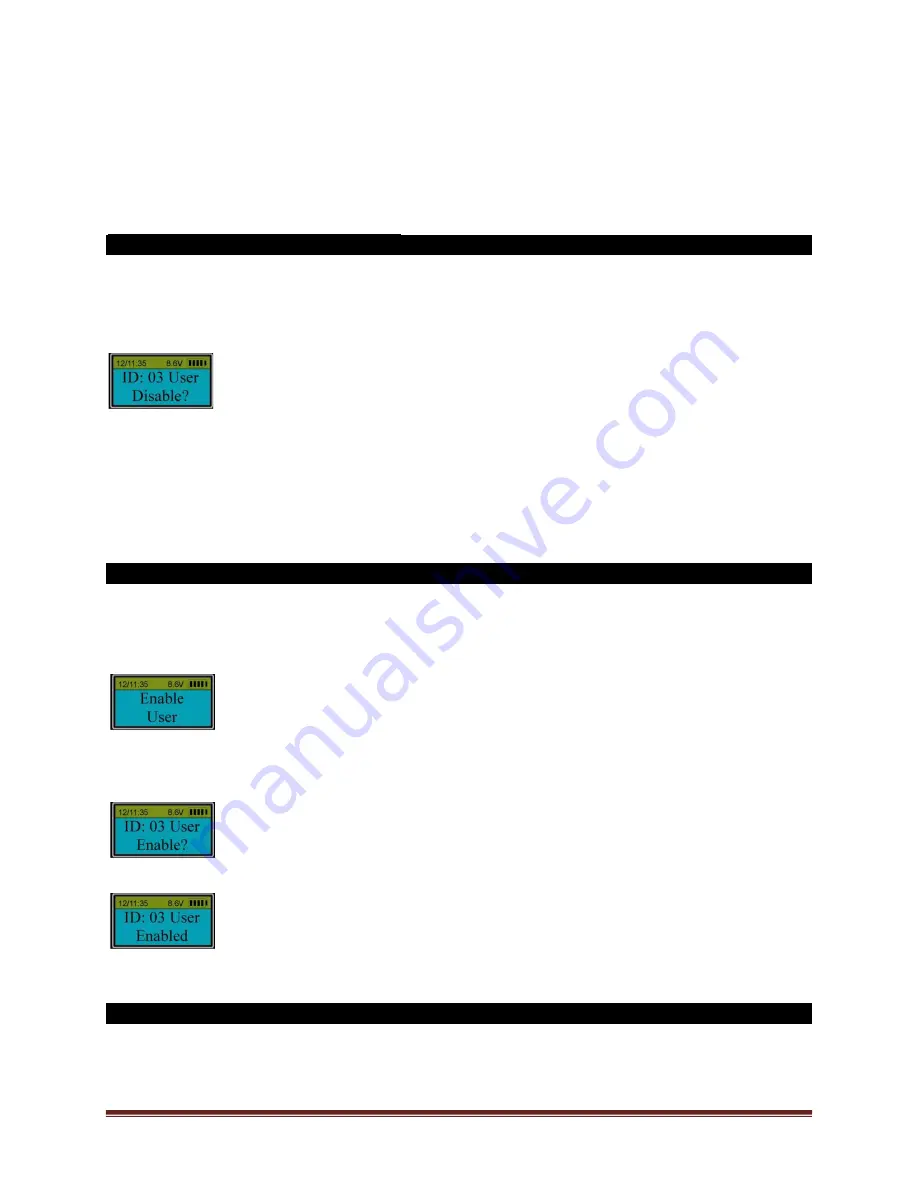
8.0 Enable User (Security Level 3)
Step 1: Press “
Menu/OK
”. The screen will show “
Select Menu
”.
Step 2: Press “▲” or “▼” to select “
System Menu
”. Press “
Menu/OK
” again.
Step 3: Place an enrolled administrator’s finger (ID No. 01 or 02) on the scanner and hold.
Step 4: After the fingerprint is verified successfully, press “▲” or “▼” to select “
Enable User
”.
Step 5: Press “
Menu/OK
”.
Step 6: Press “▲” or “▼” to select the ID No. to be enabled (e.g. ID 03).
Step 7: Press “
Menu/OK
”.
The User ID No. 03 is now enabled and can use the previously registered fingerprint and/or code to
access the lock.
9.0 Set Time Delay (Security Level 3)
Step1: Press “
Menu/OK
”. The screen will show “
Select Menu
”.
Step 2: Press “▲” or “▼” to select “
System Menu
”. Press “
Menu/OK
” again.


