


SECURAM Systems Inc.
ScanLogic D66 Operation Guide
Page 10
When the EntryPad starts its Time Delay process, user can operate the EntryPad normally,
but the Lock Body will not be unlocked even if the verification is successful.
If no valid code or enrolled fingerprint are verified successfully during Time Window period,
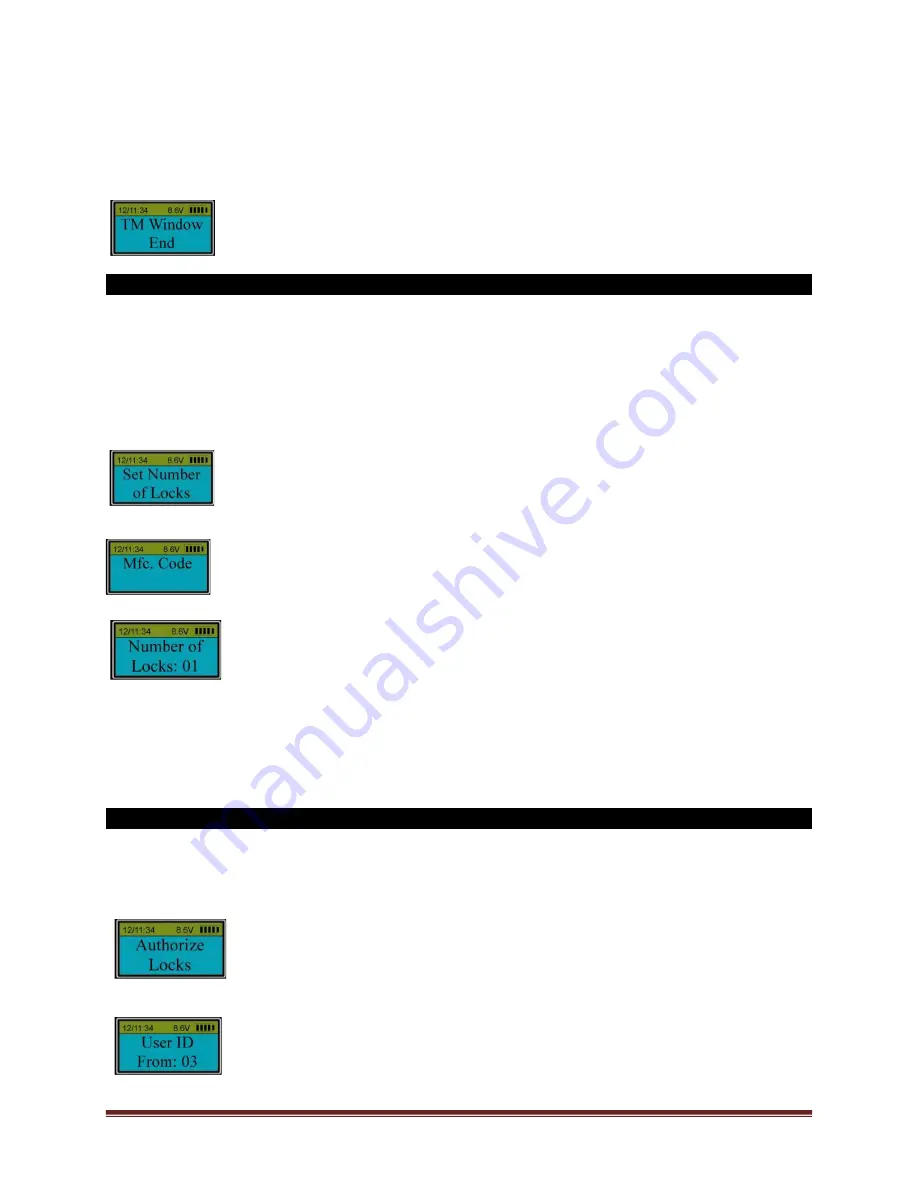
the Lock Body will be locked until the end, and then , the LCD will show:
10.0 Set number of locks (Security Level 3)
The ScanLogic D66 is capable of managing up to 4 Lock Bodies using a junction box (Junction box
Part# CB11-1T4). The EntryPad must be programmed to recognize the additional Lock Bodies.
Step 1: Press “
Menu/OK
”. The screen will show “
Select Menu
”.
Step 2: Press “▲” or “▼” to select “
System Menu
”. Press “
Menu/OK
” again.
Step 3: Place an enrolled administrator’s finger (ID No. 01 or 02) on the scanner and hold.
Step 4: After the fingerprint is verified successfully, press “▲” or “▼” to select “
Set Number of
Locks
”. Press “Menu/OK”.
Step 5: The display will prompt you to enter the “
Mfc. Code
”. The default Mfc. Code is 975246.
Step 6: Press “▲” or “▼” to set number of locks.
Note:
The default number of locks is 01. The maximum number of locks is 04.
When opening the lock, the display will ask you to select the lock to be opened, press the numbered
button that corresponds with the lock to be opened. Then, the lock will be unlocked automatically if
verification is successful.
10.1 Authorize access to locks (Level 3)
The ScanLogic D66 allows you to set the Users that will have access to specific locks.
Step 1: Press “
Menu/OK
”. The screen will show “
Select Menu
”.
Step 2: Press “▲” or “▼” to select “
System Menu
”. Press “
Menu/OK
” again.
Step 3: Place an enrolled administrator’s finger (ID No. 01 or 02) on the scanner and hold.
Step 4: After the fingerprint is verified successfully, press “▲” or “▼” to select “
Authorize Locks
”.
Step 5: Press “
Menu/OK
”. The system will now ask which range of Users are to be programmed
to open this set of locks.


