4.5 MACHINE START-UP
4.6 MACHINE STROKE INSPECTION & ADJUSTMENT
PAGE 18
BEFORE STARTING THIS MACHINE, TAKE TIME TO THOROUGHLY REVIEW THE VHS
SAFETY TAPE OR SAFETY CD AND THE OPERATOR’S MANUAL.
This machine is equipped with a lock-out, disconnect switch as standard equipment. We strongly urge you
to follow the OSHA directive CFR-1910.147 (effective 09-01-90) regarding lock-out, tag-out procedures.
BEFORE POWERING THE MACHINE be sure that all packing materials and tools have been removed
from the machine and that all work stations are clear.
TO POWER THE MACHINE:
1.
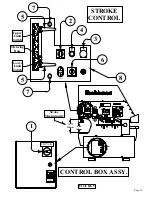
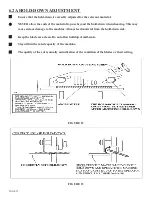
Place the disconnect switch (1) in the ON position and the selector switch (2) in the START position.
Make sure the Emergency Stop button (3) is pulled out.
2.
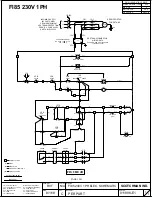
Power the machine by pushing the green START button (4). Once the machine has been powered, it
will not move until the selector switch (2) has been placed in either the PUNCH or the SHEAR
position. Placing the switch in the PUNCH position will cause the shear to close and the punch to
retract. Placing the switch in the SHEAR position will cause the shear to open and the punch to close.
If the machine does not move when the selector switch is moved, the motor rotation is not correct.
The electrician will have to switch two of the line wires to change the direction of rotation. Any time
that the power to the machine has been turned off, the selector switch (2) must be placed in the
START position to restart the machine.
The stroke setting is important for the proper operation of the machine. If this setting has changed, the
machine may over-travel and cause the cylinder to "bottom out". This continued condition will
eventually cause the starter overload to open. It can also cause the hydraulic oil to overheat and damage
hydraulic system components. A slight change in the stroke setting can result in inadequate stroke to
operate the tooling. A check of the machine’s stroke setting is made at the punch end of the machine.
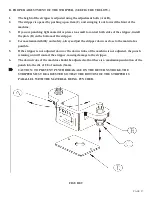
SEE FIGURE 5 ON THE FOLLOWING PAGE
1.
Set the stroke control handles (5) out to their farthest position.
2.
Place the disconnect switch (1) in the ON position and the selector switch (2) in the START position.
Make sure the Emergency Stop button (3) is pulled out.
3.
Turn the run-jog switch (6) to the JOG position.
4.
The die holder must be removed and the stripper swung back, out of the way.
5.
Power the machine by pushing the green START button (4). Jog the ram down until it measures
8-1/8 inches (20.6 cm) from the bolster to the bottom of the ram.
6.
Turn the machine’s power off.
7.
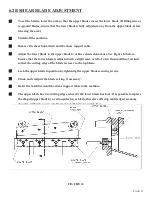
Check to see if the metering boss has contacted the lower limit switch. If it has not, loosen the two
mounting plate screws (7) and move the mounting plate (8) up until contact is made.
9.
Tighten the screws and re-check the dimensions. Repeat, if needed.
Содержание FI-8510-20M
Страница 10: ...PAGE 9 FIGURE 1...
Страница 12: ...PAGE 11 FIGURE 2...
Страница 24: ...PAGE 21 FIGURE 6...
Страница 26: ...PAGE 23 FIGURE 7...
Страница 38: ...PAGE 35 FIGURE 15...
Страница 40: ...PAGE 37 FIGURE 16...
Страница 42: ...PAGE 39 FIGURE 17...
Страница 44: ...PAGE 41 11 Install the notcher table H and adjust the guard down to the proper height FIGURE 18...
Страница 48: ...PAGE 45 FIGURE 20...
Страница 50: ...PAGE 47 FIGURE 21...
Страница 52: ...PAGE 49 FIGURE 22...
Страница 56: ...PAGE 53 FIGURE 24...
Страница 58: ...PAGE 55 FIGURE 25...
Страница 62: ...PAGE 59 FIGURE 26...
Страница 64: ...PAGE 61 FIGURE 27...
Страница 68: ...PAGE 65 FIGURE 29...
Страница 74: ...PAGE 71 FIGURE 30...
Страница 76: ...PAGE 73 FIGURE 31...
Страница 80: ...PAGE 77 FIGURE 33...
Страница 82: ...PAGE 79 FIGURE 34...
Страница 84: ...PAGE 81 FIGURE 35...
Страница 88: ...PAGE 85 FIGURE 37...
Страница 90: ...PAGE 87 FIGURE 38...
Страница 92: ...PAGE 89 FIGURE 39...
Страница 94: ...PAGE 91 FIGURE 40...
Страница 96: ...PAGE 93 FIGURE 41...
Страница 100: ...PAGE 97 FIGURE 43 SERIAL S 4481 UP...


