Copyright ©2004 G421-8600
Printed in Japan
QUICK INSTALLATION GUIDE
GB
GB
EN
USA
○○○○○○○○○○○○○○○○○○○○○○○○○○○○○○○○○○○○○○○○○○○○○○○○○
○○○○○○○○
○○○○○○○○○○○
○○○○○○○○○○○○○○○○○
○○○○○○○○○○
○○○○○○○○○○○○○○○○○○○○○○○○○○○○○○○○○○○○○○○○○○○○○○○○○○○○○○
○○○○
○○○○○○○○○○○○○○○○○○○○○○○○○○○○○○○○○
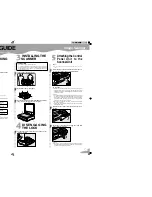
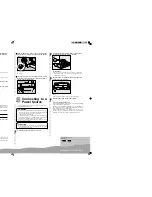
Connecting to a
Network
This section explains how to connect this machine to a network.
Important
❒
Use a 100BASE-TX (category 5) or 10BASE-T network cable when
you connect this machine to a network.
With the network cable you use for connection, create
a single loop about 15cm (6”)(
A
A
A
A
A
) away from an end of
the cable, and then attach the ferrite core that comes
with this machine as illustrated below.
Note
❒
Skip this step when you use this machine in North America.
Insert the network cable’s end that has the ferrite core
into the network interface connector of this machine.
ADG004S
Insert the other end of the network cable into an ap-
propriate connector of a network device, such as an
Ethernet hub.
Connecting to a
Power Source
Connecting to a
Local Printer
○○○○
○○○○○○○○○○○○
You can make a USB connection between this machine and a printer,
when you want to use it as a local printer for Print Scan. This section
explains how to connect a printer to this machine using a USB cable.
Note
❒
When you connect a local printer to this machine, be sure to use the
USB cable that comes with this machine.
❒
See the manuals that come with the printer you are going to connect
to this machine, for details about the printerÅfs connections and setup
information.
Turn off the power of this machine.
Insert the USB interface card that comes with this ma-
chine to the PC Card slot on the rear panel of this ma-
chine.
ADG006S
Note
❒
Make sure that the card is securely inserted, until you feel the card
click into place.
Important
❒
If you remove the USB interface card while the machine’s power is
on, it is necessary to restart the machine.
Connect a USB cable to one of the USB ports of the
USB interface card.
Connect the other end of the USB cable to the USB
port of the printer.
ADG007S
Important
❒
You cannot use more than one printer as a local printer for Print Scan
at the same time. When you connect two or more printers to the ma-
chine using USB cables, the printer that is detected by this machine
first is only available.
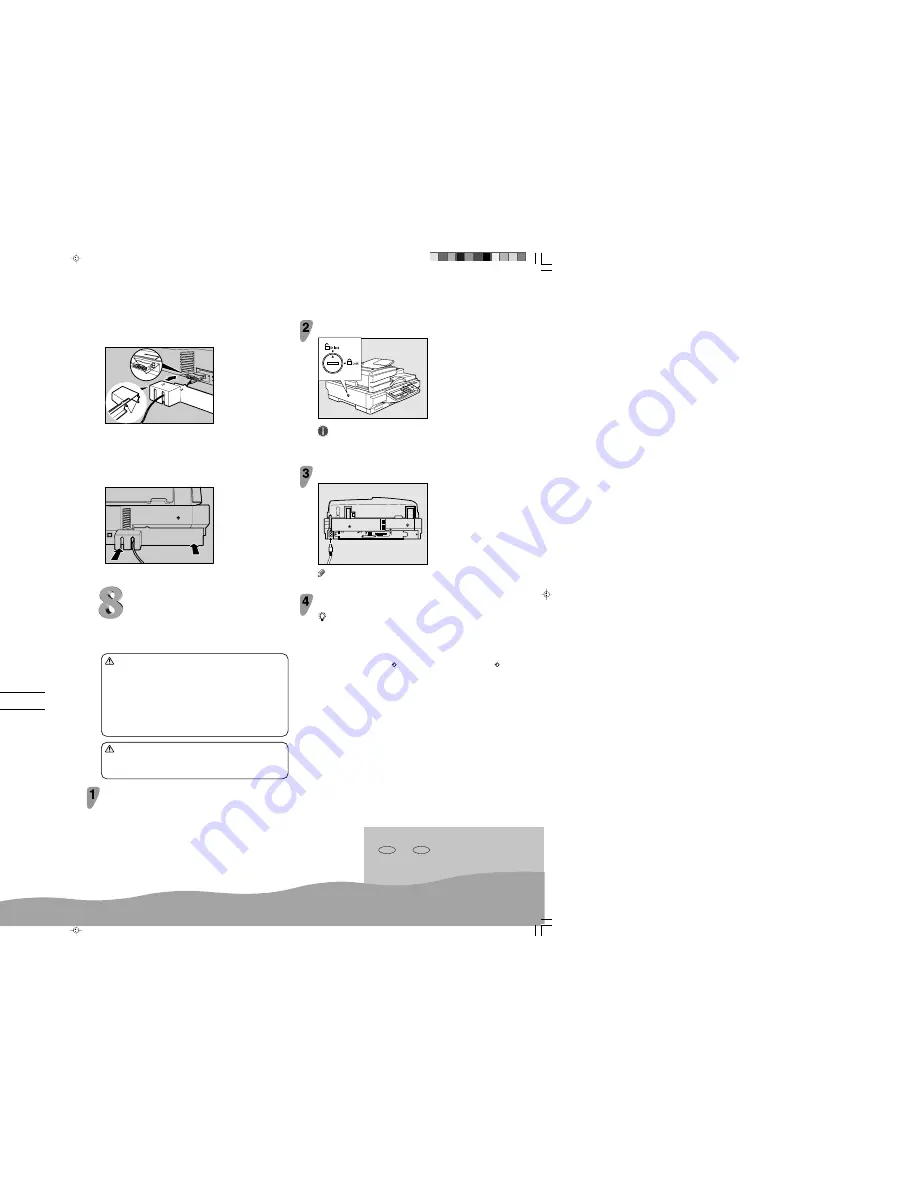
Attach the card slot cover that comes with this machine.
To attach the card slot cover
A
A
A
A
A
Reeve the USB cable through one of the slits of the
card slot cover.
ADG008S
Note
❒
When you connect two printers to this machine, reeve one of the
USB cables through a slit, and the other USB cable through the other
slit.
❒
This step is not necessary when you use an optional wireless LAN
card instead of the USB interface card.
Confirm that the lock switch located on the left side of
the machine is set to the "Unlock" position.
ZDLH350
Important
❒
Be sure to set the lock switch to"Unlock". Turning on the power with
the lock switch set to "Lock" could result in failure in scanning or
malfunction of this machine.
Push the power cord plug all the way into the power
connector on this machine.
ADG024S
Note
❒
Be sure to use the power cord that comes with this machine.
Insert the power plug into the power outlet.
Before turning off the power
Before you turn off the power of this machine, make sure that a standby
screen is displayed on the display panel.
If you turn off the power while the scanner features menu is displayed, all
the settings that you have configured could be discarded, and this ma-
chine could return to its factory default status.
You should also confirm that
is not displayed on the screen, or the
indicator on the front of this machine is not lit, when you turn of the power.
Otherwise, loss of scan data or failure in sending files might occur.
B
B
B
B
B
Align the two prongs of the card slot cover with the
two prong holes located at the upper left and right of
the PC card slot.
ADG009S
2
1
1
.
Prong holes
2
.
Prongs
C
C
C
C
C
Insert the prongs to the prong holes, and then push
both sides of the card slot cover until it is secured to
the rear panel of this machine.
ADG010S
○○○○○○○○○○○
○○○○○○○○○○○○○○○○○
This section explains how to connect this machine to a power source,
using the bundled AC power cord.
WARNING
•
Do not use with a power source with a voltage different from the speci-
fied voltage. Do not use a power outlet with multiple devices plugged
in. These could create the risk of fire or electric shock.
•
Avoid the use of an extension cord.
•
Do not damage, break, twist or modify the Power Cord. Placing heavy
objects on the cord, pulling on or bending it excessively can damage
the Power Cord, creating the risk of fire or electric shock.
•
Never touch or unplug the power plug with wet hands. This can cre-
ate the risk of electric shock.
CAUTION
•
When unplugging from an outlet, be sure to grasp the plug when
pulling. Never pull on the cord. This could damage the cord creating
the risk of fire or electrical shock.
Confirm that the power switch is set to off.
Содержание IS300e
Страница 8: ...vi...
Страница 14: ...6...
Страница 30: ...What You Can Do With This Machine 22 1...
Страница 116: ...Configuring the Scanner Settings 108 3...
Страница 126: ...Setting Originals 118 4...
Страница 146: ...Sending Scan File by E mail 138 6...
Страница 162: ...Sending Scan File by Scan to FTP 154 8...
Страница 166: ...Sending Scan Files Using Delivery Server 158 9...
Страница 176: ...Printing Scanned Image Files 168 10...
Страница 203: ...How File Size Changes Depending on Scan Area and Resolution 195 11 When Binary or Halftone is selected...
Страница 204: ...Appendix 196 11 When Gray scale is selected...
Страница 205: ...How File Size Changes Depending on Scan Area and Resolution 197 11 When 8 colors or 8 colors halftone is selected...
Страница 206: ...Appendix 198 11 When 256 colors is selected...
Страница 209: ...How File Size Changes Depending on Scan Area and Resolution 201 11 When Color Full Color is selected...
Страница 222: ...Image Scanner Operating Instructions GB GB G421 8601...

