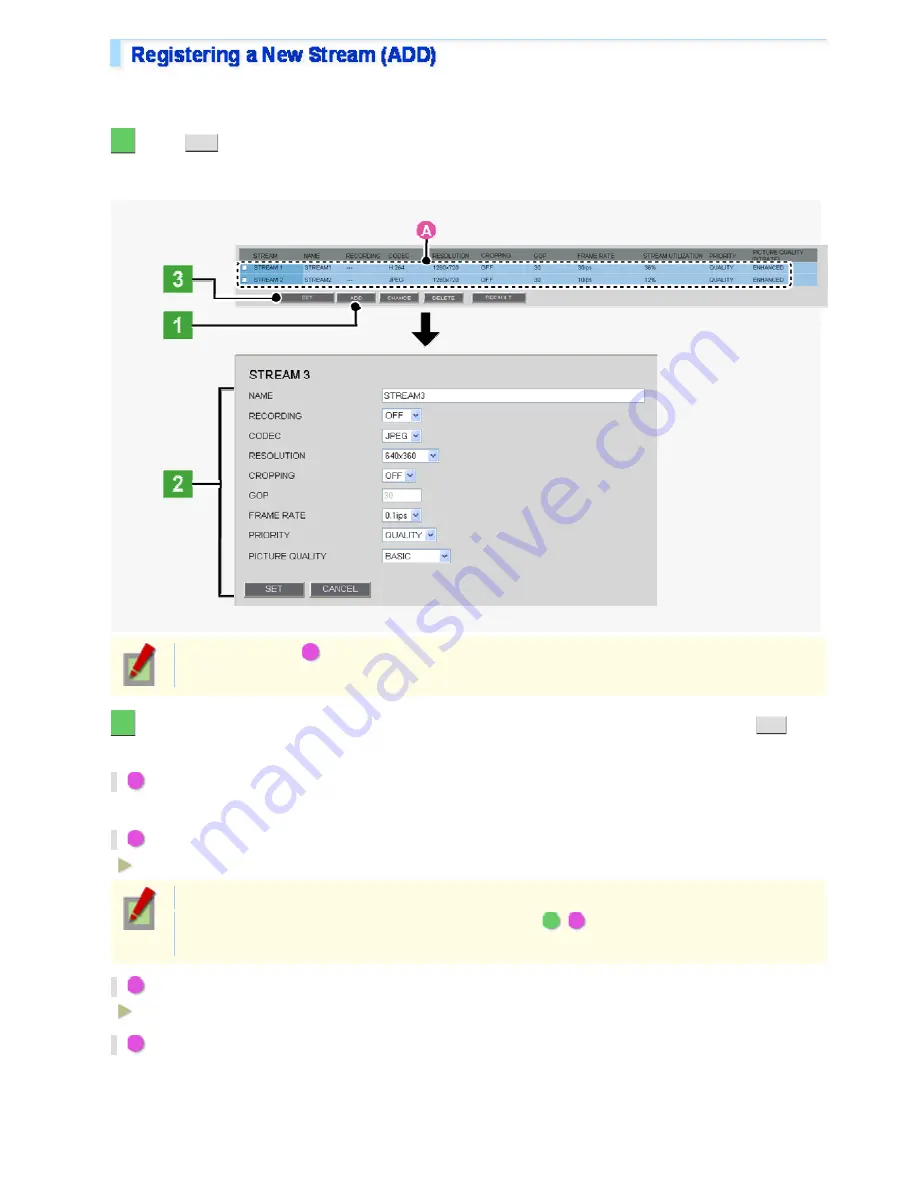
The camera provides two factory default stream patterns (STREAM1 and STREAM2. Besides these, you can
register up to two custom stream patterns (STREAM3 and STREAM4).
1
Click
ADD
.
The stream registration screen appears in a separate window.
“STREAM3” will be automatically set for the first additional stream.
In the stream list (
A
), the currently registered streams are shown.
Initially, this list shows video settings for STREAM1 and STREAM2.
2
Configure the video/image conditions for the stream you want to register and click
SET
.
The settings are saved. The stream list now includes the stream you just registered.
1
In [NAME], type the stream name you want.
You can type up to 64 alphanumeric characters.
2
In [RECORDING], select the recording type.
OFF, NORMAL, ALARM, NORMAL/ALARM, NETWORK FAILURE
The configured contents are reflected in [RECORD STREAM] on the RECORDING screen.
This cannot be configured if the recording configuration (
A
-
2
) at the top of the screen is set to
“OFF”.
3
In [CODEC], select the image/video compression format.
JPEG, H.264
4
In [RESOLUTION], select the display resolution.
The available options vary depending on your selections in [ASPECT RATIO] and [CODEC].
Working with Administrator Configuration Screens 15/77


