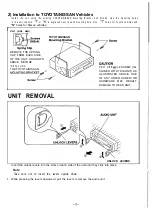
2) Installation to TOYOTA/NISSAN Vehicles
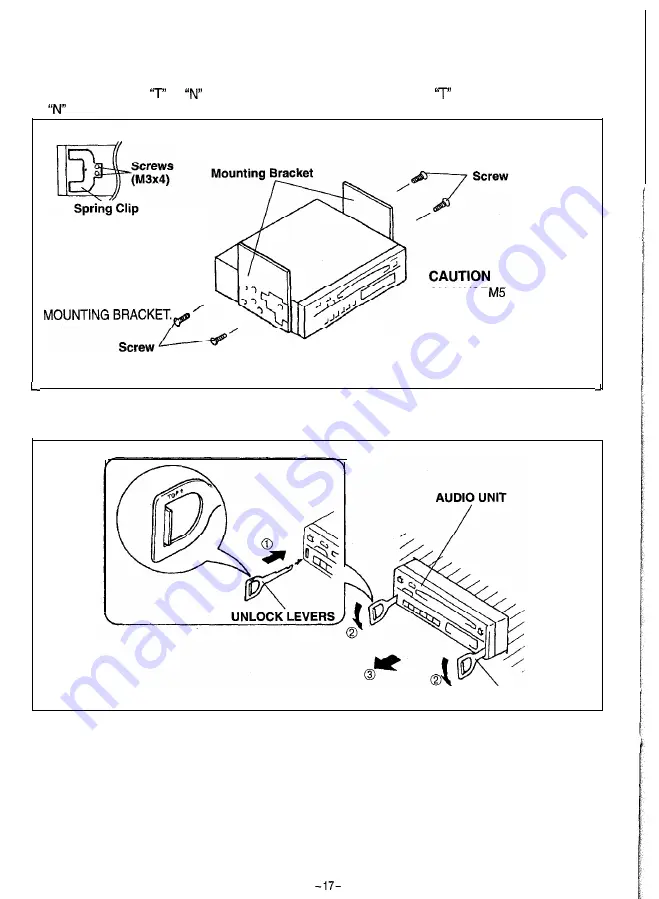
I n s t a l l t h e u n i t u s i n g t h e e x i s t i n g T O Y O T A / N I S S A N M o u n t i n g B r a c k e t a n d S c r e w s . U s e t h e m o u n t i n g h o l e s
i n t h e u n i t c h a s s i s .
o r
i s e n g r a v e d n e x t t o e a c h m o u n t i n g h o l e . U s e
h o l e s f o r T o y o t a v e h i c l e s a n d
r
holes for Nissan vehicles.
Unit (side view)
TOYOTA/NISSAN
REMOVE THE SPRING
CLIP FROM EACH SIDE
OF THE UNIT, AS SHOWN
ABOVE, BEFORE
I N S T A L L I N G
THE TOYOTA/NISSAN
O N L Y U S E
x8 SCREW (IN-
CLUDED WITH THIS UNIT) AS
ILLUSTRATED ABOVE. USE
OF ANY OTHER SCREW OR
HARDWARE MAY RESULT
DAMAGE TO HEAD UNIT.
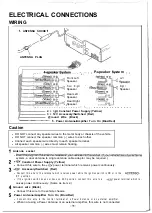
UNIT REMOVAL
UNLOCK LEVERS
Insert the unlock levers into the slots on each side of the unit until they click into place.
Note
Take care not to insert the levers upside down.
2 . While pressing the levers downward, pull the levers to remove the audio unit.


