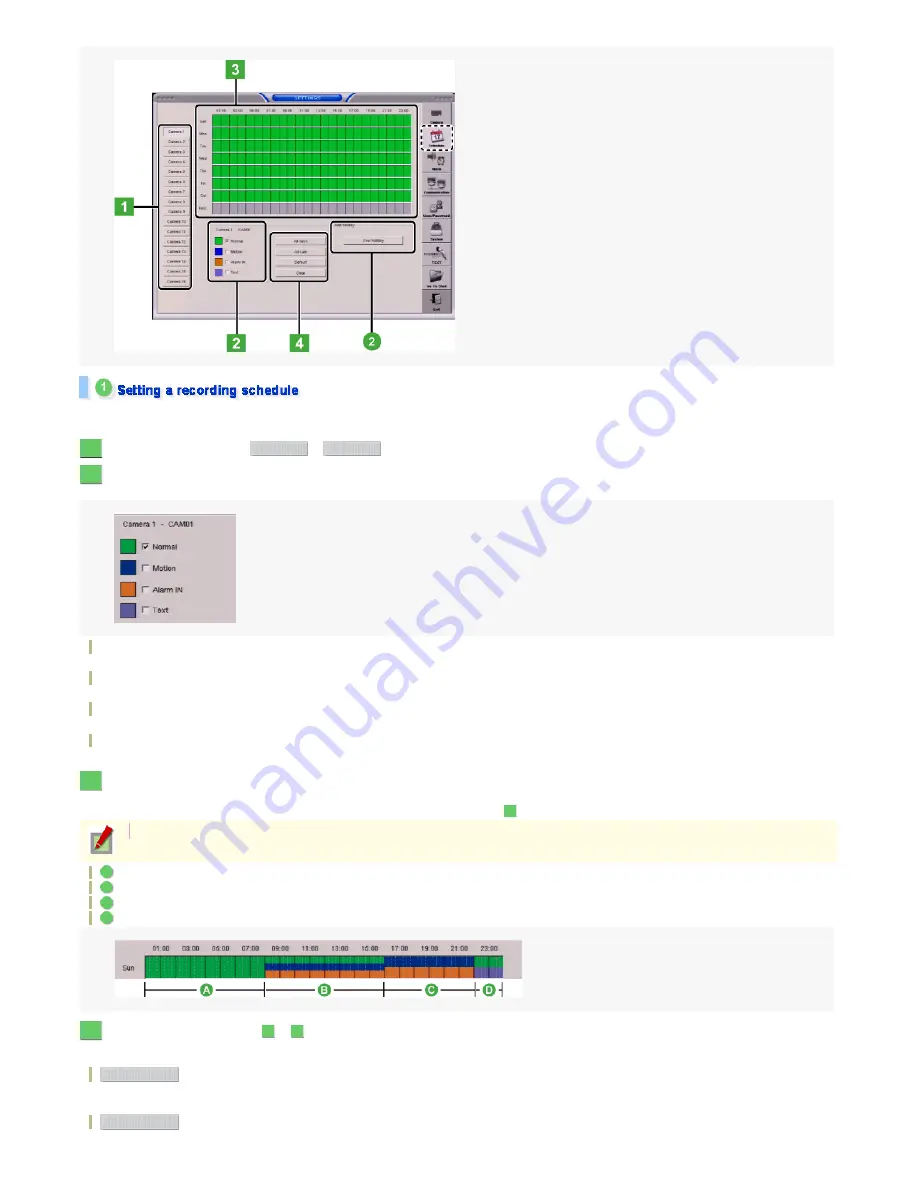
You can configure a recording schedule in the following steps:
Configuring a recording schedule allows you to automatically record video as you planned.
Click the button for the camera (
to
) for which you want to configure a recording schedule.
Select the check box for the recording mode you want to set.
Now, you can configure a recording schedule. You can select more than one recording mode.
Normal:
Records video continuously during the scheduled time period.
Motion:
Records video whenever a motion is sensed in the target by the motion sensor.
Alarm IN:
Records video whenever an alarm signal is input from an external sensor.
Text:
Records video whenever a keyword match is found in the text, if connected to a text input device such as POS or ATM.
In the Schedule setting area, drag on the time bar for the desired day of the week to set a recording schedule.
For each day (of the week), you can set the recording time period in increments of 15 minutes.
As you drag, the time bars are filled with a color assigned to the recording mode you selected in Step
.
00:00 to 08:00: Normal recording
08:00 to 16:00: Normal/Motion/Alarm IN recording
16:00 to 22:00: Motion/Alarm IN recording
22:00 to 24:00: Normal/Text recording
Follow the same procedure (Steps
to
) to set a recording schedule for each day of the week.
To apply the same schedule for all cameras or for all days of the week, use the following buttons.
:
Applies the set recording schedule to all days of the week.
To cancel, click the button again.
:
Applies the set recording schedule to all cameras.
1
Camera 1
Camera 16
2
3
2
If you drag again over a time period in which you already set a schedule, the time bar will be overwritten to update the schedule.
A
B
C
D
4
2
3
All days
All cam
68/182
ページ
2008/10/27


