3
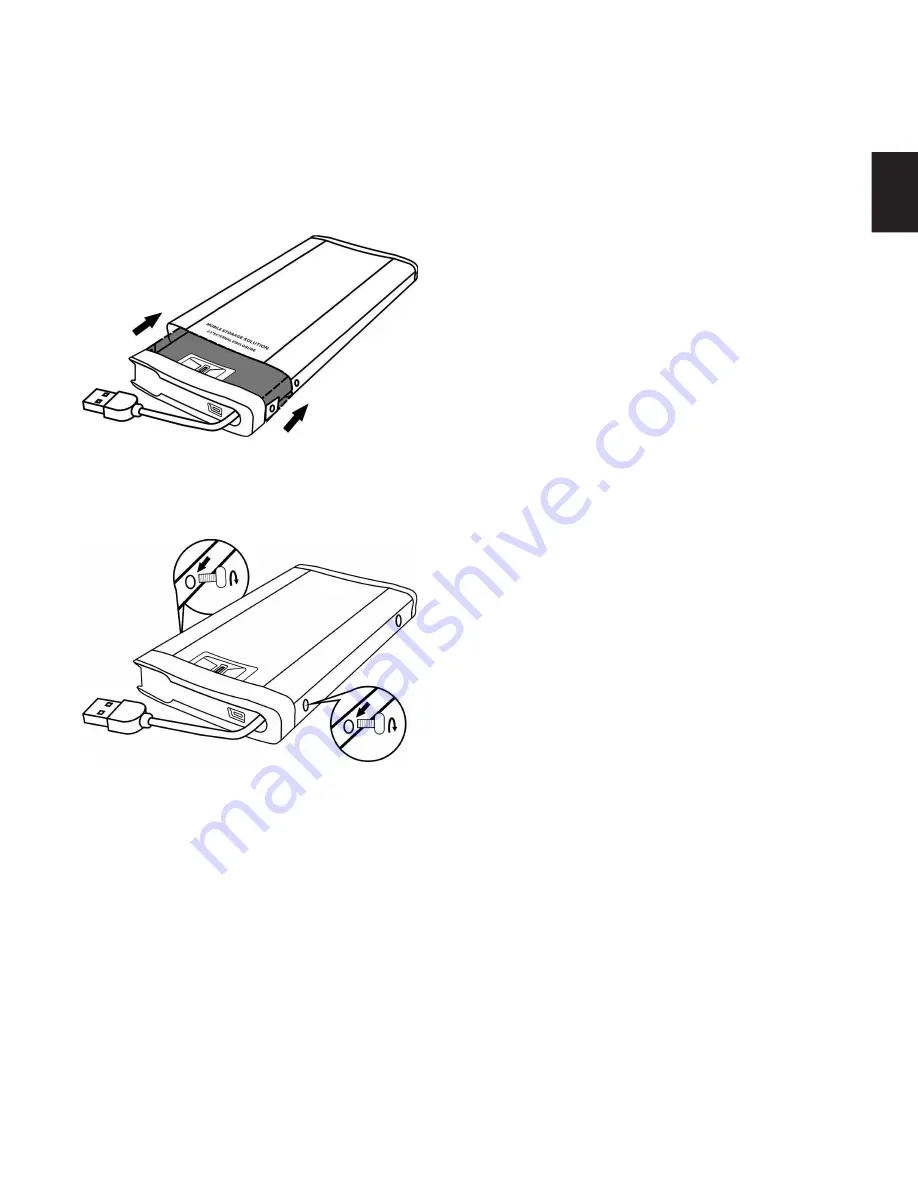
5. Put the printed circuit board with the hard disk
mounted on it into the box. See Figure 4.
6. Screw it firmly to the box. See Figure 5.
ENGLISH
3 Connection
3.1 Connection using the attached USB cable
Connect the box to your computer’s USB port
using the small USB cable attached to the box.
The box often does not get enough power to
run the hard disk from a single USB port. It is
therefore recommended that you use the
connection method described in section 3.2.
3.2 Connection using the enclosed USB cable
1. Tip out the attached USB cable. A mini USB
connector will now come into view.
2. Connect the enclosed USB cable’s mini
connector to the box and the two USB
connectors to two free USB ports on your
computer. The red connector is for power and
the black one is for data.
NB: Insert the connectors directly in the
computer’s USB ports, not via a USB hub.
4 Installation
1. Insert the CD provided.
2. Start the file “Enclosure Initial Tool”.
3. You must now decide how much of the hard
disk's capacity is going to be protected by
fingerprint verification (partitioned). The Public
field initially displays the full capacity of the
hard disk. In the Security field you can enter
the number of MB you wish to protect with
fingerprint verification. The number of MB in
the Public field is reduced accordingly.
4. Click “Start”, then click “OK”.
NB: All data on the hard disk will be deleted.
Figure 4
Figure 5


