Wireless network setup
203
2. Using a Network-Connected Machine
•
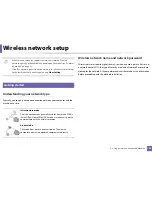
USB cable
Access point via USB cable (recommended)
1
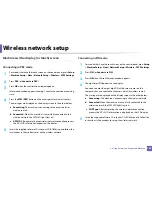
Check whether the USB cable is connected to the machine.
2
Turn on your computer, access point, and machine.
3
Insert the supplied software CD into your CD-ROM drive.
4
Double-click the CD-ROM icon that appears on your Mac desktop.
5
Double-click the
MAC_Installer
folder >
Installer OS X
icon.
6
Click
Continue
.
7
Read the license agreement and click
Continue
.
8
Click
Agree
to agree to the license agreement.
9
When the message that warns that all applications will close on your
computer appears, click
Continue
.
10
Click
Wireless Network Setting
button on the
User Options Pane
.
11
After searching, the window shows the wireless network devices. Select
the name (SSID) of the access point you want to use and click
Next
.
If the wireless network is already set up, the
Wireless Network
Information
window appears. Select
I want to install software with
the current settings. (Recommended).
Then, click
Next
.
When you set the wireless configuration manually, click
Advanced Setting
.
•
Enter the wireless Network Name:
Enter the SSID of the access point
(SSID is case-sensitive).
•
Operation Mode:
Select
Infrastructure
.
•
Authentication:
Select an authentication type.
Open System:
Authentication is not used, and encryption may or may
not be used, depending on the need for data security.
Shared Key:
Authentication is used. A device that has a proper WEP key
can access the network.
WPA Personal or WPA2 Personal:
Select this option to authenticate the
print server based on the WPA Pre-Shared Key. This uses a shared secret
key (generally called Pre Shared Key pass phrase) that is manually
configured on the access point and each of its clients.
•
Encryption:
Select the encryption. (None, WEP64, WEP128, TKIP, AES,
TKIP, AES)
•
Network Password:
Enter the encryption network password value.
•
Confirm Network Password:
Confirm the encryption network
password value.
•
WEP Key Index:
If you are using WEP Encryption, select the appropriate
WEP Key Index
.
Содержание CLX-6260ND
Страница 96: ...Redistributing toner 96 3 Maintenance...
Страница 98: ...Replacing the toner cartridge 98 3 Maintenance CLX 419xN CLX 419xFN CLX 419xFW Series 5 6...
Страница 99: ...Replacing the toner cartridge 99 3 Maintenance CLX 626xND CLX 626xFD CLX 626xFR CLX 626xFW Series...
Страница 101: ...Replacing the waste toner container 101 3 Maintenance 1 2 1 2 1 2...
Страница 105: ...Installing accessories 105 3 Maintenance 1 2 1 2...
Страница 110: ...Cleaning the machine 110 3 Maintenance...
Страница 123: ...Clearing paper jams 123 4 Troubleshooting 6 In optional tray CLX 626xND CLX 626xFD CLX 626xFR CLX 626xFW Series only...
Страница 124: ...Clearing paper jams 124 4 Troubleshooting If you do not see the paper in this area stop and go to next step...
Страница 126: ...Clearing paper jams 126 4 Troubleshooting CLX 626xND CLX 626xFD CLX 626xFR CLX 626xFW Series...
Страница 127: ...Clearing paper jams 127 4 Troubleshooting If you do not see the paper in this area stop and go to next step 1 2 3...
Страница 130: ...Clearing paper jams 130 4 Troubleshooting If you do not see the paper in this area stop and go to next step...
Страница 132: ...Clearing paper jams 132 4 Troubleshooting If you do not see the paper in this area stop and go to next step...
Страница 155: ...Specifications 155 5 Appendix Free HDD space Up to 100 MB Items Requirements...
Страница 168: ...Regulatory information 168 5 Appendix 26 China only...

