29
28
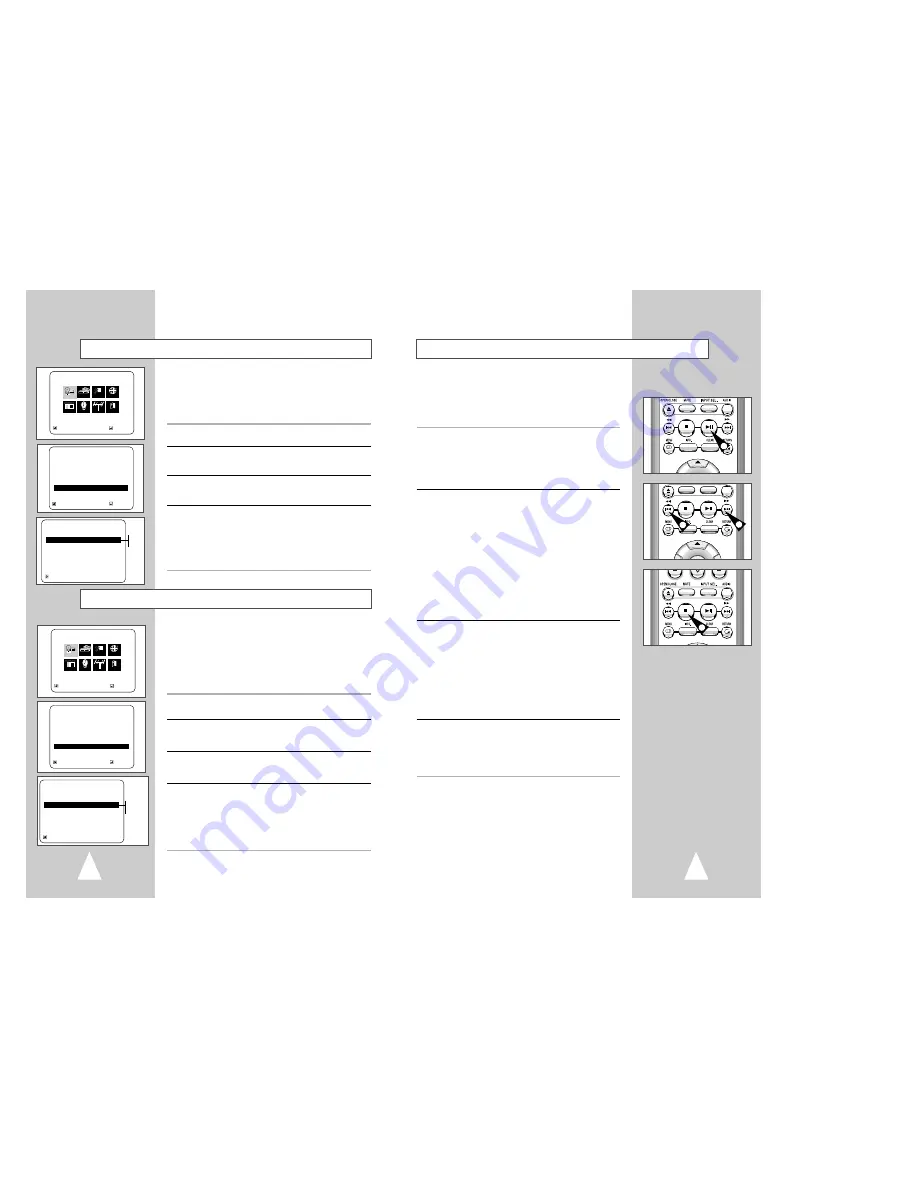
During DVD/CD playback you can select from the following
special playback options. To resume normal playback, press the
❿
ll
(Play/Pause) button.
NOTE : Changing the view during DVD/CD playback will stop the
playback.
1
Still
Press the
❿
ll (Play/Pause) button on the remote control during
playback.
• The picture will pause and the audio will mute.
• To resume playback, press the
❿
ll (Play/Pause) button.
• If the player is left in Pause mode for 5 minutes, it will stop
automatically.
2
Skip Forward/Back
While a CD or DVD disc is in Play mode, press the Skip
Forward/Back (
❿❿
l / l
➛➛
) buttons on the remote control or front
panel to jump forward and backward through disc chapters/tracks.
• Skip Forward will jump to the next chapter/track.
• Skip Back will jump to the beginning of the current chapter/track.
• Press Skip Back again to jump to the beginning of the previous
chapter/track.
Search Forward/Back
While a disc is in Play mode, press and hold the Forward/Back (
❿❿
/
➛➛
) buttons on the remote control or front panel to visually search
forward/ backward at 2X - 4X - 8X - 16X - 32X - 128X speed.
Press
❿
ll (Play/Pause) button to resume normal speed.
• During CD play back,
❿❿
/
➛➛
buttons on the remote control don’t
operate.
3
Slow Motion
During playback, press the
❿
ll (Play/Pause) button to Still the
image. Then use the Search Forward (
❿❿
) to play in slow motion at
variable speeds.
• Each press increases the slow motion speed playback to 1/8, 1/4
or 1/2 normal speed.
• Audio is muted during slow motion playback.
• Front Panel Slow Motion Buttons - While the unit is in the pause
mode, press and hold the Forward buttons on the front panel to
activate slow motion playback. Press the
❿
ll (Play/Pause)
button to resume normal playback.
NOTE : Slow motion operates only in the forward direction.
4
Stop/Resume
• Press the Stop button once to stop playback. To resume the
DVD/CD from the point where the disc stopped, press the
❿
ll
(Play/Pause) button.
• Press the
■
(Stop) button twice to completely stop playback.
The next time you press
❿
ll (Play/Pause), the disc will start over
from the beginning.
Special Playback Features
1
2
4
2
Alt Video Out
Black Level
The Black Level feature adjusts the reference level of black in the
video signal to one of two choices:
• Low - Standard NTSC black level. Yields consistent contrast
through all sources.
• High - Enhanced black level, for increased contrast during DVD
playback.
1
Open “MENU”
With the DVD in stop mode, press the MENU button.
2
Select “DVD”
Using the up/down and left/right buttons, move the selection cursor
to “DVD Setup,” then press ENTER to select.
3
Set “Display Options”
Move the selection bar to “Display Options”, then press ENTER to
select.
4
Set “Black Level”
Move the selection bar to “Black Level,” then press right to select
from the following options:
• Low - Standard NTSC reference Black Level for consistent
brightness/contrast across all sources.
• High – Enhanced Black Level for increased brightness/contrast
when viewing DVDs.
RETURN
❷
ENTER
DVD SETUP
Disc Menu
English
Audio
English
Subtitle
Automatic
Parental
Unlocked
Audio Options
Display Options
RETURN
❷
DISPLAY OPTIONS
TV Aspect
Wide
Black Level
➛ ❿
Low
Alt Video Out
S-Video
Low
High
MAIN MENU
DVD Setup
RETURN
❷
➛ ❿
ENTER
Program Clock Install Exit
DVD VCR Options Language
DVD
MAIN MENU
DVD Setup
RETURN
❷
➛ ❿
ENTER
Program Clock Install Exit
DVD VCR Options Language
DVD
RETURN
❷
ENTER
DVD SETUP
Disc Menu
English
Audio
English
Subtitle
Automatic
Parental
Unlocked
Audio Options
Display Options
RETURN
❷
DISPLAY OPTIONS
TV Aspect
Wide
Black Level
Low
Alt Video Out
➛ ❿
S-Video
S-Video
Component
If you connected your DVD-VCR to your television using the
S-VIDEO OUT or COMPONENT VIDEO OUT jacks, you MUST set
the “Alt (alternative) Video Out” selection in the on-screen menu
system.
• The S-Video or Component Video connection is only for the
DVD player. The tuner and VCR will still be viewed through the
RF or line outputs.
1
Open “MENU”
With the DVD in stop mode, press the MENU button.
2
Select “DVD”
Using the up/down and left/right buttons, move the selection cursor
to “DVD Setup,” then press ENTER to select.
3
Set “Display Options”
Move the selection bar to “Display Options”, then press ENTER to
select.
4
Select “Alt Video Out”
Move the selection bar to “Alt Video Out,” then press right to
select from the following options:
• S-Video – Indicates that you are using the S-VIDEO OUT jack on
the rear panel to connect to your TV.
• Component – Indicates that you are using the COMPONENT
VIDEO OUT jacks on the rear panel to connect to your TV.


