《58》
Protecting images
●
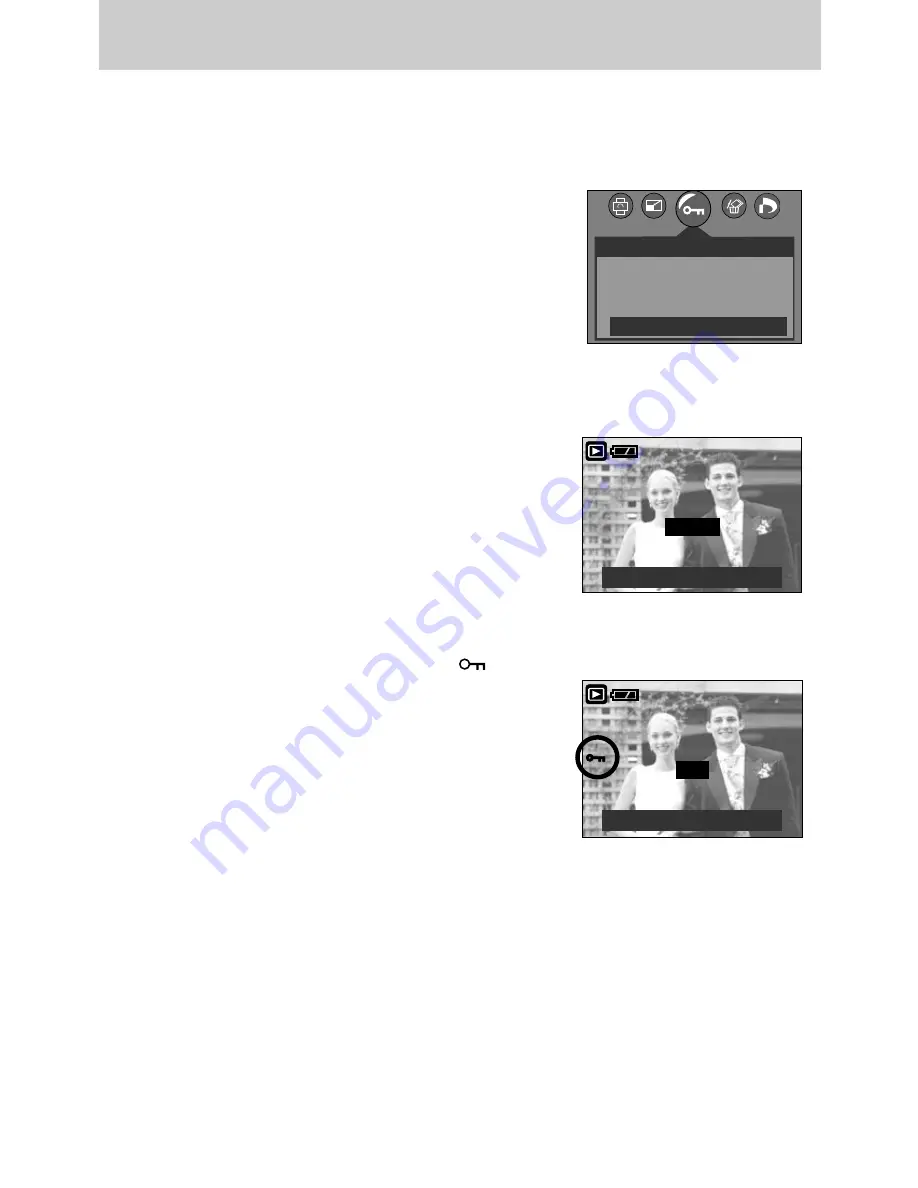
Protecting Images
1. Press the play mode button and press the menu button.
2. Press the LEFT/ RIGHT button and select the
[PROTECT] menu tab.
3. Select a desired sub menu by pressing the UP/ DOWN
button and press the OK button.
[ONE PIC] : Only an image that is displayed on the
LCD monitor is protected or unprotected.
[ALL PICS] : All of the stored images are protected or
unprotected.
4. Select the desired secondary menu by pressing the
UP/DOWN button and press the OK button.
[UNLOCK] : Cancels the protect function.
[LOCK]
: Sets up the protect function.
- If you select the[ONE PIC] sub menu at step 3, you can
protect or unprotect another image by pressing the
LEFT/ RIGHT button. If you press the SHUTTER
button, the Image Protection menu will disappear.
- If you selected [ALL PICS] in Step 3, the Image
Protection menu will disappear.
- If you protect an image, the protect icon( ) will be
displayed on the LCD monitor.
(An unprotected image has no indicator)
- An image in LOCK mode will be protected from
[DELETE] or [DELETE ALL] functions, but will NOT be
protected from the [FORMAT] function.
100-0009
MOVE PIC:
◀▶
SET:OK
EXIT:SH
■
This is used to protect specific shots from being accidentally erased (LOCK).
It also unprotects images that have been previously protected (UNLOCK).
UNLOCK
▲
▼
100-0009
MOVE PIC:
◀▶
SET:OK
LOCK
2048
◀
▶
PROTECT
ONE PIC
ALL PICS
EXIT:MENU
MOVE:
▲
▼
EXIT:SH
▲
▼


