

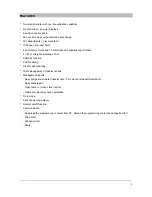


3
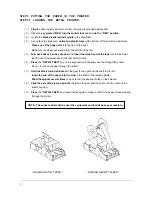
< THE FABRICATION OF REWIND SPINDLE >
( 1 ) Locate the black plastic rewind spindle ( A ) in the Styrofoam.
( 2 ) Locate the black plastic rewind spindle ( B ) in the manual bag.
( 3 ) Fabricate the black plastic rewind spindle ( A ) and ( B ) as shown in the illustration.
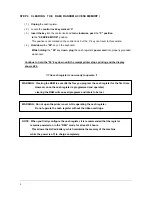
STEP 3.2 LOADING THE RECEIPT PRINTER
( 1 )
Place the other paper rolls
into the small tray on the left.
Make sure the paper will unwind from the bottom of the roll.
( 2 )
Fold back about 6 inches of paper
and
insert the folded end of the tape
into the feed slot
just in front of the paper tray at the rear of the printer.
( 3 )
Press
the
“RECEIPT FEED”
key on the keyboard until the paper comes through the printer.
Run 3 ~ 4 inches of paper through the printer.
( 4 )
Replace the printer cover
and make sure that
the receipt paper
comes out through the
opening
in the printer cover.
NOTE : Do not pull the paper back through the printer as this may damage it.
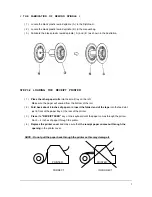
PRINTER PRINTER
CORRECT INCORRECT
Содержание ER-5100? SERIES
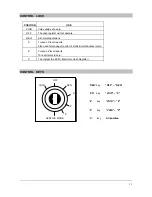
Страница 11: ...10 KEYBOARD LAYOUT...
Страница 25: ...24 2 7 3 DESCRIPTOR PROGRAMMING SCAN PAID OUT CASH TEND...
Страница 44: ...43 2 19 PARAMETERS PROGRAM SCAN SUBTL CASH TEND...
Страница 68: ...67 STEP 3 STEP 4 STEP 5 STEP 6 SLIP PRINTING STEP 7 STEP 8 SLIP PRINTING...
Страница 71: ...70 STEP 1 STEP 2 STEP 3 STEP 4 SLIP PRINTING STEP 5 STEP 6 SLIP PRINTING...
Страница 79: ...78...
Страница 80: ...79...
Страница 85: ...84 OPTIONAL FULL CLERK REPORT SYSTEM OPTION 8...
Страница 89: ...88 2 ALPHA NUMERIC KEYBOARD LAYOUT...


