38
SALICRU
6.7. OPERATING INSTRUCTIONS FOR MAINTENANCE OF
THE BYPASS AND MONITORING MODULE.
The bypass and monitoring module cannot be operated
in Battery Mode.
These actions are reserved exclusively for the
T.S.S.
staff or
the distributor.
6.7.1.1. With the system operating in Normal Mode and normal
bypass voltage and frequency, transfer the load over the
manual bypass.
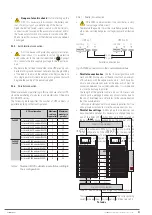
1.
Manually stop the inverter. The UPS will transfer to Bypass
Mode.
2.
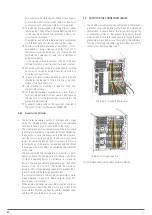
Remove the mechanical lock of the manual bypass switch
from the external panel and switch it to “On”. The load will
be fed directly from the mains via the manual bypass.
When a protection board is provided instead of a manual
bypass, the mechanical bypass lock must be removed, at
the back of the cabinet, and the bypass switch set to “On”,
as this switch will not be located in the switchboard.
3.
Switch the protection or the battery circuit breaker of the
battery cabinet to the “Off” position.
4.
Switch the circuit breakers of the manual bypass board to
the “Off” position in the following order: Output, Input and
Bypass [devices version B, with independent bypass line].
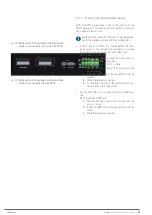
5.
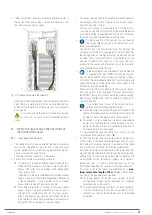
Remove the fixing screws of the lateral trim profiles and
the MBS fixing screws.
Slightly pull the handle on each end of the module and re-
move it 4-5 cm from the socket to remove it from the con-
nector on the backplane of the device.
Wait around 10 minutes and remove it from its slot.
Carry out appropriate maintenance.
6.
After the end of the maintenance operations, insert the by-
pass and monitoring module until it is at the end of its slot
to connect to the “backplane” of the device.
All UPS configuration parameters are stored in the
bypass and monitoring module. Any substitution en-
tails the necessary programming of the same parameters
as the original module. This task must only be carried out by
our
T.S.S.
staff or the distributor.
Replacing one MBS with another without carrying out the
corresponding configuration can lead to serious or very se-
rious faults.
7.
Insert and tighten the fixing screws of the module.
8.
Fit the side profiles, their screws, and fix them in place.
9.
Proceed as described in section 6.4.2. to switch back to
Normal Mode.
6.8. LANGUAGE SELECTION.
The menus displayed on the LCD touch screen and the display
of parameters and data are available in 6 languages:
•
Spanish.
•
English.
•
French.
•
Catalan.
•
Portuguese.
•
German.
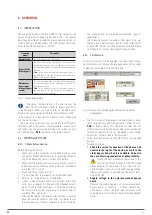
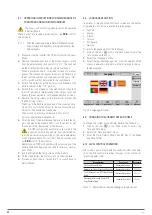
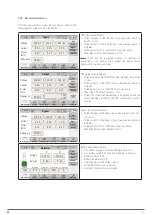
To select a language, perform the following:
1.
Click on the icon
within the main menu to enter the
set-up menu on the LCD.
2.
Select the “Language” menu.
3.
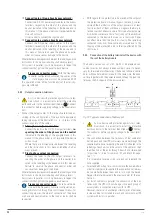
Select the required language, see
. From this moment all the
menus, parameters and data will be displayed in the se-
lected language.
Language
Time and Date
Language
Brightness
Measurements
Alarms
Status & Ops
Rated
Advanced
Charts
User
Start
Fig. 32.
Language Screen
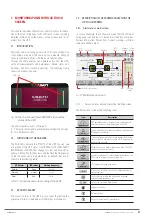
6.9. CHANGING THE CURRENT DATE AND TIME
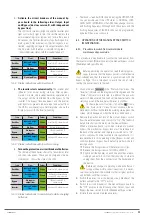
To change the system date and time, perform the following:
1.
Click on the icon
in the “Main” menu to access the
Time and Date menu.
2.
Select the “Time and Date” menu.
3.
Enter the Time, Date in Month, Month, Day of the Week
and Date Format.
6.10. LEVEL CONTROL PASSWORD.
The system is password protected to control unauthorised opera-
tions. The following table specifies the types of user and the cor-
responding permissions:
Menu Options
User level
Password
Status and Control Orders
Advanced User level
PWS#1
Rated values (Input-Output and Batteries)
Advanced User level
PWS#1
Tools (Date and Time, UPS flags, Module
flags)
Advanced User level
PWS#1
Advanced (Initial config, Power, UPS
flags, Module flags)
Technical User level
PWS#2
Table 11.
Permissions corresponding to types of user.
Содержание SLC ADAPT2 Series
Страница 1: ...SLC ADAPT2 UNINTERRUPTIBLE POWER SUPPLY USER MANUAL...
Страница 41: ...41 SLC ADAPT 2 UNINTERRUPTIBLE POWER SUPPLY SYSTEM USER MANUAL...
Страница 62: ...62 SALICRU...
Страница 63: ...63 SLC ADAPT 2 UNINTERRUPTIBLE POWER SUPPLY SYSTEM USER MANUAL...

