background image


Wireless Router User Manual 


F@st 5260


V3.0 (April 2017) 
253594684 


Содержание F@st 5260

Страница 1: ...Wireless Router UserManual F st 5260 V3 0 April 2017 253594684...

Страница 2: ...ames mentioned herein are trademarks or registered trademarks of their respective companies Copyright 2014 by Sagemcom Broadband SAS All rights reserved Rights of modifications reserved This publicati...

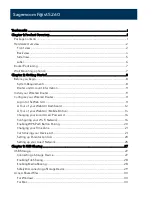
Страница 3: ...er 11 Log in to the Web GUI 11 A Tour of your Web GUI Dashboard 12 A Tour of your Web GUI Mobile Edition 14 Changing your Local Access Password 16 Configuring your Wi Fi Network 16 Enabling WPS Push B...

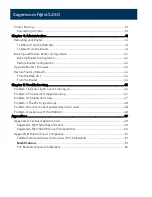
Страница 4: ...er 44 Chapter 5 Troubleshooting 45 Problem 1 Indicator lights are not turning on 45 Problem 2 The Internet stopped working 47 Problem 3 The Internet is slow 47 Problem 4 The Wi Fi signal drops 48 Prob...

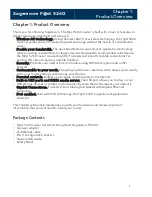
Страница 5: ...ruders using WPA2 encryption and an SPI firewall Customizable to your needs The web graphical user interface GUI allows you to easily tailor your router settings and manage your devices Parental contr...

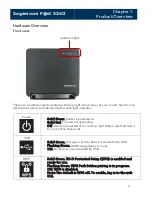
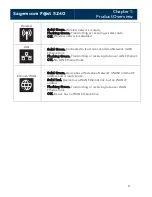
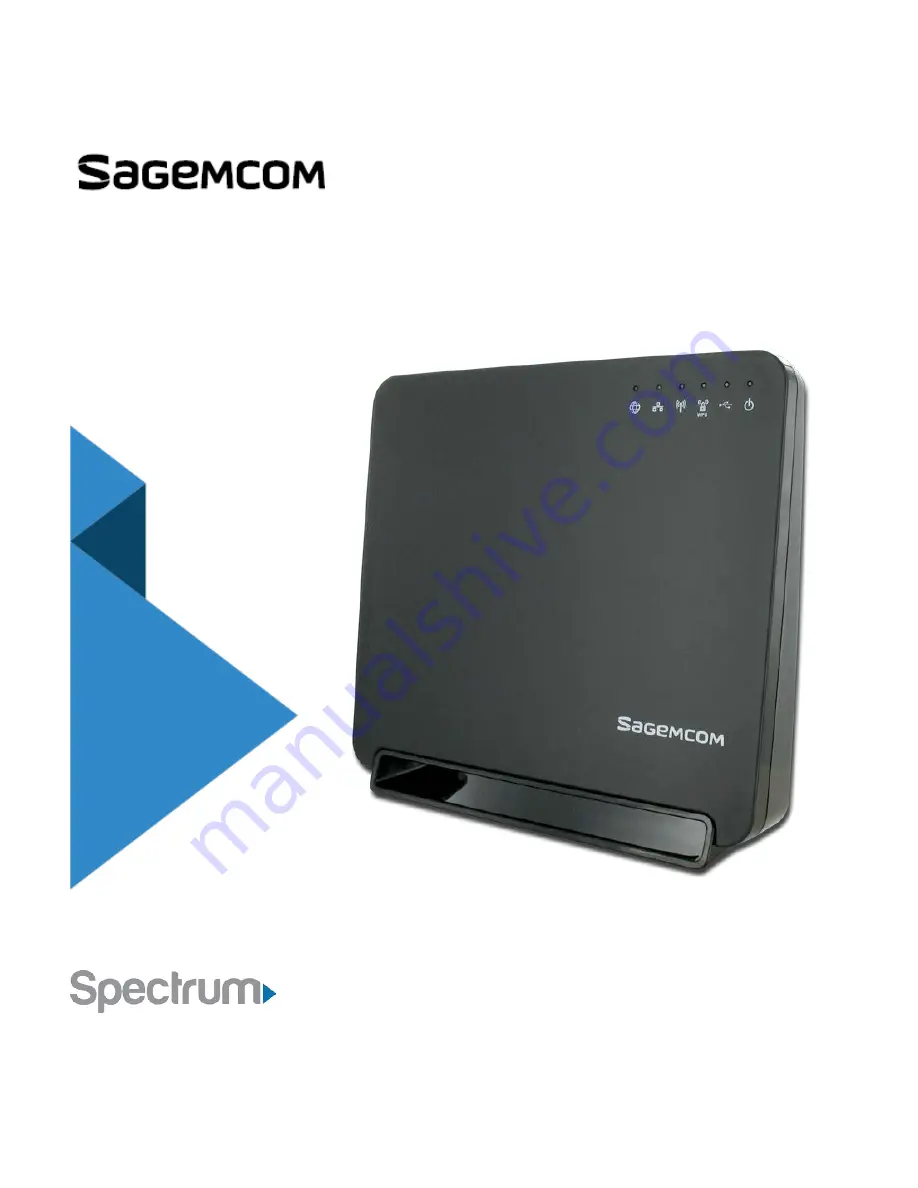
Страница 6: ...Firmware is upgrading Off Device is powered off or factory reset button was held down for more than 15 seconds USB Solid Green Storage or printer device is connected by USB Flashing Green USB storage...

Страница 7: ...o least one Local Area Network LAN Ethernet link Flashing Green Transmitting or receiving data over LAN Ethernet Off No LAN Ethernet links Internet WAN Solid Green Device has a Wide Area Network WAN I...

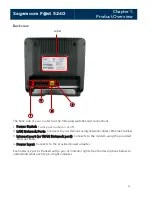
Страница 8: ...N Network Ports Connects to your devices using network cables Ethernet cables 3 Internet port or WAN Network port Connects to the modem using the provided Ethernet cable 4 Power Input Connects to the...

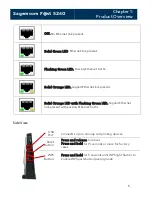
Страница 9: ...rnet link present Solid Orange LED with Flashing Green LED Gigabit Ethernet link present with passing Ethernet traffic Side View USB Port Connects to your storage and printing devices Reset Button Pre...

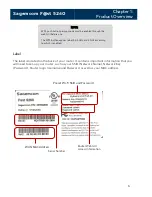
Страница 10: ...Hz according to which is enabled Label The label is located on the back of your router It contains important information that you will need to set up your router such as your SSID Network Name Network...

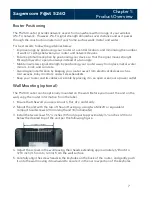
Страница 11: ...ng your router away from electrical devices such as microwaves baby monitors and wireless headsets Keep your router and its cables accessible by placing it in an open area near a power outlet Wall Mou...

Страница 12: ...rmation located on the router s label NOTE Some Internet Service Providers ISP require that you log in to their web portal to enable your Internet connection Should you require more information contac...

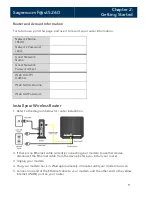
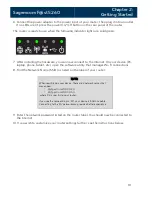
Страница 13: ...GUI Password Install your Wireless Router 1 Refer to the diagram below for router installation 2 If there is an Ethernet cable currently connecting your modem to another device disconnect the Etherne...

Страница 14: ...blet etc open the software utility that manages Wi Fi connections 8 Find the Network Name SSID as listed on the label of your router NOTE When searching on your device there are 2 network names that m...

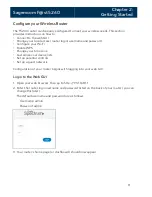
Страница 15: ...Enable WPS Change your time zone Customize your device lists Set up parental controls Set up a guest network Configuration of your router begins with logging into your web GUI Log in to the Web GUI 1...

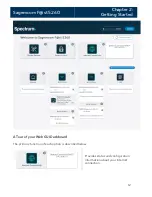
Страница 16: ...om F st 5260 Chapter 2 Getting Started A Tour of your Web GUI Dashboard The primary function of each option is described below Provides status and configuration information about your Internet connect...

Страница 17: ...controls passwords and firewall settings Configures the router reset and local network settings and contains maintenance functions Configures the 2 4 GHz Wi Fi and Guest network settings The dashboard...

Страница 18: ...e dashboard icon displays USB devices that are connected Throughout the dashboard devices highlighted in white are currently active Inactive devices are grayed out You can return to the dashboard from...

Страница 19: ...Sagemcom F st 5260 Chapter 2 Getting Started 15...

Страница 20: ...Control 3 Select the User tab 4 Ensure admin is entered for the Username 5 If you want your password to display select the Show Password box 6 Enter the old password 7 Enter the new password in the P...

Страница 21: ...Log in to the web GUI 2 Click on the network that you want to turn on or off Note By default both the 2 4 GHz and 5 GHz Wi Fi networks are enabled 3 Select the Basic tab In the Basic section Slide the...

Страница 22: ...g your network name allows you to more easily detect and identify your Wi Fi network By default SSID broadcast is enabled To change your network name 1 Log in to the web GUI 2 Click on the network to...

Страница 23: ...lick Apply Change the Wireless Network Security Encryption and Password Your wireless Wi Fi network name SSID and password provide Internet access to your network The wireless password allows you to l...

Страница 24: ...d enable WPS on both Wi Fi networks to easily pair devices to either network using the WPS button 3 In the WPS tab slide the Enable WPS switch to ON 4 Under WPS Mode leave the selection to the Push Bu...

Страница 25: ...Router Settings 3 Select the Maintenance tab then Internet Time NTP 4 Under the Time Zone drop down menu select the desired time zone DST Enabled options automatically adjust for daylight savings time...

Страница 26: ...ed in white are currently active and inactive devices are gray 3 Click on the device you wish to customize 4 Select the Device Info tab 5 In the Friendly Name field enter the name you wish to use to i...

Страница 27: ...rtain websites across all devices 1 Log in to the web GUI 2 Click on Access Control 3 Select the Parental Control tab Limit Internet Access times 1 Under Internet Access Control Planning click on All...

Страница 28: ...Sagemcom F st 5260 Chapter 2 Getting Started Block Web Sites 1 Under Site Blocking click URL Filter 2 Type or copy paste website address you wish to block 3 Click Add Address then click Apply 24...

Страница 29: ...ess to local resources by setting up a separate guest wireless network 1 Log in to the web GUI 2 Click on the Guest Stations icon in the network 2 4 GHz or 5 GHz for which you want to configure Guest...

Страница 30: ...ield the guest network name will appear with your network name Guest 5 Select a channel for the guest network or leave at the default AUTO setting 6 In the Security section enter a password for the gu...

Страница 31: ...our storage device The F5260 router supports USB 2 0 The following file systems are supported FAT16 FAT32 NTFS Ext2 Ext3 HFS HFS Note that some file systems function as read only depending on the perm...

Страница 32: ...n Router Settings 3 Select the Media tab 4 In the File Sharing section slide the tab to ON 5 Click Apply Enabling Media Sharing Enabling DLNA Digital Living Network Alliance allows you to play media f...

Страница 33: ...ure that you Always keep a second copy backup of all data Stop the USB storage device BEFORE removing it from your router To safely disconnect a USB storage device from your router wait at least 5 min...

Страница 34: ...orage device to your router s USB port 2 Open the File Explorer 3 Enter 192 168 1 1 in the address bar Your window will now show your connected USB storage device WARNING To safely disconnect a USB st...

Страница 35: ...to your router All users connected to your network will be able to use the device attached to your router Connecting a Printer Printer sharing is enabled by default To connect a printer attach it to...

Страница 36: ...Next 5 Choose Connect to a printer on the Internet or on a home or office network 6 Enter the URL http 192 168 1 1 631 IPP 7 Click Next The specific URL may vary for different models of printer Refer...

Страница 37: ...ly 9 If your driver does not appear you will need to locate the correct driver and click Have Disk to install it 10 Optional You can choose to set this printer as your system Default Printer 11 Click...

Страница 38: ...aring 3 Choose Add a network wireless or Bluetooth printer Click Next 4 Skip the search by clicking The printer that I want is not listed 5 Choose Select a shared printer by name 6 Enter the URL http...

Страница 39: ...r s documentation Some common printer URLs are http 192 168 1 1 631 http 192 168 1 1 631 IPP http 192 168 1 1 631 IPP port1 NOTE This step will fail if your printer is not connected or does not suppor...

Страница 40: ...ptional You can choose to set this printer as your system Default Printer by selecting the checkbox next to Set as default printer Click Next 11 If everything is configured correctly the Wizard will d...

Страница 41: ...6 Choose Select a shared printer by name 7 Enter the URL http 192 168 1 1 631 IPP 8 Click Next The specific URL may vary for different models of printer Refer to printer manufacturer s documentation S...

Страница 42: ...on this PC then the driver should appear in the list under the proper manufacturer and printer name If you don t see your printer check the bottom of the list for your manufacturer Printers are not al...

Страница 43: ...e default printer 13 Installation can be verified using the Print a test page button Click Finish to complete Configuring a Printer Mac 1 In the Print Fax dialog click to add a printer 2 Select the IP...

Страница 44: ...1 1 631 http 192 168 1 1 631 IPP http 192 168 1 1 631 IPP port NOTE This step will fail if your printer is not connected or does not support IPP You may also have to power cycle your printer when cha...

Страница 45: ...eboot your router There are two ways you can do this Through the web GUI Using the reset button To Reboot from the Web GUI 1 Log in to the web GUI 2 Click on Router Settings 3 Select the Maintenance t...

Страница 46: ...outer settings Back Up Router Configuration 1 Log in to the web GUI 2 Click on Router Settings 3 Select the Maintenance tab then select Backup Restore 4 Click on Backup Configuration Restore Router Co...

Страница 47: ...r light will turn a solid red Do NOT interrupt the upgrade process as it may permanently damage the router Use the following instructions to manually upgrade the firmware if required 1 Log in to the w...

Страница 48: ...Router Settings 3 Select the Maintenance tab then Backup Restore 4 Click on Choose File then browse to the file containing the factory settings 5 Select the file the click on Restore Configuration Fro...

Страница 49: ...plugged into to see if it is providing power You can check this by plugging another device into it The USB indicator light is off by default It will only turn on if a USB device is connected to your...

Страница 50: ...the back of the router If the Wireless indicator light is off and you have a device attached Check the Ethernet cable attaching the device to the router and ensure that they are securely fastened If b...

Страница 51: ...ing a battery backup you will also need to disconnect the battery from the modem Wait 2 minutes Turn the modem on Wait two minutes Turn the router on Wait two minutes 5 If you still cannot connect ref...

Страница 52: ...Fi is enabled and that the Wi Fi light is green If it is not refer to page 17 for information on how to enable your Wi Fi 2 Ensure that your device supports WPA2 encryption If not refer to page 19 to...

Страница 53: ...MHz to 5350 MHz 5470 MHz 5850 MHz excluding 5600 MHz 5650 MHz Wireless Security Support WEP WPA WPA2 WPA2 Enterprise with RADIUS Ports Power USB Ethernet WAN Ethernet LAN 1 4 Buttons Reset Wi Fi Prote...

Страница 54: ...ristics Dimensions 8 7 x 2 6 x 8 1 220 x 65 4 x 206 mm Weight 1 17 lbs 529 g Power Input 100 V to 120 V 60 Hz Output 12 VDC 2 5 A Environmental Characteristics Temperature 32 F to 104 F 0 C to 40 C Re...

Страница 55: ...lass B digital device pursuant to Part 15 of the FCC Rules These limits are designed to provide reasonable protection against harmful interference in a residential installation This equipment generate...

Страница 56: ...n uncontrolled environment This transmitter must not be co located or operating in conjunction with any other antenna or transmitter This device produces radio frequency energy in the 2 4 GHz and 5 GH...

Отзывы: