background image

ROYAL ENFIELD    UCE ENGINE SERVICE MANUAL

25

S.

No.

Fastener,  Size, Tool Usage, Precautions, Photos

Aggregate to Dismantle /

Instructions

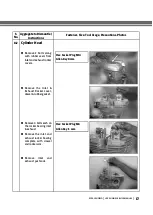
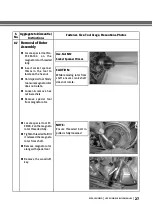
Remove circlip, oil seal

and jet crankshaft.

Remove  oil filler cap and
“O” ring.

Remove Ignition Timing

check bolt and washer (if

not removed earlier).

8.6

Removal of RH

Cover

Remove Stator assembly
by removing 3 mounting

screws.

Hex. socket head cap

screw M5
Allen Key 4 mm

Содержание EURO IV

Страница 1: ...EURO IV ENGINE SERVICE MANUAL ...

Страница 2: ...l or Royal Enfield NACS II Diagnosis tool it is recommended that the motorcycle may please be taken a nearest Royal Enfield Authorised Service Station for a detailed investigation proper attention Whilethismanual isupdatedwithlatestInformationandSpecifications atthetimeofgoingtoprint duetocontinuous improvements being done to improve performance some of the data illustrations etc in this manual ma...

Страница 3: ...ar 57 8 26 KickStarter 58 8 27 Kick Starter Shaft 59 9 Uni Directional Fittings List 61 10 Inspection 62 11 Torque Chart 78 12 Engine Assembling Sequence 80 12 1 Engine Bearings Crankcase LH 81 12 2 Engine Bearings Crankcase RH 83 12 3 Kick Starter sub Assembly 85 12 4 Kick Starter shaft 86 12 5 Layshaft Sub Assembly 88 12 6 Mainshaft Sub Assembly 90 12 7 Hydraulic Tappets 98 12 8 Drain Plug 100 1...

Страница 4: ...shaft with gears Inlet manifold Insulator Rocker Cover Oil filler cap EXHAUSTSIDE Exhaust port Hydraulic Tappets Front Drive Sprocket Rocker Arm Exhaust Rocker Arm Inlet ACG Magneto Oil Filter Paper element Oil level window Duplex chain Engine Sprocket Sprag Clutch Assembly Clutch Piston Cylinder barrel E start Motor Auto chain tensioner Valve spring ROYAL ENFIELD UCE ENGINE SERVICE MANUAL 03 ...

Страница 5: ...ent Paper Element Lubrication Forced Lubrication Wet Sump Forced Lubrication Wet Sump Fuel Supply Electronic Fuel Injection Electronic Fuel Injection IGNITION SYSTEM Ignition system Digital Electronic Ignition Electronic Ignition Spark plug gap 0 8mm 0 8 0 9mm Spark plug WQR8DC Bosch WQR8DC Bosch TRANSMISSION Clutch Wet Multiplate Wet Multiplate 7 Plates Drive Chain links 102 pitch 101 pitch 101 P...

Страница 6: ...ge Bolt M6 X 1 X 20 3 12 Cap Oil Filter Buffed 1 EXPLODED VIEWS ROYAL ENFIELD UCE ENGINE SERVICE MANUAL 05 A1 A3 Key Nos 34 to 40 Key Nos 1 to 4 8 to 20 22 24 26 to 31 44 to 46 A2 Key Nos Qty 2 Nos 21 Qty 7 Nos 23 Qty 2 Nos 25 Qty 3 Nos 11 A4 Key Nos 12 13 14 15 16 17 18 4 3 2 5 6 7 1 43 42 9 10 8 22 11 12 13 14 16 15 17 18 19 19 20 24 25 23 22 1 33 21 46 A4 32 31 30 29 28 27 26 41 40 39 38 37 36 ...

Страница 7: ... Operating Lever 1 5 Lock Pin Spring Clutch Operating Mech 1 6 OilSealINAG12X18X5 ClutchOperatingLever 1 7 Clutch Cable Assembly 1 8 OilFillerPlug 1 9 O Ring26 5mm 1 O Ring Plug 1 10 Gear Pedal Assembly Gear Lever with Sleeve Rubber 1 11 Hex Flange Bolt M6 X 1 X 30 1 Cap Screw End Cover 1 12 Sleeve Gear Lever Rubber 1 13 Oil Seal14X 20X 3 1 14 Gasket LH Crank Case Cover 1 Liquid Gasket Loctite 569...

Страница 8: ...ance Washer Sprag Clutch 1 22 Stud Chain Tensioner Pad 1 23 Bush CT Pad 1 24 Chain Tensioner Pad 1 25 Plain Washer old Type 1 26 Hex Nut M8 old Type June 2012 1 27 Auto Chain Tensioner Assy 1 28 O Ring Chain Tensioner Assy 1 29 Hex Socket Head Cap Screw M6x20 2 30 Sprag Clutch Assy 1 31 Engine Sprocket 1 32 Sprag Clutch Bearing t 1 33 Sprag Clutch Gear 1 34 Needle Bearing 1 35 Washer M12 Thick 5mm...

Страница 9: ...r motor assembly 0 9 kw 1 34 Cover starter motor 1 35 Hex socket button head screw m5x12 1 36 Dowel pin 2 37 Tappet door 1 38 Csk socket head screw m5 x 12 4 39 Rotor assembly 24t 1 40 Magneto key 1 41 Plain washer 1 42 Hex Nut m12 x 1 25 1 43 Assy gear lever shaft 1 44 Spacer shaft gear lever 1 45 Hex Socket head cap screw m5 x 40 2 46 Pivot bearing rocker shaft bottom 1 47 Dowel lower pivot bear...

Страница 10: ...20 Rocker Bearing Set inlet 1 21 Rocker Arm Exhaust 1 22 Gasket Rocker Cover Inlet 1 23 Rocker Cover Inlet 1 24 Washer Seal 3 25 Hex Head Screw rocker Cover 3 26 Gasket Rocker Cover Exhaust 1 27 Rocker Cover Exhaust 1 28 Cyl Barrel Assembly 1 29 Dowel Pin 1 30 Dowel Pin Flat 1 31 Gasket Cylinder Barrel To Crankcase 1 31a 350cc 31b 500 535cc common 32 Gasket Head mls 1 33 Push Rod Assembly Exhaust ...

Страница 11: ...t position No over selection and under selection during Gear shifting Anti Skip Mechanism Arm shift camplate stopper Striker Gear Change CamPlate Plate Anti skip Pawl Bolt Spring CamPlate Spring Roller Type Pawl Camplate PlateAnti Skip Bolt Anti Skip Copper Washer Gear ChangerAssy Main shaft Sleeve gear Main shaft 3rd gear Main shaft 4th gear Main shaft 2nd gear Main shaft 1st gear Lay shaft High ...

Страница 12: ...NLET ROCKERARM EXHAUST OILFILTER HYDRAULICTAPPET INLET HYDRAULICTAPPET EXHAUST ANTIBACKLASH GEARASSY INLET COVER RH CONRODBIG ENDBEARING DECOMPRESSORASSY SHAFTRH FLYWHEEL HYDRAULIC TAPPET FLYWHEEL CHAMBER SUCTION FILTERSCREEN OILSUMP OILPUMP OILFILTER LUBRICATION SYSTEM ...

Страница 13: ...es to flywheel to lubricate crank shaft con rod assembly and barrel piston assembly The second branch goes to hydraulic tappets to maintain a positive oil pressure for the hydraulic tappets to opeate the third branch goes to rocker arms assembly and drains down to Right cover chamber through the push rod tunnel it also lubricates inlet and exhaust cam gears and finally reaches to oil sump in crank...

Страница 14: ...eld Authorized Dealer Distributor for expert advice and to carry out the periodical maintenance PERIODICAL MAINTENANCE CHART A Adjust C Clean D De Carbonise I Inspect L Lubricate R Replace NOTE For Maintenance after 30 000 Kms Please repeat the same frequency specified above in consultation with a Royal Enfield Authorised Dealer Distributor S No DESCRIPTION SCHEDULE Kms x 1000 0 5 3 6 9 12 15 18 2...

Страница 15: ...g Tool tightening loosening hex nut ST 25128 2 Puller Magneto Rotor Removal of magneto rotor assy Extractor ST 25151 4 Puller for chain case outer To remove Crank case Left cover ST 25591 4 Sprocket clutch holding To lock Clutch housing engine tool sprocket for loosening tightening the Clutch engine Sprocket bolt ST 25594 4 Clutch spring compression To compress clutch springs while dismantling rea...

Страница 16: ...el supply Ensure piston is in TDC position Ensure gears are in neutral position COMPONENTSTHATCANBEREMOVEDWITHTHEENGINEMOUNTEDONTHEFRAME Cylinder head assembly Cylinder barrel Piston CoverRH Cover LH Clutch assembly Inlet and Exhaust Cam assy Oil pumpAssembly ENGINESHOULDBEREMOVEDFROMTHEFRAMEFORTHEFOLLOWINGJOBS Crank case repair replacement Crank shaft and main bearings replacement Roller Hydrauli...

Страница 17: ...structions Drain Bolt 2 3 1 Remove the 2 Flanged hex bolts and the drain cap with O ring Remove suction filter NOTE It is best to drain the engine oil in warm condition Hex flanged Bolt M5 T spanner 8mm Plug M14 Socket spanner 22 mm Remove the magnetic drain plug 1 3 with washer and Drain Bolt 3 8 1 Engine oil Drain ...

Страница 18: ...ts each on the rocker bearing inlet exhaust Remove the inlet and exhaust rocker bearing complete with dowel and rocker arm Hex Socket Plug M14 Allen Key 8 mm Hex Socket Plug M6 Allen Key 5 mm Remove inlet and exhaust pushrods Remove the Inlet Exhaust Rocker cover dowel rubber gasket Remove 2 bolts along with rubber seals from Inlet and exhaust rocker covers ...

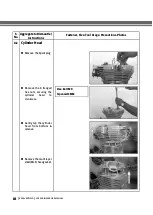
Страница 19: ...s securing the cylinder head to crankcase Fastener Size Tool Usage Precautions Photos Aggregate toDismantle Instructions Remove the multi layer steel MLS headgasket Hex Bolt M8 Tspanner13MM 8 2 Cylinder Head Remove the Spark plug Gently tap the cylinder head from bottom remove ...

Страница 20: ... the valve split collars from the spring retainer Loosen special tool till the spring is fully expanded the tool can be removed Remove spring retainer top valve spring collar bottom Remove valve from the valve guide from the inside of the cylinder head NOTE Repeat the same process to dismantle Exhaust Valve Special tool No ST25123 1 S No Fastener Size Tool Usage Precautions Photos Aggregate toDism...

Страница 21: ...er barrel piston Gently tap Cylinder barrel and remove NOTE Ensure the 2 dowels are removed from the cylinder barrel crankcase from piston NOTE Ensure piston is at TDC Cover the crankcase suitably to prevent the circlip from falling inside S No Fastener Size Tool Usage Precautions Photos Aggregate toDismantle Instructions Remove Cylinder barrel bottom Gasket NOTE Carefully remove the piston rings ...

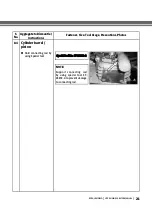
Страница 22: ...ize Tool Usage Precautions Photos Aggregate toDismantle Instructions 8 4 Cylinder barrel piston Hold connecting rod by using Special tool SpecialtoolNo ST 25592 4 NOTE Support connecting rod by using special tool ST 25592 4 to prevent damage to connecting rod ...

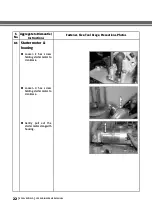
Страница 23: ... Size Tool Usage Precautions Photos Aggregate toDismantle Instructions 8 5 Starter motor housing Loosen 2 hex screw holding starter motor to crankcase Gently pull out the starter motor along with housing Loosen 4 hex screw holding starter motor to crankcase ...

Страница 24: ...utions Photos Aggregate toDismantle Instructions CAUTION Care must be taken while removing cover due to spring force Remove oil filter cap gasket O ring Spring Remove the 3 O rings Oil filter element spring cap washer Oil filter element Remove oil filter cover bolts 8 6 Removal of RH Cover Removekickstarter lever ...

Страница 25: ...acting on the stator and making it difficult to remove Remove Right cover gasket 2 dowels Remove Pulser coil by removing 2 screws NOTE Remove the stator coupler from the wiring harness before removing Right Cover Hex Socket Head Cap screwM5 Allen Key 4 mm Hex Flange Bolt M6 Socket Spanner 8 mm 8 6 Removal of RH Cover Loosen remove 2 hext flanged bolts from cover RH front Loosen remove 7 hex flange...

Страница 26: ... Aggregate toDismantle Instructions Remove circlip oil seal and jet crankshaft Remove oilfillercapand O ring Remove Ignition Timing checkboltandwasher if not removed earlier 8 6 Removal of RH Cover Remove Stator assembly by removing 3 mounting screws Hex socket head cap screwM5 Allen Key 4 mm ...

Страница 27: ... Aggregate toDismantle Instructions Remove screws to remove breather chamber cover Hex Socket Head Cap Screw M5 Allen Key 4 mm 8 6 Removal of RH Cover Remove Breather bolt and washer Removebreatherchamber gasket OUTSIDE OIL SEAL INSIDE OIL SEAL Remove the 2 oil seals from the Kick Shaft hole ...
Страница 28: ...ld special tool firmly to ensure magneto rotor does not rotate Loosen remove hex nut washers Remove special tool from magneto rotor Hex Nut M12 Socket Spanner 19 mm CAUTION While removing rotor from shaft ensure crank shaft does not rotate Remove the woodruff key Locate special tool ST 25128 2 on the magneto rotor threaded fully Tightenthreadedbolttill it released the magneto rotor from shaft Remo...

Страница 29: ...eck the number of shims oninletand exhaust cams It is important to reduce noiseandaxialplaybetween the cam gear face and the cam steady plate Remove Cam gear Exhaust along with Auto decompressor assy Hex Soc Screw M6 Allen Key 5 mm 8 8 Cam steady plate cam gears Remove the 3 allen screws 2 dowels from Cam steady plate Remove Cam steady plate and the shims ...

Страница 30: ...to Decompressor Remove hex socket screw on flyweight in exhaust cam Fastener Size Tool Usage Precautions Photos Aggregate toDismantle Instructions Remove flyweight along with return spring Remove the actuating pin Hex sockethead cap Screw M4 Allen Key 3 mm ...

Страница 31: ...tos Aggregate toDismantle Instructions Remove the 4 allen screws to remove Oil pump assy along with gasket rubber ring Remove the Oil pump assembly with O ring 8 10 Oil Pump Remove oil pump plastic gear after removing circlip NOTE Observe short boss of pump drive gear should face outwards ...

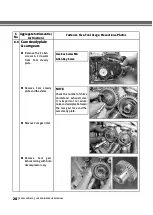
Страница 32: ...s Aggregate toDismantle Instructions HexSocketHead cap Screw M5 Allen Key 4 mm Removethe2hexsocket head cap screws holding the lower pivot bearing Removethe2hexsocket head cap screws and remove the rocker shaft upperpivotbearing with O ring Special Tool No ST 25123 4 Hex socket headcapscrew M6 Allen Key 5 mm Locate Special tool on rocker shaft return spring pivot pin with O ring gently pull the pi...
Страница 33: ...NGINE SERVICE MANUAL 32 S No Fastener Size Tool Usage Precautions Photos Aggregate toDismantle Instructions 8 11 Gear Shift assembly removal Remove therocker shaft assembly by gently tilting and twisting from crankcase RH ...

Страница 34: ...ze Tool Usage Precautions Photos Aggregate toDismantle Instructions Socket Spanner 32mm Special tool No ST 25612 4 8 12 F D Sprocket Straighten lock tab and Unlock the FD sprocket nut Remove nut and lock washer A LocateSpecialtoolonFD Sprocket remove from shaft ...

Страница 35: ...ROYAL ENFIELD UCE ENGINE SERVICE MANUAL 34 S No Fastener Size Tool Usage Precautions Photos Aggregate toDismantle Instructions 8 12 F D Sprocket Gently Pull out Sleeve gear Spacer from the sleeve gear ...

Страница 36: ...t B A B Hex Soc Pan head screw M5 Allen Key 4mm Flanged Hex Bolt M6 Socket Spanner 10mm S No Fastener Size Tool Usage Precautions Photos Aggregate toDismantle Instructions Remove kick starter shaft cover with oil seal B A Remove Kick starter return spring locking bolt with washer A Remove 4 hex socket screw hold cover A ...

Страница 37: ...H holding the cover Left Fastener Size Tool Usage Precautions Photos Aggregate toDismantle Instructions It may be necessary to tap the cover slightly to remove from crankcase PULL LOCK PIN Hex Flange Bolt M6 Socket Spanner 8MM Remove lock pin and spring from clutch operating shaft Remove clutch operat ing shaft assy from clutch cover ...

Страница 38: ...GINE SERVICE MANUAL 37 S No Fastener Size Tool Usage Precautions Photos Aggregate toDismantle Instructions Remove gear lever shaft bush and oil seal 8 14 Cover LH Remove Clutch operat ing shaft oil seal and 2 Nos of Dowels ...

Страница 39: ...ng and spring Gently press push rod lock torelease plunger lower chain pad to slackness primary chain tensioner 8 15 Clutch Assembly Locate Special tool to lock Clutch outer sprocket and engine sprocket Special tool No ST 25591 4 Hex Nut M16 Socketspanner21mm Loosen remove nyloc nut plain washer from clutch center Remove clutch push pad ball bearing bearing retainer cup ...

Страница 40: ...U Nut M8 Removespecialdistance washer sprag clutch on Crankshaft drive side 8 15 Clutch Assembly Remove bolt on t3he Engine sprocket Remove Duplex chain along with Sprag clutch and Clutch assembly Remove special tool gently pull out clutch assy along with engine sprocket primarychian Remove distance washer from engine drive shaft and collar from main shaft Hex Flange Screw M12 Socket Spanner 19 mm...

Страница 41: ...s Aggregate toDismantle Instructions FLANGE FACE 8 16 Sprag Clutch Assembly Remove sprag clutch assy fromprimarychian Holdingdrivegeargently rotate engine sprocket clockwise pull out simultaneously to seperate engine sprocket from sprag gear Remove spacer Remove sprag clutch from sprag gear ...

Страница 42: ...ed on the clutch Loosen the 2 screw of the special tool slowly simultaneously to release the spring tension NOTE Loosen bolts in diagonally simultaneously 5 threads each S No Fastener Size Tool Usage Precautions Photos Aggregate toDismantle Instructions Hex Screw M6 Socket Spanner 10 mm Special tool No ST 25594 4 Hex Screw M6 T Spanner 8 mm Remove special tool Loosen remove the other 4 hex screws ...

Страница 43: ... Fastener Size Tool Usage Precautions Photos Aggregate toDismantle Instructions 8 17 Dismantling of Clutch Assembly Remove Spring retainer plate 6 Springs Remove clutch drum sprocket with big washer Remove clutch hub centre friction and steel plates ...

Страница 44: ...in Tensioner Remove hex nut and washer to remove chain tensioner pad Remove Auto chain tensioner body assy by removingtheallenscrews HexSocket Head Cap Screw M6 Allen Key 6mm S No Fastener Size Tool Usage Precautions Photos Aggregate toDismantle Instructions ...

Страница 45: ...ner Size Tool Usage Precautions Photos Aggregate toDismantle Instructions Remove circlip in jack shaft Remove gear NOTE Ensure jack shaft is not pushed into the crankcase 8 19 Starter Double Gear Remove double gear shaft and double gear from crankcase LH ...

Страница 46: ...os Aggregate toDismantle Instructions Remove special thrust washer lay shaft from Crank case Left 2 Nos Dowel pins Gently split the crankcase remvoe crankcasee LHsoasto leave the gear shaft in crankse RH NOTE Ensure all nuts hext socket are recommended before splitting crankse Loosen the crankcase nuts and remove completely Loosen 2 hex socket screw ...

Страница 47: ...t M5 Allen Key 4 mm CAUTION Ensure all oil seals are removed before dismantling crankcase heatcrakcasesin an electric woven such that the bearings bushes can drop out of the crankcase turned upside down Remove clutch bearing retainer plate holding screws and remove the retainer plate from crankcase Left Remove needle roller bearing for lay shaft from crankcase Left Remove clutch ball bearing from ...

Страница 48: ...ns Photos Aggregate toDismantle Instructions 8 20 Crankcase LH RH Remove last circlip from crankcase Left Remove spacer circlip crank shaft bearing 6305 from crankcase Left Remove crank shaft needle roller bearing from crankcase Right Remove roller bearing NU 305 from crankcase Left ...

Страница 49: ... 8 20 Crankcase LH RH Remove lay shaft needle bearing from crankcase Right Remove nyloc nut machinedwasher pawl camplate return spring and bolt pawl from crankcase Right Gently pull out the 2 needle roller pins holding the inlet and exhaust hydraulic tappets Remove circlip and sleeve gear ball bearing 6007 from crankcase Right ...

Страница 50: ...os Aggregate toDismantle Instructions 8 20 Crankcase LH RH NOTE Remove Inlet tappet first and then the exhaust tappet CAUTION Storethetappetscarefullyin vertical direction always INLET tappet EX Tappet Gently pull out the exhaustandinlethydraulic tappets carefully from Crankcase RH top side ...

Страница 51: ... thebolt copper washer cap pivot pin and O ring above the cam plate pivot pin on crankcase RH Gently pull out the 3mm roller locating pin from crankcase RH inside Special tool No ST 25153 4 Locate special tool on cam plate pivot pin gently pull out cam plate pivot pin with O ring from crankcase RH Remove Layshaft 1st gear and thrust washer from the Layshaft ...

Страница 52: ...otatecamplatesuchthatit is in 3rd gear position before removing Remove the cam plate from the gears NOTE Ensure the 4 roller do not drop out of the cam plate 8 21 Gear Train Removal Gently pull out the gear train selectorassembly as a complete set from crankcase RH NOTE Take care not to drop the selector fork while seperating the gear shafts NOTE Ensure special thrust washers of layshaft is remove...

Страница 53: ...52 Remove circlip from the selector shaft if required S No Fastener Size Tool Usage Precautions Photos Aggregate toDismantle Instructions 8 21 Gear Train Removal Remove centre selector fork from the selector shaft and then Left selector fork ...

Страница 54: ...emove the Tappet cover Hex Socket CSK head Screw M5 Allen Key 4 mm Remove the Allen screw and the bracket on crankcase RH inside from barrel sealing area Hex Cap Screw M5 Allen Key 4mm S No Fastener Size Tool Usage Precautions Photos Aggregate toDismantle Instructions Remove special thrust washer Layshaft from Crank case RH ...

Страница 55: ...from smaller side of lay shaft Remove 2nd gear and thrust washer from smaller side of layshaft 8 23 Layshaft Remove Double gear Layshaft 3rd and 4th gear from larger side of layshaft S No Fastener Size Tool Usage Precautions Photos Aggregate toDismantle Instructions ...

Страница 56: ...tener Size Tool Usage Precautions Photos Aggregate toDismantle Instructions Remove the main shaft 3rd gear from opposite end Remove the main shaft 2nd gear from opposite end Remove circlip 1st thrust washer Remove main shaft 1st gear from the thread end of main shaft ...

Страница 57: ... ENFIELD UCE ENGINE SERVICE MANUAL 56 S No 8 24 Mainshaft Fastener Size Tool Usage Precautions Photos Aggregate toDismantle Instructions Remove 4th gear and 2nd thrust washer from threaded end of main shaft ...

Страница 58: ...ROYAL ENFIELD UCE ENGINE SERVICE MANUAL 57 S No Fastener Size Tool Usage Precautions Photos Aggregate toDismantle Instructions 8 25 Sleeve Gear Gently pull out sleeve gear assy from bearing in crankcase ...

Страница 59: ... out kick starter sub assy from crankcase RH by rotate clockwisetoreleasekick pawl from its stop Hex Socket Screw M5 Allen Key 4mm S No Fastener Size Tool Usage Precautions Photos Aggregate toDismantle Instructions Remove 3 hext socket screwontheoilthrough Remove oil trough ...

Страница 60: ...S No Fastener Size Tool Usage Precautions Photos Aggregate toDismantle Instructions Remove the thrust washer Remove the thrust washer Remove the Kick pinion gear 8 27 Kick Starter Shaft Remove circlip thrust washer from kick starter end of shaft ...

Страница 61: ...ENFIELD UCE ENGINE SERVICE MANUAL 60 8 27 Kick Starter Shaft S No Fastener Size Tool Usage Precautions Photos Aggregate toDismantle Instructions Remove the Kick pawl plunger and spring from kickstarter shaft ...

Страница 62: ...t face facing outwards Distancewasherspragclutch Doublestepfacing inside should rest on Crankshaft and Crankcase Left side bearing Sprag Clutch Bearing Wide Flanges side facing upwards Clutch plain plate All plates smooth teeth face in same direction while fitting on Clutch hub FD sprocket Side face circular groove facing outwards Oil pump inner and outer trochoid gear Punch mark facing outwards C...

Страница 63: ...imit New Min New Max ServiceLimit New Min New Max ServiceLimit New Min New Max ServiceLimit 0 095 0 095 0 115 0 114 0 30 0 30 New Min New Max ServiceLimit 0 04 0 010 0 16 0 180 0 21 0 44 Piston Ring to groove clearance comp rings Middle Piston to bore clearance Ring to groove clearance oil ring 0 03 0 03 0 07 0 05 0 11 0 11 83 940 86 940 83 970 86 970 83 890 86 890 0 03 0 05 0 07 0 09 0 15 0 15 Ne...

Страница 64: ...0 70 0 85 Piston ring end gap Oil ring Top and bottom rail Big end axial play Crank shaft Run out Small end bore inner diameter New Min New Max ServiceLimit New Min New Max ServiceLimit 0 20 0 20 0 55 0 55 0 65 0 65 New Min New Max ServiceLimit 20 007 20 007 20 016 20 016 20 046 20 046 New Min New Max ServiceLimit 0 00 0 00 0 05 0 05 0 08 0 08 0 20 0 20 0 70 0 70 0 90 0 90 UCE 500 UCE 535 UCE 500 ...

Страница 65: ...40 New Min New Max ServiceLimit 6 945 6 945 6 960 6 960 6 935 6 935 New Min New Max ServiceLimit 0 00 0 00 0 05 0 05 0 08 0 08 Connecting rod bend Valve stem OD Inlet Valve to guide inlet clearance Cylinder Head warpage Valve guide bore Valve stem OD Exhaust New Min New Max ServiceLimit 0 02 0 02 0 05 0 05 0 08 0 08 UCE 500 41 3mm UCE 500 UCE 500 UCE 535 UCE 500 UCE 535 UCE 500 UCE 535 UCE 535 UCE...

Страница 66: ... 0 070 0 120 0 120 New Min New Max ServiceLimit Valve to guide Exhaust Clearance Hydraulic Tappet OD Valve Spring length 21 417 21 438 21 450 Hydraulic Tappet guide bore Push rod run out 0 00 0 03 0 05 0 012 0 051 0 060 Hydraulic tappet to guide clearance 21 387 21 405 21 380 42 80 43 80 41 50 21 417 21 438 21 450 0 00 0 03 0 05 0 012 0 051 0 060 UCE 500 UCE 535 UCE 500 UCE 535 UCE 500 UCE 535 UCE...

Страница 67: ...Max ServiceLimit X Y 17 99 23 95 18 00 23 97 17 97 23 93 Lay shaft Outer diameter New Min New Max ServiceLimit New Min New Max ServiceLimit 10 00 10 03 10 06 Selector fork inner diameter 3 90 3 95 3 88 Selector fork lug thikness New Min New Max ServiceLimit Cam plate ratchet inner diameter 12 995 13 045 13 060 UCE 500 UCE 500 A A 9 96 9 98 9 94 10 00 10 03 10 06 12 995 13 045 13 060 3 90 3 95 3 88...

Страница 68: ...diameter 64 5 65 5 60 0 2 95 3 05 2 60 24 00 24 03 24 06 24 02 24 05 24 06 Pivot cam plate outside diameter 12 98 13 00 12 96 Lay shaft 2nd gear inner diameter Clutch spring Length Main shaft 3rd 4th gear inner diameter Friction plate with insert thickness MS3 MS4 18 03 18 06 18 09 12 98 13 00 12 96 24 02 24 05 24 06 64 5 65 5 60 0 24 00 24 03 24 06 2 95 3 05 2 60 UCE 500 UCE 535 UCE 500 UCE 535 U...

Страница 69: ...m Bush I D Cam Lobe height 15 884 15 886 38 079 38 179 15 884 15 886 37 679 37 779 UCE 500 535 exhaust I D 15 916 37 979 15 916 37 579 New Min New Max ServiceLimit UCE 500 535 0 7 0 8 0 9 M10 M14 Spark Plug Gap New Min New Max ServiceLimit 190 00 191 00 195 00 Duplex Chain Length across 21 pins 190 00 191 00 195 00 UCE 500 UCE 535 New Min New Max ServiceLimit 0 00 0 05 0 10 Clutch steel plate Dist...

Страница 70: ...Rocker Arm Shaft OD New Min New Max ServiceLimit UCE 500 535 15 848 15 860 15 838 ID Rocker Bearing ID OD New Min New Max ServiceLimit Oil pump body clearance New Min New Max ServiceLimit Oil pump end clearance UCE 500 535 0 080 0 200 UCE 500 535 0 053 0 10 NOTE Tip clearance between rotors new 0 15mm Max ...

Страница 71: ...the barrel with cleaning solvent and dry it with compressed air Thoroughly lubricate cylinder bore with fresh engine oil and then assemble over the pistonbygentlytwisting and tilting NOTE Do not use any sharp objects topress piston rings against groove Use thumb fingerforcetolocateringsin its position properly Inspection Visuallycheckforcracks scratches breakage of fins scoring seizure mark etc of...

Страница 72: ... the carbon deposits from the skirt area and groove area of piston without causing any scratches or scoring Clean piston rings and piston pin with cleaning solvent and dry it with compressed air Inspection Visually inspect for cracks scratches scoring seizure marks pitting etc Check for piston wear measure the outside diameter of piston perpendicular to the piston pin hole Insert piston rings on i...

Страница 73: ...heck the piston pin for wear Measure outside dia of piston pin at 3 points 11 2 Piston Sub Assembly Inspection Check the piston rings end gap at the bottom end of the Cylinder CAUTION Set each piston ring squarely into the Cylinder barrelatapoint25mmfrom the bottom pushing the ring by piston head and then measuring the end gap ...

Страница 74: ...cracks breaks of Cylinder head fins Check valve stem scoring bent or any other damage Check the Cylinder head face for warpage on surface plate S No Fastener Size Tool Usage Precautions Photos AggregatetoAssemble Instructions Checkthevalveguidefor wear with small bore gaugeandvalvestemOD by vernier caliper to measure valve to guide clearance Replacevalveifthevalve head is knife edged ...

Страница 75: ...recautions Photos AggregatetoAssemble Instructions Check inlet and exhaust valve stem for wear 11 3 Cylinder Head Inspection Check the valve stemfor run out Make pencil marks on the seating area of valve head as shown in Fig Check the valve seat to valve head seating as below ...

Страница 76: ...ing area WARNING Do not allow the grinding paste to seep into the valve stem and valve guide S No Fastener Size Tool Usage Precautions Photos AggregatetoAssemble Instructions Using a suction valve grinder valve lapping stick rotatethevalveback and forth several times Lift and turn the valve by half and grind valve on its seat Repeat the process of valvelappingasexplained severaltimesforensuring pe...

Страница 77: ...g with pencil marks as explained above Valve seating on valve seat can also be checked as follows Assemble the valve assembly in position Keep the Cylinder head on a table Fill petrol on top of the valves Seepage of petrol past the valve seat indicates improper valve seating Check the free length of valve spring Pour solvent into exhaust port and check for valve seat leakage if any ...

Страница 78: ...UCE ENGINE SERVICE MANUAL 77 S No Fastener Size Tool Usage Precautions Photos AggregatetoAssemble Instructions 11 5 ValveTiming Bring piston to TDC so that the woodruf key in the timing shaft is at 12 Clock position ...

Страница 79: ...nder barrel If compression pressure does not increase then check for blown out cylinder head gasket improper torque of Rocker bearing bolts or cylinder head nuts valve seat damage leakage valve stem bend cylinder head warpage improper valve timing Auto decompressor STEP C Incasecompressionpressureismorethan110PSI thenenginerequiresDecarbonisationofcylinder head piston combustion chamber Also check...

Страница 80: ...procket assy 17 Teeth Nut M35 1 5 1 78 8 Pump Assy Hex Socket Head cap screw M6 25 2 10 1 CSK Socket Head cap screw M6 30 3 10 1 Starter motor assy Hex Socket Head cap screw M6 60 2 10 1 Cam pivot screw assy Pivot M4 0 7 1 3 0 3 Inlet Exhaust Cam sleeve nut assy Nut M10 1 2 20 2 Cam steady plate assy Hex Socket Head cap screw M6 30 2 10 1 Hex Socket Head cap screw M6 25 1 10 1 Auto chain tensioner...

Страница 81: ...1 1 10 1 Sprak plug assy M14 Spark Plug M14 WQR8DC 1 25 2 5 Sprak plug assy M10 Spark Plug M10 UR6DC 1 13 1 3 Cylinder Head Nut M8 Grade 10 2 30 3 1 Cylinder Cylinder head assy Flanged Hex nut M8 1 25 1 30 3 1 Head Inlet Exhaust Rocker bearing assy Hex Socket head cap screw M6 55 4 10 1 Rocker cover assy Bolts M7 1 3 14 1 4 Hex head screw rocker cover mounting 1 14 1 4 seal bolt M7 1 Gear Pivot up...

Страница 82: ...ored in a sequence for inspection and reassembly Lubricate all moving parts prior to reassembly While fixing bearings or bushes in the crankcases it is necessary to heat the crankcase for ease of fixing Cool the crankcases after the fixing the bearings bushings before further assembly Fix the clutch bearing retainer plate with 2 allen bolts Torque 0 60 KG M 6NM Assemble clutch ball bearing 6006 C3...

Страница 83: ...recautions Photos AggregatetoAssemble Instructions 12 1 Engine Bearings Crankcase LH Assemble 6305 C3 bearing after 1st circlip Insert 2nd circlip then bearing spacer in Crank case Left Assemble NU 305 big roller bearing after bearing spacer in Left Crank case for crankshaft ...

Страница 84: ... is facing the FD sprocket side while assembling the 6007 bearing Assemble sleeve gear ball bearing 6007 R1 C3 and circlip S No Fastener Size Tool Usage Precautions Photos AggregatetoAssemble Instructions Insert circlip and then assemble crankshaft Right side needle roller bearing into Crank case Assemble closed end needle bearing inside sleeve Gear ...

Страница 85: ...INE SERVICE MANUAL 84 S No Fastener Size Tool Usage Precautions Photos AggregatetoAssemble Instructions 12 2 Engine Bearings Crankcase RH Assemble open end needle bearing Check bearing seating position and for free rotation ...

Страница 86: ...tions Photos AggregatetoAssemble Instructions 12 3 Kick Starter sub Assembly Insert the spring plunger and pawl in the kick starter spindle Assemble the Kick pinion gear over kick pawl mechanism Insert the thrust washer above the kick spindle Fix the thrust washer on kick spindle ...

Страница 87: ...hile pressing down the kick pawl and plunger Fix kickstarter sub assy in to Crankcase Right as shown in Fig Assemble oil thrower under the kickstarter Gear Torque 0 6 KG M Assemble Kick starter spring on kick starter stud that the inner lug is above facing the stud eyelet in facing down NOTE Ensure kick pawl is seated over the trip plate in the CrankcaseRight Rotatekick Gear andconfirmfree wheel m...

Страница 88: ...the mounting hole in crankse RH Carefull reamin the rod while supporting the eyelet to prevent it from setting disturbed Insert the hext bolt into spring eyelet tighten on crankcase RH Apply LOCTITE 5699 RTV silicon liquid gasket then assemble kick shaft Cover with oil seal onCrank caseRightby 4 screws NOTE Ensure oil seal is replaced before fixing kick shaft cover Hex bolt M6 Socket Spanner 10 mm...

Страница 89: ...gatetoAssemble Instructions 12 5 Layshaft Sub Assembly Assemble High gear Assemble Double gear Layshaft 3rd and 4th gear Assemble thrust washer and then Lay shaft 1st gear NOTE Ensure bottom pivot bearing smooth machined surface are facing upwards Assemblethrustwasher and then 2nd gear on layshaft ...

Страница 90: ...89 S No Fastener Size Tool Usage Precautions Photos AggregatetoAssemble Instructions 12 5 Layshaft Sub Assembly Assemble rocker shaft upperpivotbearing with O ring with 2 bolts Torque 1 KG M Hex Soc Hd Cap Screw M6 Allen Key 5mm Torque 1 KG M ...

Страница 91: ...ear Smear oil on the 3rd 4th gear with bush before assembly on Mainshaft S No Fastener Size Tool Usage Precautions Photos AggregatetoAssemble Instructions Assemble main shaft 3rd gear Smear oil on the 3rd 4th gear with bush before assembly on Mainshaft Smear oil and assemble the 1st thrust washer andthen the4thgearon the main shaft ...

Страница 92: ...o Fastener Size Tool Usage Precautions Photos AggregatetoAssemble Instructions 12 6 Mainshaft Sub Assembly NOTE Ensure 2nd gear selector fork groove side is facing towards Mainshaft 4th gear Assemble main shaft 1st gear Assemble main shaft 2nd gear ...

Страница 93: ...autions Photos AggregatetoAssemble Instructions 12 6 Main Shaft Sub Assembly Assemble Left selector fork on the selector shaft and then insert centre fork so that the cut shoulders of both the forks are matched Assemble circlip on the selector shaft Assemble Right selector fork ...

Страница 94: ...y in 3rd gear position ensure the 4 rollers are in good condition and located properly Assemble the thrust washer Layshaft 2nd gear HighgearwithLay shaft mounted on the Crank case Right NOTE Ensure alignment of main shaft with sleeve gear hole fork shaft with fork hole inside the Crank case Right and sliding gear with lay shaft NOTE Ensure special thrust washer profile is facing towards sleeve gea...

Страница 95: ...gears in 3rd gear position Gently slide inside the crankcase Right Insert cam plate piviot pin with O ring Insert 3 mm locating pin to lock piviot pin Assemble thrust washer and then Layshaft 1st gear on the Layshaft NOTE Check Gear shifting system by rotating Cam plate and Main shaft sub assy while rotating the shafts simul taneously Check for smooth gears engagement NOTE Apply LOCTITE 577 thread...

Страница 96: ...er and tighten bolt Check Crank shaft big end bearing axial play is within service limit Assemble the crank shaft into the crankcase Right Check Crank shaft run outiswithinservicelimit NOTE Ensure the bearing inner races small one on timing shaft big one on drive shaft are fitted on the crank shaft before assembl ing in the crankcase Right Hex Flange bolt M5 Socket spanner 8mm Torque 1 Kg M ...

Страница 97: ...k case Left Apply gasket sealant on crankcase RH mating surface Insert the jack shaft into crankcase LH inner side Assemble the crankcase LH on crankcase RH ensuirng all shaft holes are aligned The jack shaft is in position and does not fall off The crankcase joints are perfectly matched NOTE Ensure special thrust washer profile facing towards Crank shaft bearing side on Left Crank case CAUTION En...

Страница 98: ... woodruff key NOTE Ensure step face of jack shaft gear facing crankcase LH inside NOTE Ensuresmallergearisfacing crankcase LH inside meshes with idler gear 12 6 Main Shaft Sub Assembly Tighten crankcase stud nuts and allen screws diagnolly and as per the sequence in the illustration shown The crankcase can be assembled on the vehicle CAUTION During tightening rotate shaft to ensure freeness CAUTIO...

Страница 99: ...n of hydraulic valvelifter and tighten with hex socket screw Hex socket screws M6 Allen Key 45 mm Torque 1 KG M Ensure hydraulic tappet free up down movement 12 7 Hydraulic Tappets Please ensure the roller should be facing down wards during assembly INLET RHVL EX RHVL Ensure the rollers in perpendicular to the cam spindle Insert hydraulic tappet in crankcase RH with the rollder facing down Ensure ...

Страница 100: ...CE MANUAL 99 12 7 Hydraulic Tappets Hex Socket CSK head Screw M5 Allen Key 4 mm S No Fastener Size Tool Usage Precautions Photos AggregatetoAssemble Instructions Tighten 4hexsocketcsk head screws Locate tappet cover on crankcase RH ...

Страница 101: ...sage Precautions Photos AggregatetoAssemble Instructions 12 8 Drain Plug NOTE Apply LOCKTITE 542 thread sealant before assembling the drain plug DRAIN BOLT Hex flange bolt M5 Socker Spanner 8mm Torque 2KG M Assemble magnetic drain plug assy with O ring on crankcase Right ...

Страница 102: ...D UCE ENGINE SERVICE MANUAL 101 12 9 Gear Train NOTE Do not hammer directly over sleeve Gear S No Fastener Size Tool Usage Precautions Photos AggregatetoAssemble Instructions Insert sleeve Gear into Crankcase Right ...

Страница 103: ...tructions 12 10 Gear Rocker Shaft on Crankcase RH outer Assemble striker spring on rocker shaft assy NOTE Ensure striker spring both ends are seated on striker lever rocker shaft Locate gear change spring on rocker shaft assy ensuring the ends are correctly position at the rocker shaft Locate spacer inside the spring ...

Страница 104: ...shaft Assemble lower pivot bearing bolts Alignlowerpivotbearing mounting holder to crankcase RH locate 2 hext socket screw Assemble upper pivot bearing crankcase RH outside tighten with 2 hex socket head screw NOTE It is recommended to tighten the upper pivot bearing first and then the bottom pivot bearing hex screw SMOOTH HexSocHeadCapScrewM5 Allen Key 4 mm Torque 0 6 KG M Tighten lower pivot bea...

Страница 105: ...egatetoAssemble Instructions 12 10 Gear Rocker Crank case RH inner Assemble bolt pawl into Crank Case Right as shown in Fig Fix cam plate return spring pawl cam plate with machined washer and nyloc nut CAUTION This double stepped face should be inside Torque 2 KG M Pawl Bolt Torque 1 KG M Nyloc Nut ...

Страница 106: ...and tighten bolt Check Crank shaft big end bearing axial play is within service limit Assemble the crank shaft into the crankcase Right Check Crank shaft run outiswithinservicelimit NOTE Ensure the bearing inner races small one on timing shaft big one on drive shaft are fitted on the crank shaft before assembl ing in the crankcase Right Hex Flange bolt M5 Socket spanner 8mm Torque 1 Kg M ...

Страница 107: ...ase Left Apply gasket sealant on crankcase RH mating surface Insert the jack shaft into crankcase LH inner side Assemble the crankcase LH on crankcase RH ensuirng all shaft holes are aligned The jack shaft is in position and does not fall off The crankcase joints are perfectly matched NOTE Ensure special thrust washer profile facing towards Crank shaft bearing side on Left Crank case CAUTION Ensur...

Страница 108: ...s on woodruff key NOTE Ensure step face of jack shaft gear facing crankcase LH inside NOTE Ensuresmallergearisfacing crankcase LH inside meshes with idler gear 12 11 Crankcase LH RH Tighten crankcase stud nuts and allen screws diagnolly and as per the sequence in the illustration shown The crankcase can be assembled on the vehicle CAUTION During tightening rotate shaft to ensure freeness CAUTION E...

Страница 109: ...ANUAL 108 Locate the double gear in the crankcase LH and insert shaft CUT PORTION 12 12 Starter Double Gear S No Fastener Size Tool Usage Precautions Photos AggregatetoAssemble Instructions Ensure cut portion of shaft is facing upwards ...

Страница 110: ...en screws Torque1 KG M Hex Soc Hd Cap Screw M6 Allen Key 5 mm Torque 1 KG M S No Fastener Size Tool Usage Precautions Photos AggregatetoAssemble Instructions 12 13 Auto Chain Tensioner Assemble collar on main shaft distance collar on Assemble chain tensioner pad washer and hex nut Hex Flange U Nut 8mm Ring Spanner 10mm Torque 2 5 KG M ...

Страница 111: ...tch bearing into gear with the wide flange facing outside Locate engine sprocket into sprag clutch gently press inside simultaneously rotating anticlockwise NOTE Ensure wide flanges face of the sprag clutch bearing must face outwards CAUTION Lubricatetheneedlebearing well before assembling on the sprag clutch FLANGE FACE Assemble spacer distance washer on Crankshaft Left ...

Страница 112: ... assemble all the clutch plates CAUTION Ensure smooth face of all clutch plain plates are kept in the same direction to avoid clutch jerk slippage Assemble wheel clutch on clutch hub 12 15 Sub Assembly of Clutch Plates Special tool No ST 25594 4 Hex Bolt M6 Socket Spanner 8 mm Assemble clutch springs 6 Nos on clutch sub assy then place clutch spring holder Insert clutch sub assy into clutch sprock...

Страница 113: ...th 2 long bolts 12 15 Sub Assembly of Clutch Plates Assemble the 4 clutch holding bolts bolts and tighten diagonally and evenly NOTE Tighten bolts diagonally and evenly 5 threads each Torque 1 KG M Remove the 2 long bolts and the special tool Fix the 2 hex bolts Locate clutch sprocket engine in primary chain assembly as a set on the main shaft crankshaft respectively Locate thrust washer in clutch...

Страница 114: ...b mate with main shaft the clutch plate lugs match with clutch sprocket Special tool No ST25591 4 Locate Special tool between Clutch sprocket and engine sprag clutch assy 12 16 Assembly of Clutch Fixthewasher andnyloc hex nut over clutch assembly and tighten Hex Flange Bolt M17 Socket Spanner 24 mm Torque 4 8 Kg M Nyloc Nut M20 Socket Spanner 24 mm Fix hex head bolt with washer on sprag clutch ass...

Страница 115: ...le Instructions Use Torque wrench to tighten the nyloc nut on Clutc Torque 4 2 Kg M 12 16 Assembly of Clutch Fix the spring and bolt with O ringforthe auto chain tensioner Torque 1KG M Hex Flange Screw M5 Allen Key 4mm Assemble gear lever shaft bush Assemble clutch bearing cup ball bearing 6001 clutch push pad ...

Страница 116: ...ge Precautions Photos AggregatetoAssemble Instructions Assemble clutch cable on Crank case cover Left and fix to clevis Assemble Sleeve gear Spacer over sleeve as Hex Flange bolt M6 Allen Key 5mm Torque 1 Kg M 12 17 Cover LH Locate 11 allen screws on cover Left and tighten ...

Страница 117: ...egatetoAssemble Instructions Assemble spring for clutch operating shaft and lock the pin Assemble oil filler plug with O ring NOTE Ensure 2 Nos dowel pins are located properly Apply LOCKTITE 5699 RTV silicon liquid gasket Assemble the cover LH on Crank case LH Assemble clutch operating shaft assembly on cover LH ...

Страница 118: ...LD UCE ENGINE SERVICE MANUAL 117 S No Fastener Size Tool Usage Precautions Photos AggregatetoAssemble Instructions Assemble gear lever oil seal on cover Left 12 17 Cover LH Assemble Clutch operating shaft oil seal ...

Страница 119: ...er Size Tool Usage Precautions Photos AggregatetoAssemble Instructions Fix Rear Chain master link plate and lock clip Lock thetabover theFD sprocket nut Assemble lock type washer and nut Torque 7 5 KG M NOTE Care to be taken while fixing the FD sprocket direction circular groove index mark facing outwards Assemble FD Sprocket ...

Страница 120: ... shaft with spacer on RH side Locate Gear change lever on gear shift shaft on LH side Install 2 hex screws and locate the rocker shaft upperpivotbearingwith O ring Locate Special tool on rocker shaft return spring pivot pin with O ring gently push the pivot pin into the Crankcase RH Hex Socket Head Cap ScrewsM5 Allen Key 4mm Torque 0 6 Kg M Hex Socket Head Cap Screws M6 Allen Key 5mm Torque 1 Kg M...

Страница 121: ... Torque 0 35 to 0 6KG M CAUTION Ensure O ringislocatedon the oil pump body outlet S No Fastener Size Tool Usage Precautions Photos AggregatetoAssemble Instructions 12 20 Oil Pump Fix the woodruff key carefully on Crankshaft Assemble Gear lever shaft assembly into RightCrankcasewindow and then fix gear shaft spacer ...

Страница 122: ... Instructions 12 21 Auto Decompressor Lubricate and ensure free movement of the returning of the flyweight NOTE Ensure spring eyelet is seated properly inside flyweight hole Assemble the flyweight along with return spring over activating pin and tighten with allen screw Locate the actuating pin in the Exhaust cam ...

Страница 123: ...oblem NOTE After assembling both cam gears adjust Eccentric cam to reduce gear backlash Torque 2 KG M NOTE Ensure the short boss of the gear is facing outwards NOTE To reduce axial play in between Cam Gears outer surface and steady late additional shim may be added as per need HexSocketScreW M6 Allen Key 5 mm Torque 1 Kg M Locate the exhaust cam onthespindleandensure the2punchmarksonthe camalignsw...

Страница 124: ...emble Instructions Assemble magneto rotor plain washer and nut and tighten Torque 4 8 KG M by using Special tool Special tool No ST 25592 4 Fix oil seal 2 Nos at Kick Shaft hole on Crank case Right cover Fix breather chamber gasket INSIDE OIL SEAL OUTSIDE OIL SEAL Assemble the dowels and allen screws on Cam steady plate and tighten Torque 1 KG M ...

Страница 125: ...s to fix breather chamber coverplate Torque0 60 KG M Hex Socket Hd Cap Screw M5 Allen Key 4 mm Torque 0 6 KG M Assemble Breather bolt and washer Assemble jet Crankshaft oil seal Crank feed and circlip on cover Right inside NOTE Replace the oil seal every 20 000 kms interval Torque 2KG M Torque 1 5 KG M Assemble Ignition Timing inspection bolt with copper washer if not assembled earlier ...

Страница 126: ...dhesivesealanttomagneto wire cable grommet to avoid oil seepage Assemble Pulser coil on cover Right and tighten with 2 screws Torque 1 KG M Assemble 2 dowels and Right Crank case cover gasket HexSoc Hd CapScrewM6 Allen Key 5 mm Torque 1KG M Assemble cover Right carefully by aligning kickshaft and dowels Fix cover Right and tighten with 11 allen screws Torque 1 KG M Assemble Stator on cover Right a...

Страница 127: ...2 22 Assembly Procedure of Cam Gears Assemble oil filter cover Torque 0 60 KG M Assemble O ring Spring and gasket oil filter cap CAUTION Care must be taken while fixing cover due to spring force and gasket Assemble kickstarter lever Torque 2 5 KG M Torque 2 5 Kg m Assemble the O rings Oilfilter element washer and plate as shown ...

Страница 128: ...ROYAL ENFIELD UCE ENGINE SERVICE MANUAL 127 S No Fastener Size Tool Usage Precautions Photos AggregatetoAssemble Instructions 12 22 Assembly Procedure of Cam Gears Fix Cylinder barrel bottom Gasket ...

Страница 129: ...etoAssemble Instructions 12 23 Assembly of Rotor Assembly Assemble magneto rotor plain washer and nut and tighten Torque 4 8 KG M by using Special tool Special tool No ST 25592 4 Fix oil seal 2 Nos at Kick Shaft hole on Crank case Right cover Fix breather chamber gasket INSIDE OIL SEAL OUTSIDE OIL SEAL ...

Страница 130: ...o fix breather chamber coverplate Torque0 60 KG M Hex Socket Hd Cap Screw M5 Allen Key 4 mm Torque 0 6 KG M Assemble Breather bolt and washer Assemble jet Crankshaft oil seal Crank feed and circlip on cover Right inside NOTE Replace the oil seal every 20 000 kms interval Torque 2KG M Torque 1 5 KG M Assemble Ignition Timing inspection bolt with copper washer if not assembled earlier ...

Страница 131: ...Allen Key 4 mm Torque 1KG M NOTE Apply LOCKTITE 595 silicon adhesivesealanttomagneto wire cable grommet to avoid oil seepage Assemble Pulser coil on cover Right and tighten with 2 screws Torque 1 KG M Assemble 2 dowels and Right Crank case cover gasket HexSoc Hd CapScrewM6 Allen Key 5 mm Torque 1KG M Assemble Stator on cover Right and tighten with 3 mounting screws Torque 1 KG M ...

Страница 132: ...nd gasket Assemble the O rings Oilfilter element washer and plate as shown S No Fastener Size Tool Usage Precautions Photos AggregatetoAssemble Instructions Assemble 2 dowels and Right Crank case cover gasket Assemble cover Right carefully by aligning kickshaft and dowels Fix cover Right and tighten with 11 allen screws Torque 1 KG M 12 24 Assembly of RH Cover ...

Страница 133: ...ENGINE SERVICE MANUAL 132 S No Fastener Size Tool Usage Precautions Photos AggregatetoAssemble Instructions 12 24 Assembly of RH Cover Assemble oil filter cover Assemble kickstarter lever Torque 2 5 Kg m Torque 0 6 Kg M ...

Страница 134: ...orque 0 6 KG M Fix the E Start motor with 2 allen bolts Torque 1 KG M along with earthing cable NOTE Apply LOCTITE 577 thread sealanttomountingboltsto avoid oil seepage if any Hex Soc Screw M6 Allen Key 5 mm Torque 1 KG M Fix the E Start motor cover Fix the 4 Allen screws of housing starter drive and tighten Fix the dowels in the crankcase and carefully fix the motor with housing starter drive App...

Страница 135: ...D UCE ENGINE SERVICE MANUAL 134 S No Fastener Size Tool Usage Precautions Photos AggregatetoAssemble Instructions Assemblethemultilayer steel MLS head gasket on the barrel 2 Nos dowels 12 26 Cylinder Barrel Piston ...

Страница 136: ...ng upwards Stagger piston rings end gap as shown in Fig NOTE Top ring has rectangular cross section with black colour Nitride coating NOTE After installation the ring should rotate freely rotatable in the ring grooves CAUTION Ensure the open end of any piston ring does not align with the piston pin boss EX IN Locate the piston on the connecting rod and insert the piston pin into the piston Fit the...

Страница 137: ...and Exhaust Valve stem seal in valve guides S No Fastener Size Tool Usage Precautions Photos AggregatetoAssemble Instructions Locate special tool till the spring is fully compressed Locate spring retainer top valve spring collar bottom Locate valve in the valve guideontheinsideofthe cylinder head ...

Страница 138: ...g retainer S No Fastener Size Tool Usage Precautions Photos AggregatetoAssemble Instructions Repeatthesameprocess to assemble Exhaust valve Loosen the bolt on special tool and remove special tool on the inlet valve when the bolt is seated on the valve the collar is seated on the valve spring retainer Special Tool No ST 25123 1 ...

Страница 139: ... barrel Fastener Size Tool Usage Precautions Photos AggregatetoAssemble Instructions Locate Spark plug Hex Flange Bolt M8 TSpanner13mm Torque 3 Kg M 12 29 Cylinder Head Assembly Locate the multi layer steel MLS head gasket Install6hexflangednuts securing the cylinder head to crankcase ...

Страница 140: ...s AggregatetoAssemble Instructions Install 2 Hex Plugs with rubber seals on Inlet and exhaust rocker covers Hex Socket Plug M7 Allen Key 6 mm Torque 1 4 Kg M 12 29 Cylinder Head Assembly Locate Inlet Exhaust Push rods Install 4 Hex Plugs each on the rocker bearing inlet exhaust Locate the Inlet Exhaust Rocker cover dowel rubber gasket Hex Socket Plug M6 Allen Key 5 mm Torque 1 Kg M ...

Страница 141: ...ENGINE SERVICE MANUAL 140 S No Fastener Size Tool Usage Precautions Photos AggregatetoAssemble Instructions Fill recommended the engine oil to the correct level and tighten filler cap with O ring 12 30 Engine Oil Filling ...

Страница 142: ...idthe misfiring start immediately after fuel was refilled Did the misfiring occur immediately after the motorcycle was water washed used in water logged area etc Was the motorcycle out of use for a prolonged period of time Was the motorcycle attended to by any unauthorized inexperienced free lance technical person s This will help analyze and pinpoint the most likely cause of the misfiring and hel...

Страница 143: ...ace No Fuel in fuel tank Fill fuel tank Stale adulterated fuel Clean fuel tank Fill with fresh fuel Fuel Tap in Closed Position Turn fuel knob to On Reserve C Fuelrelated Air vent blocked in fuel cap Clean air vent s Fuel filter clogged Clean fuel filter Fuel line pinched Check correct fuel line Ambient temperature too low for Use Choke for starting in cold engine to start conditions Choke Left ON...

Страница 144: ...ect battery B Startermotorrotates battery worn out starter motor starter motor BUTenginedoes brush notcrank Magneto rotor woodruff key broken Check replace woodruff key Starter clutch assembly slipping Check replace starter clutch assy Inlet Exhaust rocker arm seized in Investigate cause of seizure rocker shaft check correct as required Cam shaft seized in cylinder Investigate cause of seizure hea...

Страница 145: ...ated partially blocked Fuel flow partially blocked Check clean fuel tap filter Air filter dirty clogged Check clean replace Pulse air valve pipe connections Check correct loose cracked C Compressionrelated Spark plug loose Check tighten to torque Inlet Exhaust tappets adjusted Check correct wrongly Cylinder head gasket blown Check correct Cylinder head studs loose Check tighten to torque Cylinder ...

Страница 146: ... adjusted wrongly Check correct Cylinder head gasket blown Check correct Cylinder head studs loose Check tighten to torque Cylinder head seating area warped Check replace Cam shaft sticky rotation seized Check correct in cylinder head Valve spring broken or weak Check replace Valve not seating properly stem Check replace bent Heavy carbon deposit on seating surface Piston rings worn out broken Che...

Страница 147: ... fuel tap filter B Fuel Inductionrelated Inlet manifold loose cracked Check tighten replace inlet manifold C CompressionRelated Spark plug loose Tighten spark plug to torque Tappets adjusted too tight Check adjust tappets correctly Cylinder head bolts loose Check tighten to torque Cylinder head gasket damaged Check Replace Cylinder head warped Check Replace Valve spring broken or weak Check Replac...

Страница 148: ...rrect loose cracked Ignition coil defective Check replace B Brownsmoke Adulterated Bad fuel Clean fuel tank Fill with fresh fuel Air filter box poorly sealed Check correct element partially clogged C Bluish Whitesmoke Engine oil level too high Check Maintain Oil level as Recommended Valve stem seal damaged Check correct Excess clearance between valve Check correct stem guide Oil scrapper ring worn...

Страница 149: ... plug Spark plug insulator cracked Check replace Suppressor cap H T lead loose Check correct as required Suppressor cap H T lead defective Check correct as required Ignition coil defective Check Replace Pulsar coil Magneto defective Check replace C Fuel Inductionrelated Adulterated Bad fuel Clean fuel tank Fill with fresh fuel Air filter dirty clogged Check clean replace D CompressionRelated Spark...

Страница 150: ...Valve stem squeaky noise Replace stem seals Valve stem to guide clearance high Check replace D Cylinderbarrel central Piston rings broken Check replace portionnoise Cylinder Piston scored Check replace Check air filter housing also for damages Excess clearance between piston barrel Check replace Piston slap Cam chain pads worn out Check replace Auto chain tensioner jammed Check replace Excessive c...

Страница 151: ...eck correct Shift forks pins worn out Check replace Selector drum grooves worn out Check replace Clutch pad sticky worn out Check replace Clutch plates movement sticky Check correct D Clutchassemblyrelated Springs weak broken Check replace Friction plates worn out burnt Check replace Steel plates warped Check replace No end float of clutch assembly in shaft Check correct E Gearsdoesnotengage Shift...

Страница 152: ...Royal Enfield Support 1800 2100 007 Email support royalenfield com Twitter RoyalEnfieldSupport Web www royalenfield com ...

Отзывы: