Section 5 Operating Instructions
SG10A Manual
www.rottlermfg.com
5-7
Three Angle Seat Cutting
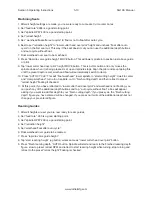
1. Place the ball drive adapter in the spindle.
2. Align spindle to valve guide.
3.
Place a valve in the setting fixture. Position the pointer on the
valve where you wish to place the top of the seat.
4. Remove the valve; replace it with the correct pilot.
5. Select the proper diameter tool holder. Place the carbide insert
in tool holder. Slide tool holder onto ball head.
6.
Place ball head over the pilot in setting fixture. Use radial
adjusting screw to set diameter of cutter to correspond to
position of pointer on setting fixture.
7.
Tighten hex socket screws on bottom of ball head. See figure
9
8.
Remove ball head assembly from setting fixture. Place fixed
carbide pilot in cylinder head.
9. Center the spherical ball head toolholder over the pilot shank.
10. Required spindle rotation speed will vary, depending on seat
hardness. As seat hardness increases, so does the required
spindle speed. Some will require full speed.
11.
Special care should be taken in centering the floating head
above the valve guide, to achieve a concentric seat.
12. Cut seat only enough to clean up surface.
Too much cutting will sink the valve too far in the head. Many
operators prefer to use the spindle fine feed when machining seats
as extreme control of spindle down feed can be accomplished.
The capacity of the Rottler SG80A associated with a complete
tooling range allow working on seats of diameters up to 210
millimeters (8.25”).
Four tooling ranges are possible:
1) For seats diameters between 18 and 60 mm ( 0.71’’- 2.4’’): tool holder BH375R1 or UPTSH375R1
and tip holder TH2000 for seat range .710” - 1.180” (18mm-30mm) or TH2001 for seat range 1.100” -
1.570” (28mm-42mm) or TH2002 for seat range 1.570” - 2.360” (40mm-60mm), with 9,52 mm ( 3/8 ’’)
pilots of shank diameter
2) For seats diameters between 40 and 80 mm (1,570”- 3.150”): tool holder BH375WR1 or
UPTSH375WR1and tip holder TH2003 for seat range . 1.570’’ - 2.360’’ (40mm - 60mm) or TH2004 for
seat range 2.280” - 3.150” (58mm - 80mm), with pilots with 9,52 mm ( 3/8 ’’) shank diameter
3) For seats diameters between 60 and 110 mm (2,362” – 4.330”): tool holder BH20R and tip holder
TH3005 or TH3006 for pilots with 20mm shank
4) For seats diameters between 95 and 150 mm (3.740” – 5.905): tool holder BH20RW and tip holder
TH3007 or TH3008 for pilots with 20mm shank
IMPORTANT: When the form tips, the square tips or the triangle inserts are fitted, check that their
reference faces are perfectly clean. The accuracy of the seat angles depends on this.
Содержание SG10A
Страница 2: ......
Страница 4: ......
Страница 8: ...Section 1 Introduction SG10A Manual www rottlermfg com 1 4...
Страница 22: ...Section 2 Installation SG10A Manual www rottlermfg com 2 13...
Страница 60: ...Section 5 Operating Instructions SG10A Manual www rottlermfg com 5 14 Rottler Six and One Instructions...
Страница 61: ...Section 5 Operating Instructions SG10A Manual www rottlermfg com 5 15...
Страница 62: ...Section 5 Operating Instructions SG10A Manual www rottlermfg com 5 16...
Страница 82: ...Section 6 Maintenance SG10A Manual www rottlermfg com 6 9...
Страница 90: ...Section 8 Machine Parts SG10A Manual www rottlermfg com 8 3 Base Table and Riser Assembly...
Страница 91: ...Section 8 Machine Parts SG10A Manual www rottlermfg com 8 4...
Страница 92: ...Section 8 Machine Parts SG10A Manual www rottlermfg com 8 5...
Страница 93: ...Section 8 Machine Parts SG10A Manual www rottlermfg com 8 6 Base Assembly...
Страница 94: ...Section 8 Machine Parts SG10A Manual www rottlermfg com 8 7...
Страница 95: ...Section 8 Machine Parts SG10A Manual www rottlermfg com 8 8...
Страница 96: ...Section 8 Machine Parts SG10A Manual www rottlermfg com 8 9 Spindle Assembly...
Страница 97: ...Section 8 Machine Parts SG10A Manual www rottlermfg com 8 10...
Страница 98: ...Section 8 Machine Parts SG10A Manual www rottlermfg com 8 11...
Страница 99: ...Section 8 Machine Parts SG10A Manual www rottlermfg com 8 12...
Страница 100: ...Section 8 Machine Parts SG10A Manual www rottlermfg com 8 13 Transmission Assembly...
Страница 101: ...Section 8 Machine Parts SG10A Manual www rottlermfg com 8 14...
Страница 102: ...Section 8 Machine Parts SG10A Manual www rottlermfg com 8 15...
Страница 103: ...Section 8 Machine Parts SG10A Manual www rottlermfg com 8 16 Head Support Assembly...
Страница 104: ...Section 8 Machine Parts SG10A Manual www rottlermfg com 8 17...
Страница 105: ...Section 8 Machine Parts SG10A Manual www rottlermfg com 8 18...
Страница 106: ...Section 8 Machine Parts SG10A Manual www rottlermfg com 8 19 Pneumatic Circuit Diagram...
Страница 107: ...Section 8 Machine Parts SG10A Manual www rottlermfg com 8 20 Electrical Components...
Страница 110: ...Section 9 Options SG10A Manual www rottlermfg com 9 2...
Страница 112: ...Section 10 Material Data Safety Sheets SG10A Manual www rottlermfg com 10 2...
Страница 113: ...Section 10 Material Data Safety Sheets SG10A Manual www rottlermfg com 10 3...
Страница 114: ...Section 10 Material Data Safety Sheets SG10A Manual www rottlermfg com 10 4...
Страница 115: ...Section 10 Material Data Safety Sheets SG10A Manual www rottlermfg com 10 5...
Страница 116: ...Section 10 Material Data Safety Sheets SG10A Manual www rottlermfg com 10 6...
Страница 117: ...Section 10 Material Data Safety Sheets SG10A Manual www rottlermfg com 10 7...
Страница 118: ...Section 10 Material Data Safety Sheets SG10A Manual www rottlermfg com 10 8...
Страница 119: ...Section 10 Material Data Safety Sheets SG10A Manual www rottlermfg com 10 9...
Страница 120: ...Section 10 Material Data Safety Sheets SG10A Manual www rottlermfg com 10 10...
Страница 121: ...Section 10 Material Data Safety Sheets SG10A Manual www rottlermfg com 10 11...
Страница 122: ...Section 10 Material Data Safety Sheets SG10A Manual www rottlermfg com 10 12...
Страница 123: ...Section 10 Material Data Safety Sheets SG10A Manual www rottlermfg com 10 13...
Страница 124: ...Section 10 Material Data Safety Sheets SG10A Manual www rottlermfg com 10 14...


