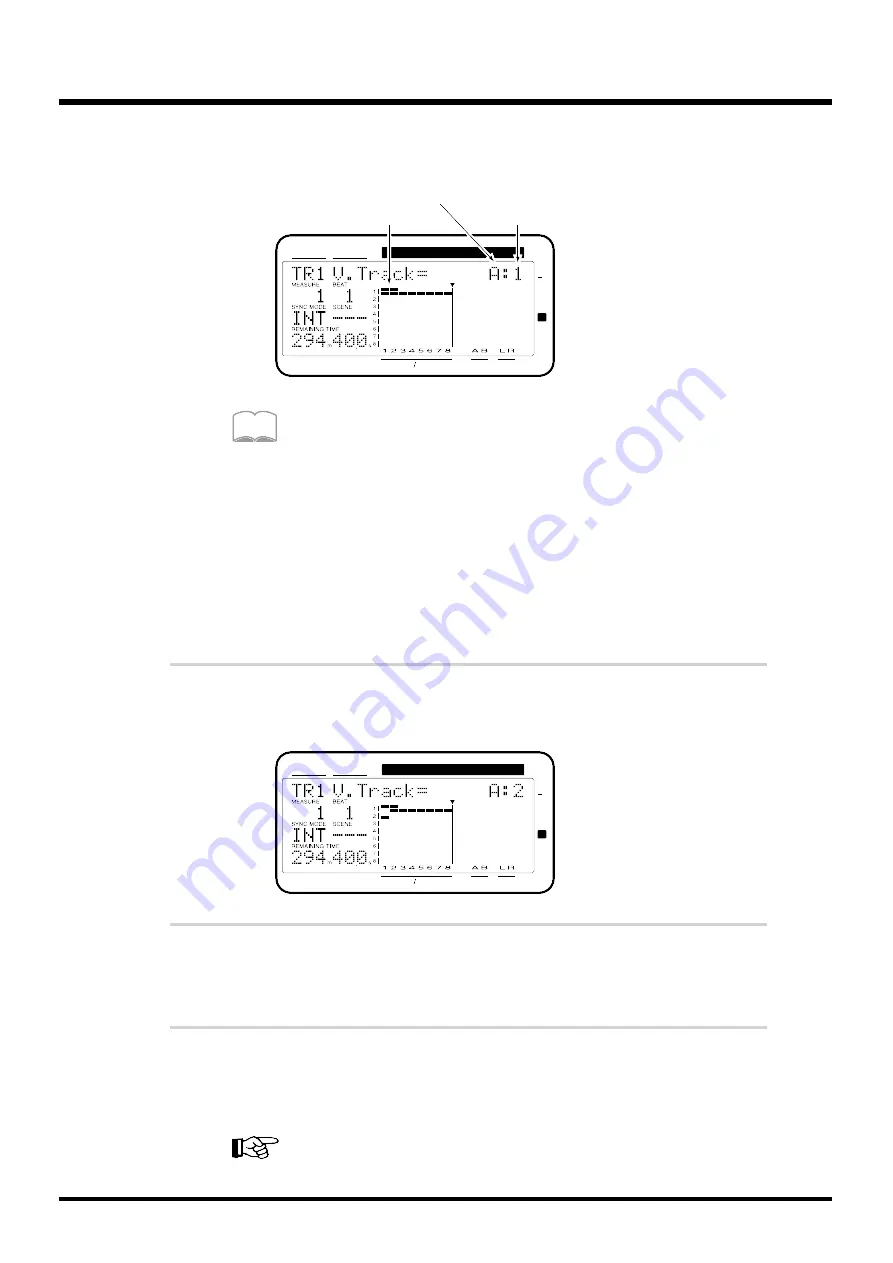
The upper line of the display will indicate “V.Track=,” allowing you to select the
V-track.
At this time, the bar display will indicate the V-tracks on which sound
has been recorded, and the V-track which is selected for each track.
1–8 in the horizontal axis are the track numbers, and 1—8 in the verti-
cal axis are the V-track numbers.
A
■
displayed on the upper line of the V-track number indicates that
sound has been recorded in that V-track. In the above display, sound
has been recorded in V-Tracks 1 of Tracks 1 and 2.
A
■
displayed on the lower line of the V-track number indicates that
that V-track is selected. In the above display, V-track 1 is selected for
all tracks 1–8.
4
Use the TIME/VALUE dial to select the V-track for recording or
playback. Here, select “2.”
5
Press [PLAY (DISPLAY)].
The initial display reappears.
6
Now you have set up V-Track2 of Track1 for recording. Record
and check the content by following the procedure described in
“Recording to the Tracks” (p. 15).
For more detailed information, please refer to “Auxiliary Tracks for
Each Track” (Owner’s Manual p. 30).
CONDITION MARKER#
MASTER
INPUT TRACK
AUX
TIME
48
24
4
0
dB
12
Tracks on which sound
has been recorded
V-Track Bank
V-Track
MEMO
CONDITION MARKER#
MASTER
INPUT TRACK
AUX
TIME
48
24
4
0
dB
12
Basic Operation (Multi-Track Recording)
27


