3
3
BASIC OPERATION
* In this manual, sections that explain
commons points for the PNC-1860/
1410/1210 use only illustrations of the
PNC-1860. Some details of the PNC-
1410/1210 differ from the figure.
3-1 Setting Up and Connection
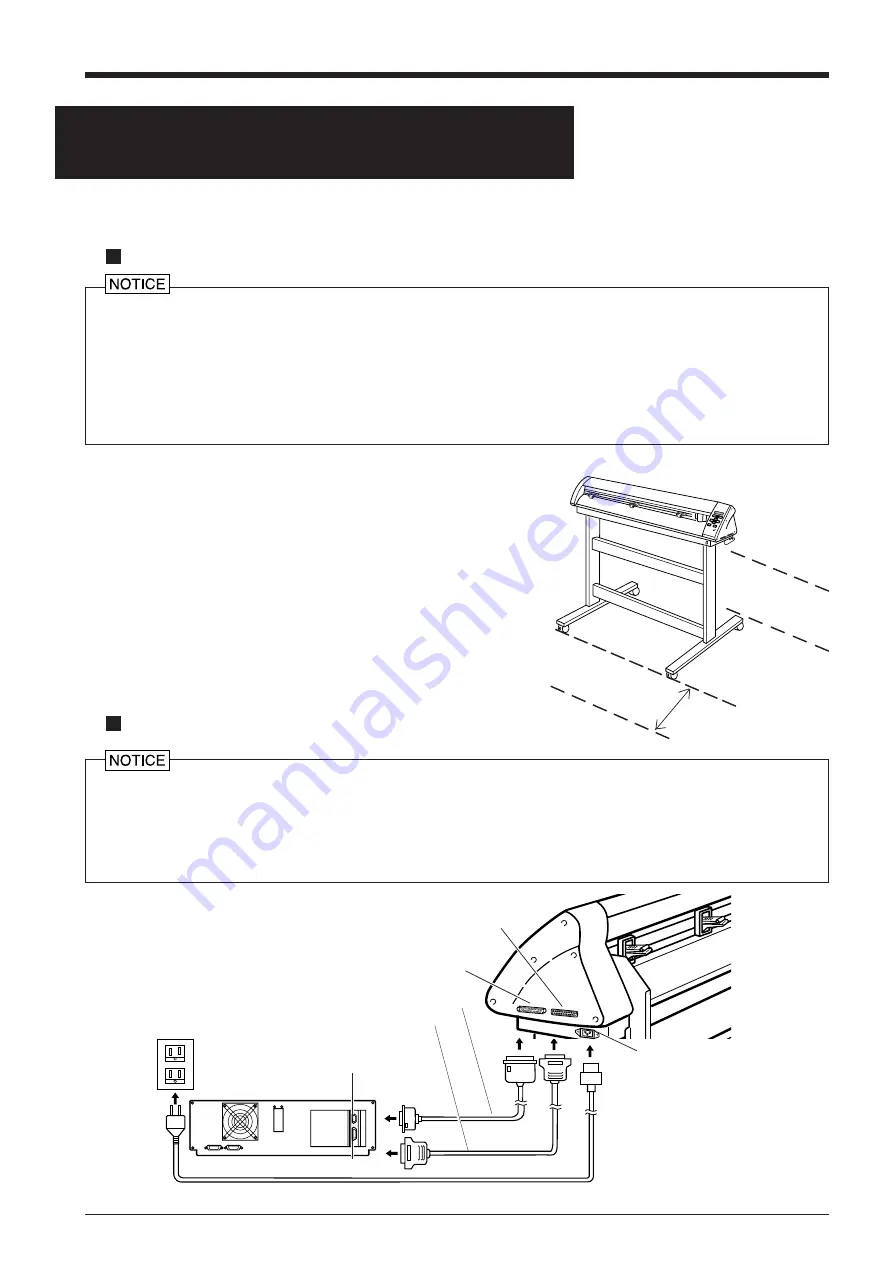
Setting up
Power outlet
Power cord
Never install this unit in any of the following situations, as it could result in damage:
Places where the installation surface is unstable or not level.
Places with excessive electrical noise.
Places with excessive humidity or dust.
Places with poor ventilation, because the PNC-1860/1410/1210 generates considerable heat during operation.
Places with excessive vibration.
Places exposed to strong illumination or direct sunlight.
Connection
• Always make sure that the power is off on both the computer and the PNC-1860/1410/1210 whenever any cables are connected
or disconnected.
• Securely connect the power cord, computer I/O cable and so on so that they will not be unplugged and cause failure during
operation.
• Cables are available separately. One which you are sure matches the model of computer being used should be selected.
Serial connector
Parallel connector
Serial connector
Parallel connector
Parallel interface cable or
Serial interface cable
Power connector [AC IN]
For an explanation of how to assemble the unit and the stand (PNS-186/141/
130), refer to the “ASSEMBLY INSTRUCTIONS” included with the stand.
When using the unit while mounted on a stand, be sure to ensure a sufficient
amount of installation space for the unit. The required installation spaces for
each model are listed below.
PNC-1860 : 1200 mm (47-1/4") high, 1700 mm (66-15/16") wide,
and 750 mm (29-1/2") depth
PNC-1410 : 1200 mm (47-1/4") high, 1350 mm (53-1/8") wide,
and 750 mm (29-1/2") depth
PNC-1210 : 1200 mm (47-1/4") high, 1050 mm (41-5/16") wide,
and 750 mm (29-1/2") depth
The material moves while cutting is in progress. Objects which may obstruct
material movement must not be placed within 60 cm (23-5/8") to the front or
rear of the unit.
600 mm
(23-5/8")
600 mm
(23-5/8")
Содержание Camm-1 Pro GX-640
Страница 8: ...v MEMO...
Страница 38: ...30 Automatic backspace 13 CHARACTER SET...
Страница 41: ...R9 980506...

