27
Subject to change without notice
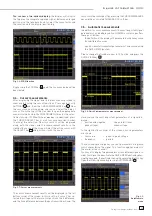
Fig. 10.2: Storing instrument settings
10 Documentation, storing and recalling
The oscilloscope allows you to store and recall all screen
displays, user defi ned settings (e.g. the trigger conditions and
time base settings), reference curves, simple curves and sets
of formulas. There is an internal memory for reference curves,
instrument settings, and sets of formulas. These data, copies
of screen displays and curve data can also be stored on an
USB stick.
10.1. Instrument settings
Push the key SAVE/RECALL for calling the main menu for
storage and load functions. First a listing is shown of the kinds
of data which can be stored and loaded. By pushing the key
next to the top menu item
INSTRUMENT SETTINGS
this menu
will open.
Fig. 10.1: Basic menu for instrument settings
In this menu, by pushing the respective key, it is possible to
call the menu for storing, the data manager for loading, and
the menu for exporting and importing instrument settings.
Additionally, the menu item
STANDARD SETTINGS
will reset
the instrument to the factory settings. The storing menu is
opened by pushing the STORE key.
Here the storage location (internal memory, front panel USB,
rear panel USB) is selected, also a name and a commentary can
be added; these will be stored by pushing the soft menu key next
to
STORE
. In order to recall stored instrument settings, call the
main instrument settings menu and select
LOAD
by pushing the
respective soft menu key. The data manager will open, use the
menu keys and the universal knob for navigating.
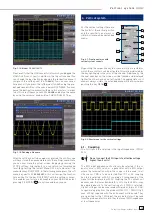
Fig. 10.3: Recalling instrument settings
Here the location is selected from which the settings data are
to be loaded. After the selection in the data manager, load the
settings by pushing the soft menu key
LOAD
. The data mana-
ger also allows you to erase individual settings in the internal
memory. If a USB stick is plugged in and has been selected as
the location, it is also possible to change or erase directories. In
order to export or import instrument settings, a USB stick must
be plugged in, otherwise this menu can not be accessed. Pro-
vided this is fulfi lled, pushing the key next to
IMPORT/EXPORT
will open a menu allowing to copy instrument settings between
the internal memory and a USB stick.
The source is selected by pushing the respective key (e.g. IN-
TERNAL), the selection will be indicated by its blue background.
Then the destination is selected (e.g. FRONT). By pushing the
key next to
IMPORT/EXPORT
, the selected settings data will be
copied as previously chosen (in this example from the internal
memory to a USB stick). It is possible to copy from the internal
memory to the external memory and also between two USB
sticks .
Fig. 10.4: Import/Export menu for instrument settings
D o c u m e n t a t i o n , s t o r i n g a n d r e c a l l i n g
Содержание Hameg HMO3522
Страница 1: ...350 MHz Digital Oscilloscope with FFT and mixed signal option HMO3522 3524 Manual English...
Страница 33: ...33 Subject to change without notice A p p e n d i x...
Страница 34: ...34 Subject to change without notice Appendix...
Страница 35: ...35 Subject to change without notice A p p e n d i x...


