Robo-Tank DIY All-In-One Aquarium Controller User Manual
Robo-Tank DIY All-In-One Aquarium Controller
Back to Top
User Manual v4.05 – Page 48
Atlas-Scientific Probes
Robo-Tank uses the Atlas-Scientific EZO circuits, to interface with the controller, and as such you can use most manufacturer’s
probes, as long as they use a standard BNC connector.
You can use probes from the more expensive American Marine Pinpoint & Neptune Systems Apex probes, to the reasonably
priced BRS and Atlas probes, through to the cheaper ones found on eBay, (though the quality and life expectancy may be
significantly less with the eBay ones).
These circuits, handle the load of any calculations required, for example the EZO EC circuit calculates the TDS and Salinity
values from a reading, and simply passes those values to the controller, reducing the processing load on the controller itself.
Up to 2 pH probes, and single ORP, Dissolved Oxygen, and Electrical Conductivity probe can be monitored and graphed, and
alerted on.
Connecting Atlas Circuits
*Refer to: Connecting Atlas Scientific Circuits (V2 RevB)
Adding a Probe
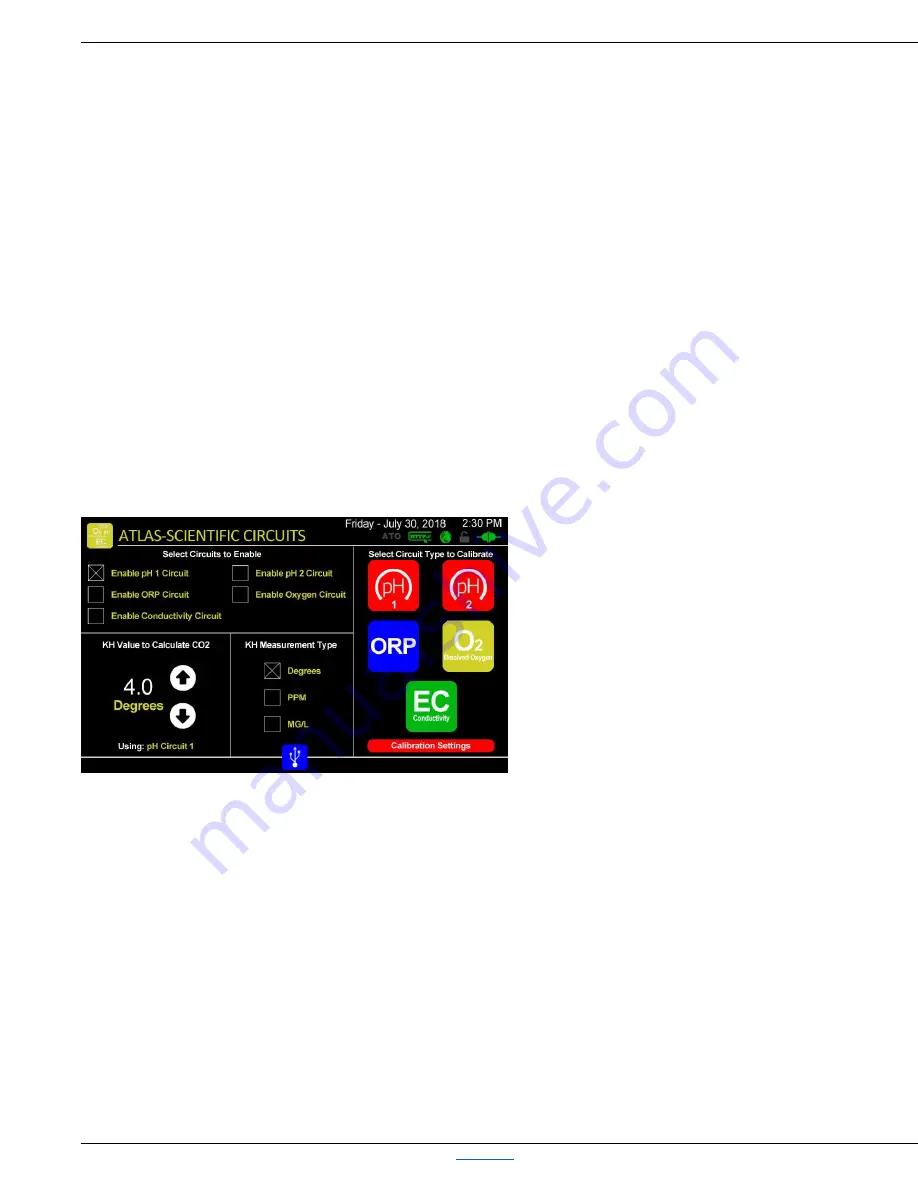
From the Home screen, press Settings > Hardware
> Atlas-Scientific Probes, here you’re able to select
and calibrate your probes.
When you add a probe, you have to tell the
controller it’s available, by enabling it here.
*NOTE: If you don’t have, for example, a
conductivity circuit, be sure that circuit isn’t enabled
or any other circuits you don’t have connected, as
this affects the controller’s cycle time, because it
pauses slightly trying to find the circuit that isn’t
attached.
Calculating CO
2
using pH and KH values
You can also monitor CO
2
levels using either of the pH circuits, but only from one of them.
As there is no probe currently available to automatically monitor KH, (or if there is, it’s extremely expensive), to display the
CO2 concentration, you must manually enter the KH value from the latest KH water test you performed.
Enter in the KH value, (from using a standard basic KH test kit), on the screen above, in the area to the bottom left, using the
up or down arrows. Select the KH Measurement Type, in Degrees, PPM or MG/L.
*This same measurement value will be used to display the CO
2
value on the home page. (Note: PPM and MG/L are
interchangeable, it’s just the label that changes).


