16
User's Guide Digiface AES
© RME
6. Hardware, Driver and Firmware Installation
6.1 Hardware and Driver Installation
To simplify installation it is recommended to first install the drivers before the unit is connected to
the computer. But it will also work the other way round.
RME is constantly improving the drivers. Please download the latest drivers from the RME web-
site. Driver version 4.30 or higher is available via
. Unzip the down-
loaded file and start the driver installation with
rmeinstaller.exe.
Start
rmeinstaller.exe
and follow the instructions of the installer. After installation connect com-
puter and Digiface AES using a USB 2 cable. Windows detects the new hardware as
Digiface
AES
and installs the drivers automatically.
After a reboot, the icons of TotalMix FX and Settings dialog appear in
the notification area. If not a click on the chevron leads to the settings
that control the icon display.
Driver Updates
do not require to remove the existing drivers. Simply install the new driver over
the existing one.
6.2 De-Installing the Drivers
A de-installation of the driver files is not necessary
– and not supported by Windows anyway.
Thanks to full Plug & Play support, the driver files will not be loaded after the hardware has been
removed. If desired these files can then be deleted manually.
Unfortunately Windows Plug & Play methods do not cover the additional autorun entries of To-
talMix, the Settings dialog, and the registration of the ASIO driver. Those entries can be removed
from the registry through a software de-installation request. This request can be found (like all de-
installation entries) in
Control Panel, Software
. Click on the entry 'RME MADIface'.
6.3 Firmware Update
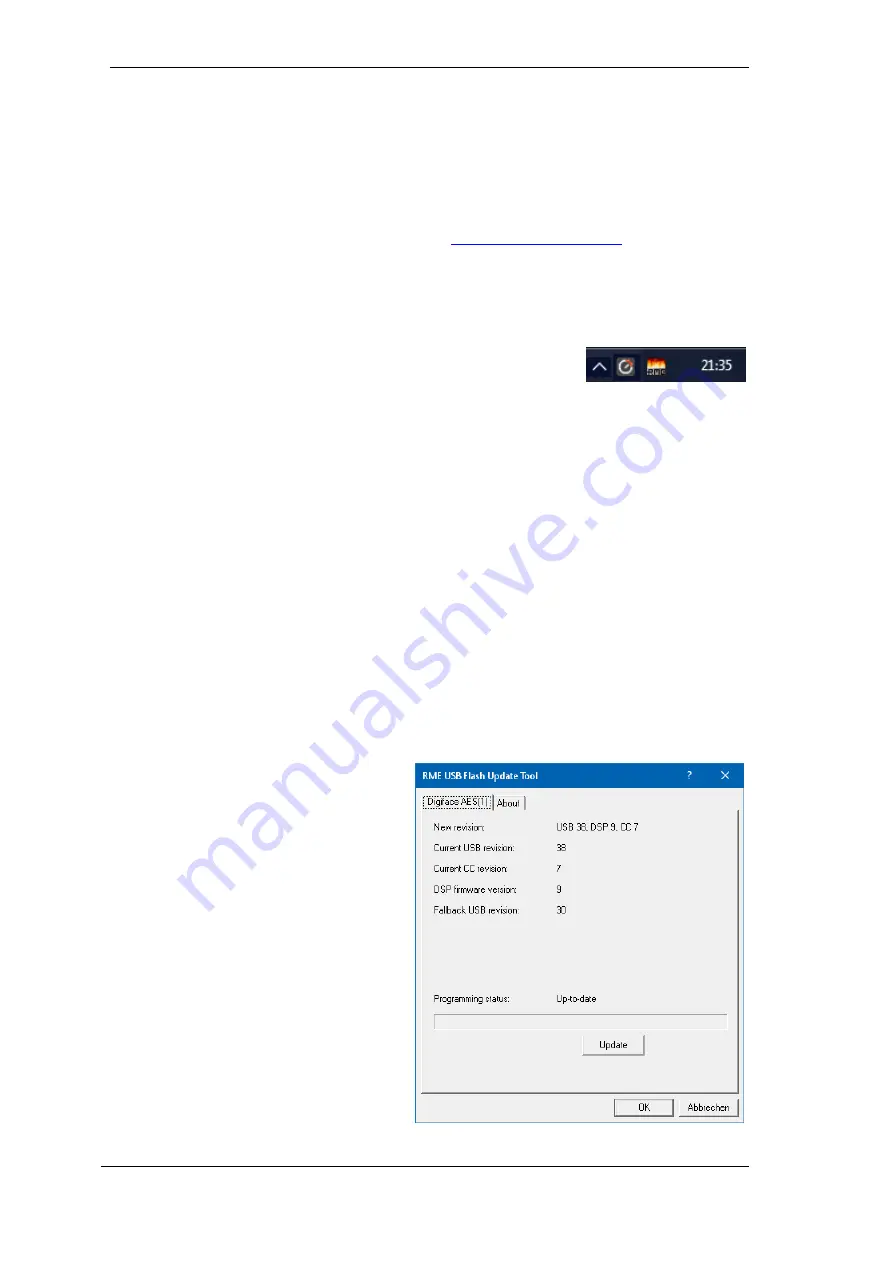
The Flash Update Tool updates the firmware of the Digiface AES to the latest version. It requires
an already installed driver.
Start the program
fut_usb.exe
. The Flash
Update Tool displays the current revision of
the Digiface firmware, and whether it needs
an update or not. If so, then simply press the
'Update' button. A progress bar will indicate
when the flash process is finished (Verify
Ok).
After the update the unit needs to be reset.
This is done by powering down the unit for a
few seconds. A reboot of the computer is not
necessary.
When the update unexpectedly fails (status:
failure), the unit's Safety BIOS will be used
from the next boot on, the unit stays fully
functional. The flash process should then be
tried again.
Содержание Digiface AES
Страница 7: ...User s Guide Digiface AES RME 7 User s Guide Digiface AES General...
Страница 13: ...User s Guide Digiface AES RME 13 5 4 Overview Menu Structure...
Страница 15: ...User s Guide Digiface AES RME 15 User s Guide Digiface AES Installation and Operation Windows...
Страница 29: ...User s Guide Digiface AES RME 29 User s Guide Digiface AES Installation and Operation Mac OS X...
Страница 37: ...User s Guide Digiface AES RME 37 User s Guide Digiface AES Inputs and Outputs...
Страница 42: ...42 User s Guide Digiface AES RME...
Страница 43: ...User s Guide Digiface AES RME 43 User s Guide Digiface AES Stand Alone Operation...
Страница 46: ...46 User s Guide Digiface AES RME...
Страница 47: ...User s Guide Digiface AES RME 47 User s Guide Digiface AES TotalMix FX...
Страница 49: ...User s Guide Digiface AES RME 49...
Страница 82: ...82 User s Guide Digiface AES RME...
Страница 83: ...User s Guide Digiface AES RME 83 User s Guide Digiface AES Class Compliant Mode...
Страница 89: ...User s Guide Digiface AES RME 89 User s Guide Digiface AES Technical Reference...
Страница 98: ...98 User s Guide Digiface AES RME 39 Diagrams 39 1 Block Diagram Digiface AES...
Страница 100: ...100 User s Guide Digiface AES RME...
Страница 101: ...User s Guide Digiface AES RME 101 User s Guide Digiface AES Miscellaneous...


