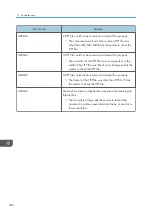

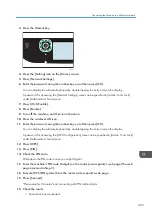


4.
Press [Network Settings].
5.
Enter the password using the number keys, and then press [OK].
You can display the software keyboard by double tapping the entry area on the display.
A password for accessing the [Network Settings] menu can be specified in [Admin. Tools Lock]
under [Administrator Tools] menu.
6.
Press [Wi-Fi Enable].
7.
Press [Enable].
8.
Turn off the machine, and then turn it back on.
9.
Press the wireless LAN icon.
10.
Enter the password using the number keys, and then press [OK].
You can display the software keyboard by double tapping the entry area on the display.
A password for accessing the [Wi-Fi Configuration] menu can be specified in [Admin. Tools Lock]
under [Administrator Tools] menu.
11.
Press [Setup Wizard].
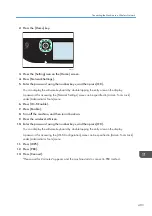
12.
Press the SSID of the router (access point) from the searched SSID list.
13.
Enter the encryption key using the number keys, and then press the [Connect].
As the passphrase, you can enter either 8 to 63 ASCII characters (0x20-0x7e) or 64 hexadecimal
digits (0-9, A-F, a-f).
14.
Check the result.
• Connection has succeeded:
Configuring the Wi-Fi settings is complete.
• Connection has failed:
Check the configuration for the router (access point), and then try the connection again.
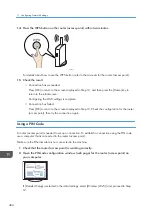
Using the WPS Button
A router (access point) is needed to set up a connection.
Make sure the Ethernet cable is not connected to the machine.
1.
Check that the router (access point) is working correctly.
If [Detailed Setup] is selected in the initial settings, select [Wireless (Wi-Fi)] and proceed to Step
11.
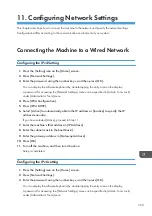
11. Configuring Network Settings
402
Содержание M C251FW
Страница 2: ......
Страница 23: ...3 2 1 ECC105 Interior ECC106 4 3 2 1 Guide to Components 21 ...
Страница 45: ...Deleting characters 1 Press to delete characters Entering Characters 43 ...
Страница 48: ...1 Guide to the Machine 46 ...
Страница 82: ...2 Paper Specifications and Adding Paper 80 ...
Страница 100: ...3 Printing Documents 98 ...
Страница 124: ...4 Copying Originals 122 ...
Страница 170: ...5 Scanning Originals 168 ...
Страница 216: ...6 Sending and Receiving a Fax 214 ...
Страница 270: ...7 Configuring the Machine Using the Control Panel 268 ...
Страница 346: ...6 Close the ADF cover 9 Maintaining the Machine 344 ...
Страница 360: ...Main unit DUE292 1 3 2 1 DUE288 2 DUE289 10 Troubleshooting 358 ...
Страница 361: ...3 DUE290 Waste toner bottle ECC168 Paper feed unit DUE320 1 Removing Paper Jams 359 ...
Страница 440: ...12 Appendix 438 ...
Страница 445: ...MEMO 443 ...
Страница 446: ...MEMO 444 EN GB EN US EN AU M0EQ 8504A ...
Страница 447: ......
Страница 448: ...EN GB EN US EN AU M0EQ 8504A 2021 2022 Ricoh Co Ltd ...