
7.
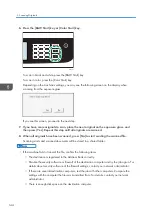
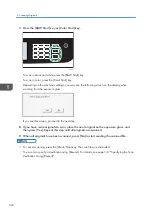
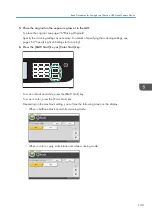
Press the appropriate selection key according to the desired file format, and then press
[OK].
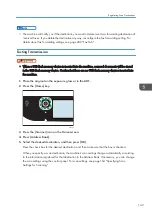
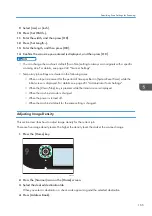
Depending on the machine's settings, you may see the following screen on the display when
scanning from the exposure glass.
If you see this screen, proceed to the next step.
8.
If you have more originals to scan, place the next original on the exposure glass, and
then press [Yes]. Repeat this step until all originals are scanned.
9.
When all originals have been scanned, press [No] to start sending the scanned file.
10.
Wait until "Completed the Process" is displayed on the screen.
Scanned files are saved in the root directory of the USB flash memory device.
11.
Remove the USB flash memory device from the machine.
• To cancel scanning, press the [Clear/Stop] key. The scan files are discarded.
• You can configure the machine to perform black-and-white scanning in halftone or grayscale by
changing [B&W scanning Mode] setting under [Scanner Settings]. For details about [B&W
scanning Mode], see page 222 "Scanner Settings".
• If the [Limitless Scan] setting under [Scanner Settings] is enabled, you can place originals on the
exposure glass repeatedly in a single scan procedure. For details about [Limitless Scan], see
page 222 "Scanner Settings".
• If the [Single/ Multi Page] setting under scanner settings is set to [Multi-page], you can scan
multiple pages to create a single PDF or TIFF file containing all pages. However, if the file format is
JPEG, a single-page file will be created for every page scanned. For details about [Single/ Multi
Page], see page 222 "Scanner Settings".
• If paper is jammed in the ADF, the scan job will be put on hold. To resume the current job, remove
the jammed paper and scan the originals again starting from the jammed page. For details about
how to remove the paper jammed in the ADF, see page 365 "Removing Scanning Jams".
5. Scanning Originals
150
Содержание M C251FW
Страница 2: ......
Страница 23: ...3 2 1 ECC105 Interior ECC106 4 3 2 1 Guide to Components 21 ...
Страница 45: ...Deleting characters 1 Press to delete characters Entering Characters 43 ...
Страница 48: ...1 Guide to the Machine 46 ...
Страница 82: ...2 Paper Specifications and Adding Paper 80 ...
Страница 100: ...3 Printing Documents 98 ...
Страница 124: ...4 Copying Originals 122 ...
Страница 170: ...5 Scanning Originals 168 ...
Страница 216: ...6 Sending and Receiving a Fax 214 ...
Страница 270: ...7 Configuring the Machine Using the Control Panel 268 ...
Страница 346: ...6 Close the ADF cover 9 Maintaining the Machine 344 ...
Страница 360: ...Main unit DUE292 1 3 2 1 DUE288 2 DUE289 10 Troubleshooting 358 ...
Страница 361: ...3 DUE290 Waste toner bottle ECC168 Paper feed unit DUE320 1 Removing Paper Jams 359 ...
Страница 440: ...12 Appendix 438 ...
Страница 445: ...MEMO 443 ...
Страница 446: ...MEMO 444 EN GB EN US EN AU M0EQ 8504A ...
Страница 447: ......
Страница 448: ...EN GB EN US EN AU M0EQ 8504A 2021 2022 Ricoh Co Ltd ...


