60
COPYING
2
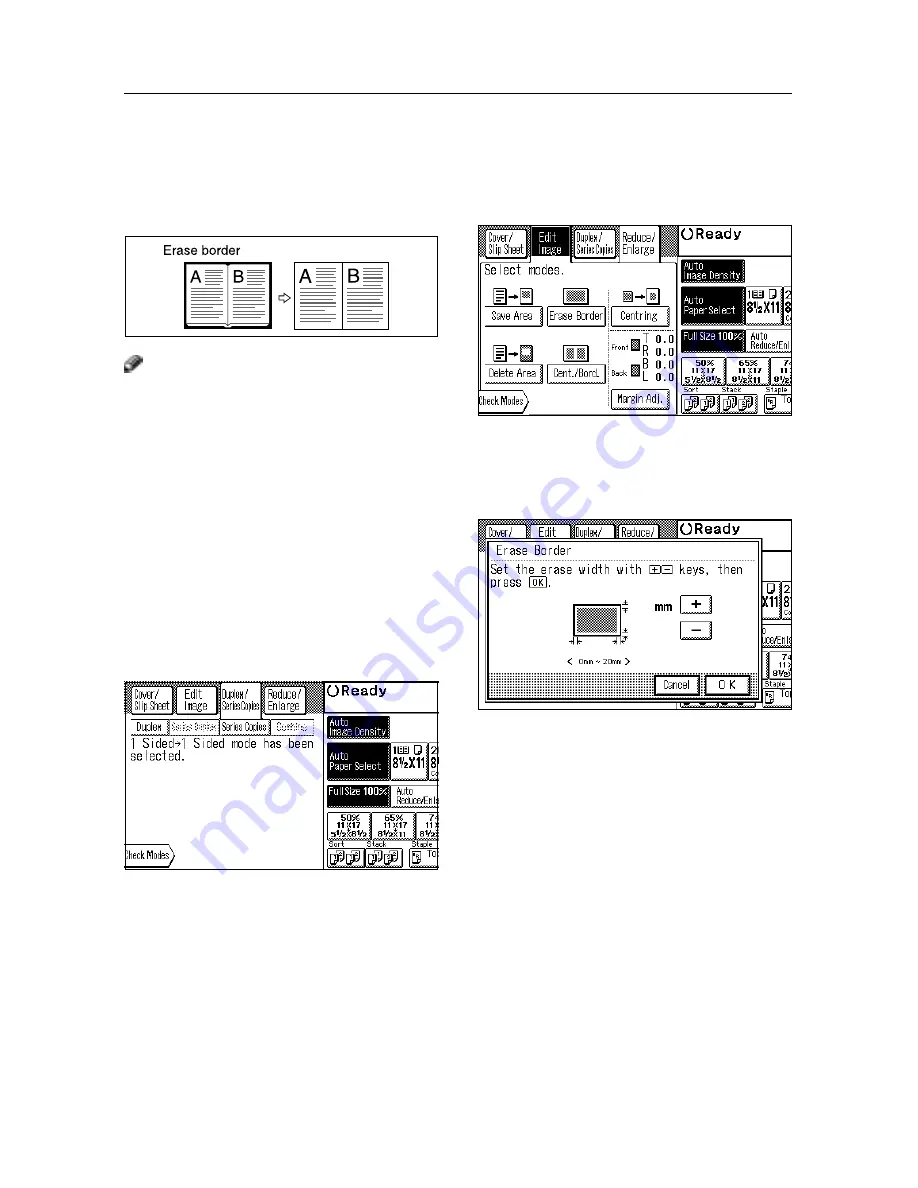
Press the [Erase Border] key.
3
Set the dimensions of the border width
using the [+] and [-] keys and press the
[OK] key.
4
Set your originals and press the
{
Start
}
key.
This function erases all four sides of the origi-
nal image.
Note
❏
You can specify the wide of the border to
be erased within the range of 0 - 20 mm in
2.5 mm steps (0 - 0.8" in 0.1" steps.)
❏
The initial erasure width is 5 mm(0.2" ).
You can change this initial value. See
⇒
P.99 “Erase Border Width priority setting.”
❏
Use the Erase Center/Border function to
specify the width of the top, bottom, left,
and right borders individually. See
⇒
P.61
“ERASE CENTER/BORDER.”
❏
You can combine both the Erase Border
and Centering function.
1
Press the [Edit Image] key.
ERASE BORDER
Содержание FT7950
Страница 7: ...v Deliver to collection point for waste products Do not be disposed of via domestic refuse collection...
Страница 10: ...viii This page is intentionally blank...
Страница 16: ...2 WHATYOU CAN DOWITHTHIS MACHINE...
Страница 17: ...3...
Страница 103: ...89 IF STAPLES RUN OUT This page is intentionally blank...
Страница 105: ...91 IF A STAPLE IS JAMMED This page is intentionally blank...
Страница 108: ...94 USER TOOLS Prev Next USERTOOL MENU Prev Next...
Страница 109: ...95 USERTOOL MENU Prev Next Prev Next...
Страница 118: ...104 USER TOOLS This page is intentionally blank...
Страница 124: ...110 REMARKS This page is intentionally blank...
Страница 130: ...116 SPECIFICATIONS This page is intentionally blank...
Страница 137: ...123 This page is intentionally blank...
Страница 138: ...124 This page is intentionally blank A246 UE USA...


