FIRST Global Building Guide Created by REV Robotics 2019, Licensed Under CC BY-SA
34
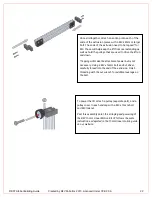
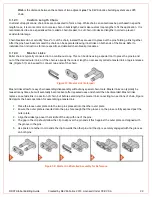
Installing the clip as shown in Steps 4 and Step 5
of Figure 58 can be sometimes difficult.
There are a number of approaches that may work
for these steps, but a common method is to use a
pair of needle nose pliers to grip between the back
of the clip and the nearest pin to slide the clip
(Figure 59).
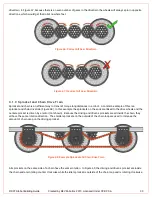
Figure 59: Installing the Master Link Clip with Pliers
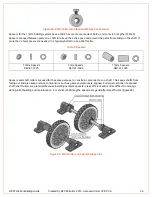
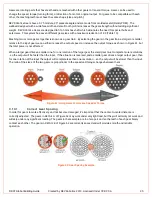
Master links are used to connect two ends of a section of chain to create a loop of chain. In order to use a master link, the
chain ends should both terminate with inside links (Figure 60). Slide the two pins from the master link into the rollers of
the two terminating inside links. Follow the procedure from Figure 58 to complete the link installation.
Figure 60: Master Link Assembly on Chain
3.12.5
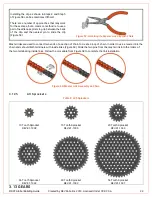
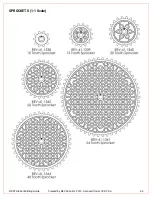
All Sprockets
Table 9: #25 Sprockets
10 Tooth Sprocket
REV-41-1338
15 Tooth Sprocket
REV-41-1339
20 Tooth Sprocket
REV-41-1340
26 Tooth Sprocket
REV-41-1342
40 Tooth Sprocket
REV-41-1343
54 Tooth Sprocket
REV-41-1341
3.13
GEARS
Содержание FIRST Global
Страница 26: ...FIRST Global Building Guide Created by REV Robotics 2019 Licensed Under CC BY SA 24 Figure 40 M3 Drop in Bolt...
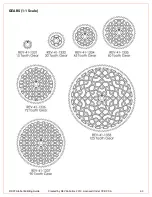
Страница 45: ...FIRST Global Building Guide Created by REV Robotics 2019 Licensed Under CC BY SA 43 GEARS 1 1 Scale...
Страница 46: ...FIRST Global Building Guide Created by REV Robotics 2019 Licensed Under CC BY SA 44 SPROCKETS 1 1 Scale...
Страница 47: ...FIRST Global Building Guide Created by REV Robotics 2019 Licensed Under CC BY SA 45 WHEELS 1 1 Scale...
Страница 49: ...FIRST Global Building Guide Created by REV Robotics 2019 Licensed Under CC BY SA 47 BRACKETS 1 1 Scale...
Страница 50: ...FIRST Global Building Guide Created by REV Robotics 2019 Licensed Under CC BY SA 48...

