17
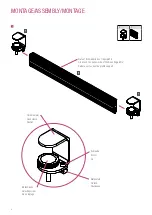
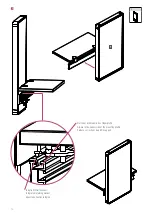
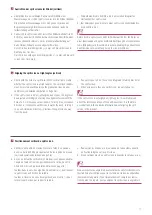
a. Überprüfen Sie am vertikalen Rahmenprofil mithilfe einer
Wasserwaage, ob sich der split screen im rechten Winkel befindet.
Die Libelle der Wasserwaage muss sich genau zwischen der
Begrenzungsanzeige Ihrer Wasserwaage befinden (siehe De-
taildarstellung auf Seite 16).
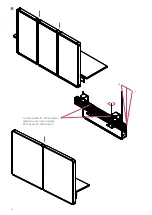
b. Falls sich die split screen nicht im rechten Winkel befindet (siehe
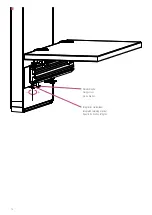
Schritt a), kann durch Drehen der Ausrichtschraube mithilfe eines
Innensechskant-Schlüssels 4 mm (siehe Detaildarstellung auf
Seite 16) der Winkel passend eingestellt werden.
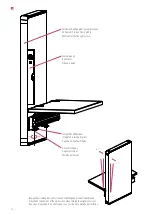
Durch Drehen im Uhrzeigersinn (+) neigt sich die split screen in
Richtung des Tisches.
Durch Drehen entgegen des Uhrzeigersinns (−) neigt sich die split
screen vom Tisch weg.
Ausrichten der split screens im Winkel (vertikal)
6
c. Wiederholen Sie die Schritte a bis b am zweiten integrierten
Haltewinkel der split screen.
d. Bei Verwendung von mehr als einer split screen wiederholen Sie
die Schritte a bis c.
e.
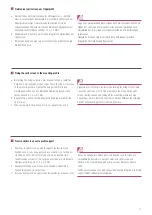
Sofern Sie die split screens nicht im Winkel ausrichten, führt dies zu
einer funktionalen und optischen Beeinträchtigung des Trennwandsys-
tems (Winkelversatz). Beachten Sie daher unbedingt die nebenstehen-
den Hinweise zur Ausrichtung der split screen im Winkel.
a. Vérifiez la verticalité du montant vertical à l’aide d’un niveau à
bulle. La bulle doit être précisément entre les repères du niveau
(voir représentation détaillée en page 16).
b. En cas de défaut de verticalité (cf. étape a), vous pouvez adapter
l’angle en tournant la vis de positionnement à l’aide d’une clé
Allen de 4 mm (voir représentation détaillée en page 16).
Tournez dans le sens des aiguilles d’une montre (+) pour incliner
le split screen en direction de la table.
Tournez à l’inverse du sens des aiguilles d’une montre (−) pour
relever le split screen par rapport à la table.
Positionnement vertical du split screen
6
c. Renouvelez les étapes a) à b) au niveau de la deuxième équerre
de fixation intégrée sur le split screen.
d. Si vous utilisez plus d’un split screen renouvelez les étapes a) à c).
Ne pas respecter un angle droit peut entraîner des dysfonctionnements
fonctionnels et esthétiques pour le système de cloison de séparation
(déplacement angulaire). Tenez impérativement compte des indica-
tions figurant en regard, pour positionner le split screen à angle droit.
a. Check with the help of a spirit level on the vertical frame profile
whether the split screen is at right angles. The spirit level bubble
must be located exactly between the graduation lines on your
spirit level (see detailed illustration on Page 16).
b. If the split screen is not at right angles (see step a), the angle can
be adjusted accordingly by turning the alignment screw with the
help of a 4 mm hexagon socket wrench. Turning it in a clockwise
direction (+) inclines the split screen towards the desk. Turning it
in an anti-clockwise direction (−) inclines the split screen away
from the desk.
Aligning the split screen at right angles (vertical)
6
c. Repeat steps a to b on the second integrated retaining bracket of
the split screen.
d. When using more than one split screen, repeat steps a to c.
e.
If the split screen is not aligned at right angles, this will adversely
affect the function and look of the partition system. It is therefore
essential to note the opposite information about aligning the split
screen in the bracket.
Содержание RAUWORKS B41602
Страница 8: ...2 200 300 mm 200 300 mm 8...
Страница 10: ...3 Ansicht von unten auf die Tischanbindung View from below of the desk attachment Fixation vue de dessous 10...
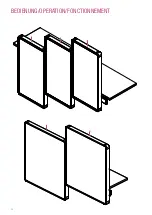
Страница 20: ...20 Bedienung Operation Fonctionnement...
Страница 22: ...Notes...
Страница 23: ...Notes...

