11
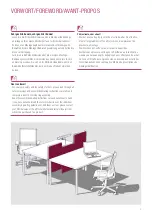
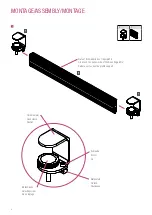
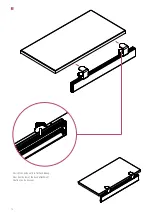
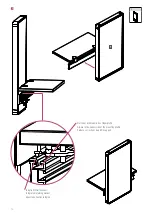
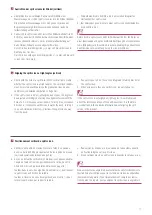
a. Vor der Montage an die Tischplatte die Stellschraube an der
Tischanbindung an die Tischplattenstärke voreinstellen (auf
ausreichenden Abstand der Stellschraube zur Tischplatte achten).
b. Trägerprofil mit Hilfe der Tischanbindungen auf die Tischplatte
aufsetzen und durch Anziehen der Stellschrauben per Hand oder
mit Innensechskantschlüssel 4 mm fest anziehen (siehe Darstel-
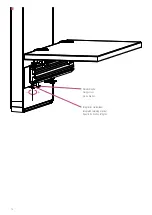
lung „Ansicht von unten auf die Tischanbindung“ auf Seite 10 und
den nebenstehenden Warnhinweis!). Das empfohlene Anzugsmo-
ment mit Drehmomentschlüssel beträgt 4 ± 0,5 Nm).
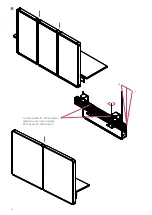
Aufschieben und Anschrauben des Trägerprofils an die
Tischplatte
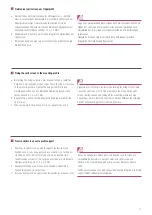
Zu geringe Anzugskräfte beim Anziehen der Stellschrauben können ein
Lösen und Herabfallen des Trägerprofils mitsamt der Trennwand vom
Tisch verursachen und zu Verletzungen führen. Überprüfen Sie daher
die hinreichend feste Verbindung zwischen Trägerprofil und Tisch.
Nicht an Glasplatten montieren, diese können brechen –
Verletzungsgefahr!
Die Montage ist an gängigen Büroarbeitstischen, außer an Glastischen
(siehe Warnhinweis!), möglich. Bitte beachten Sie, dass je nach
Plattenmaterial (z.B. Weichholz) eine Druckfläche durch die Tischan-
bindung am Tisch verursacht werden kann.
3
a. Avant d’installer le profilé support sur le plateau du bureau, réglez
les molettes des fixations en fonction de l’épaisseur du plateau
(veillez à laisser un espace suffisant entre la molette de réglage et
le plateau !).
b. Placez le profilé support avec la fixation sur le plateau du bureau
et serrez les boulons des molettes de réglage à la main ou à l’aide
de la clé Allen de 4 mm (cf. image « fixation vue de dessous » à la
page 10 et avertissements ci-contre !). Le couple de serrage à la
clé dynamométrique est préconisé à 4 ± 0,5 Nm.
Faire coulisser le profilé support sur le plateau du bureau et
serrer
Un serrage insuffisant des molettes peut entraîner le détachement et
la chute du profilé support avec la cloison occasionnant un risque de
blessures. Veillez par conséquent à ce que le profilé support et le
bureau soient suffisamment solidarisés.
Ne pas installer sur des plateaux en verre, ceux-ci pouvant se briser,
occasionnant un risque de blessure !
Les cloisons peuvent être installées sur tous les bureaux courants sauf
avec un plateau verre (cf. avertissements !). Veuillez noter que les
fixations peuvent marquer les plateaux, par exemple lorsque ceux-ci
sont en bois tendre.
3
a. Prior to mounting to the desk top, pre-adjust the adjusting screw
on the desk attachment to the thickness of the desk top (ensure
that there is a sufficient gap between the adjusting screw and the
desk top).
b. Place the mounting profile onto the desk top with the help of the
desk attachments and tighten by turning the adjusting screws by
hand or using a 4 mm hexagon socket wrench (see illustration
„View from below of the desk attachment“ on Page 10 and the
warning next to it!). The recommended tightening torque with a
torque wrench is 4 ± 0.5 Nm.
Inserting and screwing the mounting profile onto the desk
top
Tightening forces that are too low when tightening the adjusting
screws could cause the partition, including the mounting profile, to
come loose and fall off and lead to injury. Please therefore check that
the connection between the mounting profile and desk is sufficiently
secure.
Do not fit to glass panes, these can break - risk of injury!
Mounting is possible to conventional office desks, except for glass
desks (see warning!). Please note that, depending on the material that
the desk top is made from (e.g. softwood), an indentation on the desk
may be caused by the desk attachment.
3
Содержание RAUWORKS B41602
Страница 8: ...2 200 300 mm 200 300 mm 8...
Страница 10: ...3 Ansicht von unten auf die Tischanbindung View from below of the desk attachment Fixation vue de dessous 10...
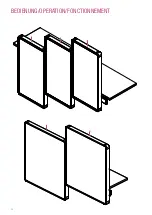
Страница 20: ...20 Bedienung Operation Fonctionnement...
Страница 22: ...Notes...
Страница 23: ...Notes...


