
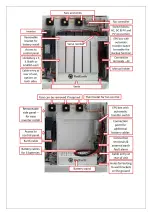

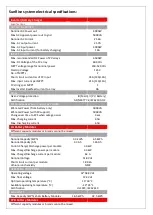
•
Do not block the air inlet by placing objects hard up against the sides of the system. Air enters through the
base of the system.
•
Install in a shaded area outside direct sunlight.
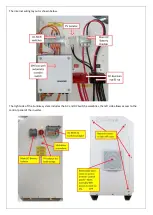
1)
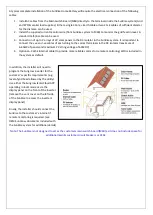
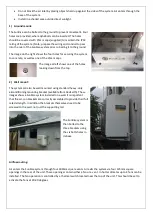
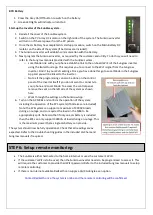
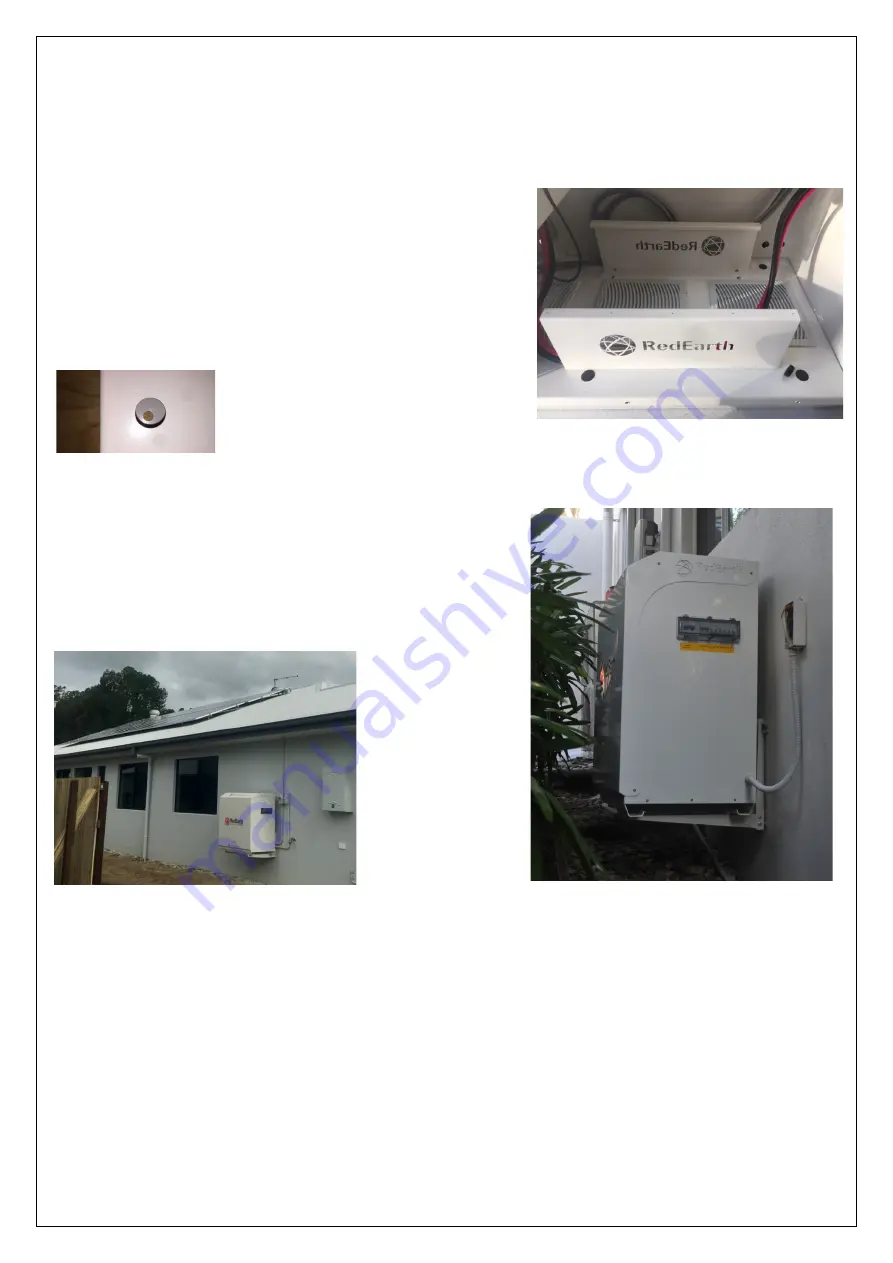
Ground mount:
The SunRise can be bolted to the ground to prevent movement. Four
holes are provided, where dynabolts can be inserted. The holes
should be covered with 25mm caps (supplied) to maintain the IP43
rating of the system. (Note: prepare the wiring and conduit to pass
into the rear of the SunRise system prior to bolting it to the ground.
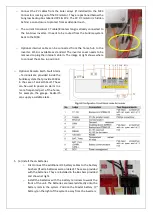
The image on the right shows the four holes for securing the system
to concrete, as well as one of the 25mm caps.
The image at left shows one of the holes
looking down from the top.
2)
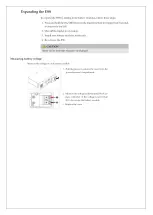
Wall mount:
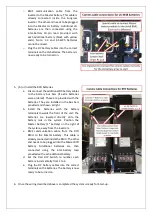
The system can also be wall mounted using standard heavy-duty
airconditioning mounting bracket (available from RedEarth). These
images show a SunRise system installed on a wall. It is important
that the air-con brackets are correctly assembled to provide their full
rated strength. In addition the brackets themselves need to be
screwed to the wall; not just the supporting rail.
The SunRise system is
then bolted to the
three brackets using
the six bolts holes in
its base.
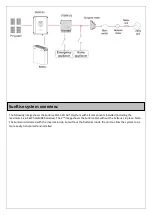
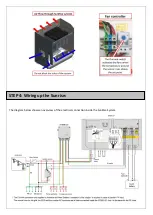
Airflow routing:
Air enters the SunRise system through four 300mm square vents. Air exits the system via four 125mm square
openings in the rear of the unit. These openings contain either a fan or a vent. In hotter climates up to 4 fans can be
installed. The fan operation is controlled by a thermal switch located near the top of the unit. This should be set to
activate the fans at 20-30 degrees.
Содержание SunRise 1-PH
Страница 1: ...SunRise Home Battery System Model SGS 1 PH AUTO with LG BYD battery Installation Manual...
Страница 6: ......
Страница 19: ......
Страница 22: ......


