Setup and Connections
14
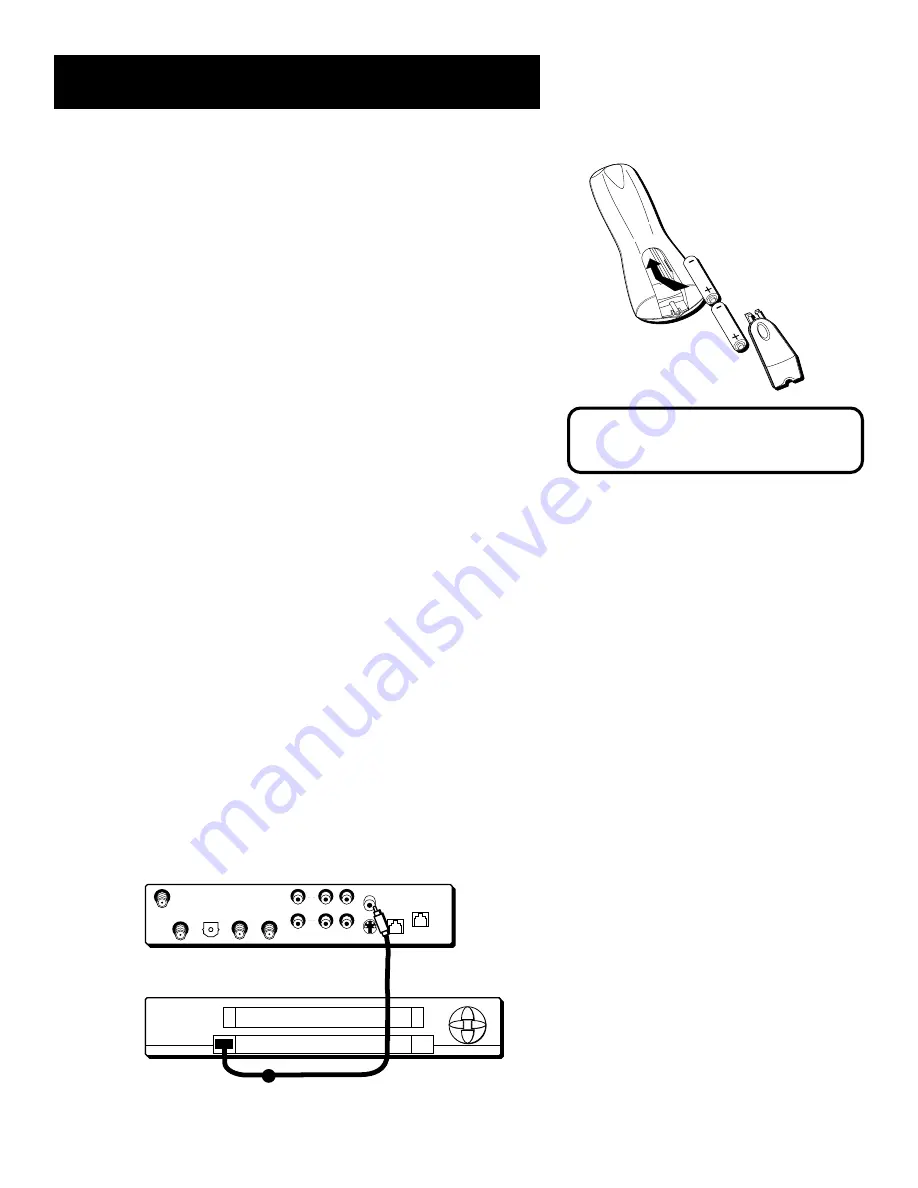
Step 3: Place Batteries In the
Remote Control
Follow these steps whenever you need to install or change the batteries
in your digital satellite receiver’s remote control.
1.
Remove the cover from the battery compartment.
2.
Insert batteries in the battery compartment, matching
the + and – end of each battery.
3.
Replace the cover.
Step 4: Plug In and Turn On the
Digital Satellite Receiver
Plug the end of the power cord into the wall outlet. Be sure to insert the
plug completely.
To turn on the digital satellite receiver, press the DIRECTV button on the
remote control or the ON•OFF button on the front panel. If your TV
brand is RCA, GE, or PROSCAN, press the TV button on the remote to
turn on the TV. If your TV brand is not RCA, GE, or PROSCAN, see the
next section, “Using the Remote,” for details on how to program the
remote to control your TV.
Step 5: Connect the VCR Controller
In order for you to use the One-Touch Record and Timer recording
features, you need to attach the VCR Controller to the back of the
digital satellite receiver.
1.
Plug the VCR Controller into the VCR jack on the digital satellite
receiver.
2.
Affix the other end to the remote control sensor on your VCR.
Back of Digital Satellite Receiver
VIDEO
AUDIO
R
L
SATELLITE
IN
OUT
TO
TV
DIGITAL AUDIO
OUTPUT
RF REMOTE
SATELLITE
IN
OUT
TO
TV
S-VIDEO
VIDEO
AUDIO
IN
FROM
ANT
PHONE
JACK
VCR
DIGITAL
AUDIO
OUTPUT
RF REMOTE
R
L
LOW
SPEED
DATA
REMOTE SENSOR
VCR
Front of VCR
When replacing old batteries, note that
you may have to reprogram your remote
to control other devices.
*The digital audio output jack is only available on model DRD480RE.
*


