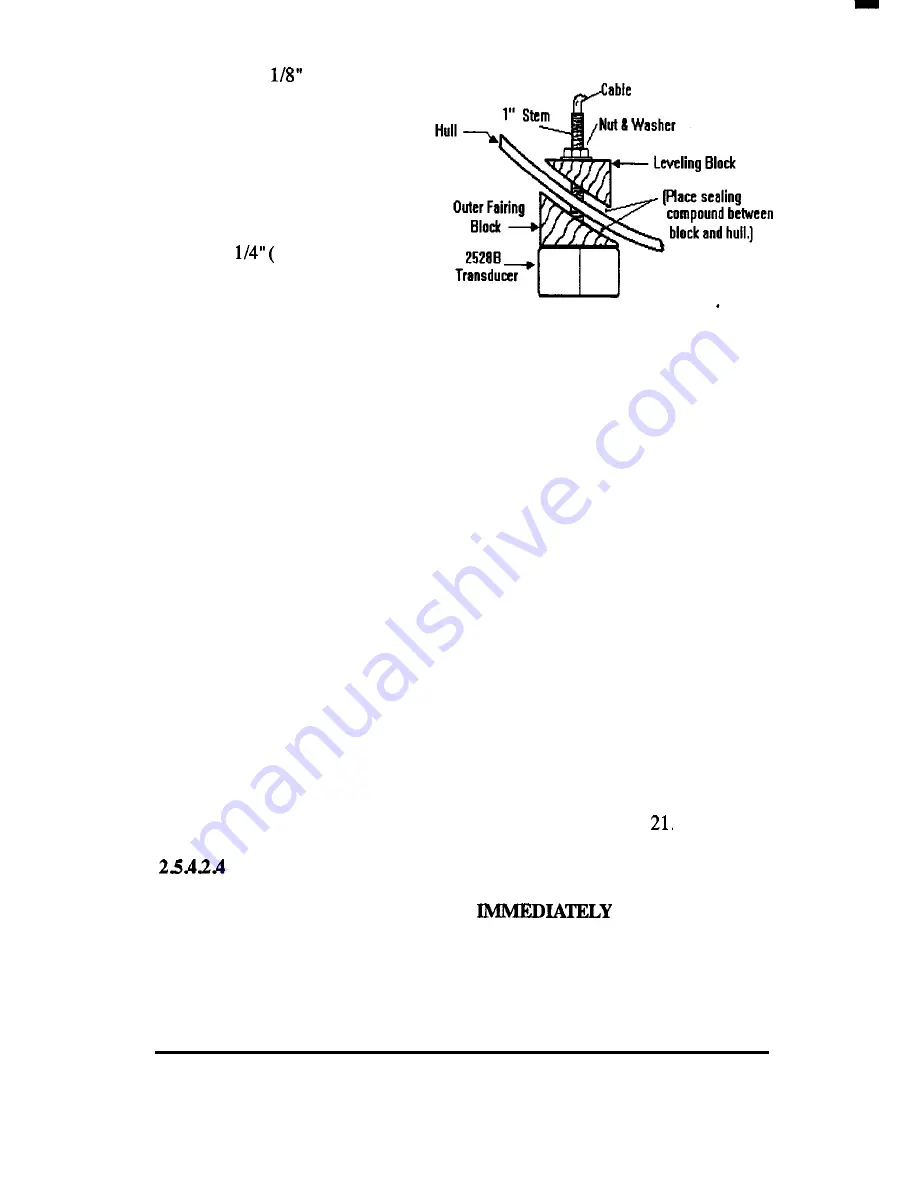
3. Apply a
( mm) thick
layer of sealant on the surfacesof
the transducer and fairing block
(if used) which mate with each
other and to the hull, and bronze
housing (see the figure). A thin
layer should also be applied up
the sidewalls of the stem to a
height of
mm) greater than
the hull plus fairing block thick-
ness. This will ensure there is
sealant material in the threads to
seal them and hold the housing nut securely in place.
4. From the outside of the hull, push the housing (with sealant applied)
into the drilled hole. Apply a twisting motion to the housing to squeeze out
excess sealants while taking care to align the transducer assembly
parallel
to the keel. Verify the transducer and fairing block are seated to the hull
and the transducer is also pointing straight down to the sea bottom.
5. Slip the backing block onto the transducer stem and coat the surface
contacting the hull interior with the caulking compound. Tighten the hex
nut with a wrench or large slip-joint pliers. (Allow for swelling on wooden
hulls.)
6. From the outside, remove excess sealant to assure smooth water flow
over and around the transducer.
7. Route the cable to the echo sounder, being very careful not to tear the
cable jacket when passing the cable through bulkheads, etc. To reduce
electrical interference, keep the transducer cable separated from ignition,
tachometer, alternator or other electrical wiring. Secure the transducer
cable in place to prevent damage using tywraps or lacing twine.
8. Attach the 5 pin connector to the cable as shown on page
Check For Leaks
When the boat is placed in the water,
check around the
thru-hull for leaks. Note that very small leaks may not be readily
observed.
It is best not to leave the boat in the water for more than 8-24 hours before
checking it again. If there is a leak, there may be considerable water
INSTALLATION 37
Содержание V8010
Страница 2: ...WCOLOR ECHO SOUNDER OPERATlON MANUAL...
Страница 16: ...1 q i z INTRODUCTION 8...
Страница 20: ...8 1 205 mm 13 07 _l m 332 mm Y OUTLINE DIdENS O S MI010 ECHO SOUNDER INSTALLATION 12...
Страница 127: ...MAINTENANCE...


