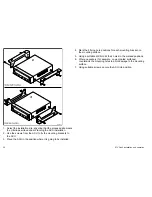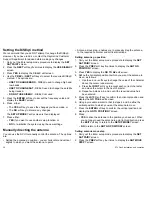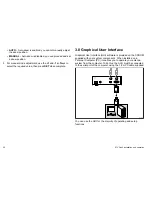
4. Point your remote control towards the ACU, then press the
remote control button that you want to allocate to the selected
function.
5. Press the same remote control button again to confirm the
selection.
6. If you want to set up another remote function:
i.
At the ACU, press the
BACK
softkey.
ii. Press
NEXT
to select the next function to set up.
iii. Repeat the steps 3 to 6 above, for each remote control
function to be set up.
7. When all required functions have been set for remote control,
press the
EXIT
softkey to return to the top level of the setup
menu.
Setting the GPS
With the ACU in setup mode:
1. Press the
NEXT
softkey until
SET GPS?
is displayed.
2. Press
YES
to enter GPS setup mode and display the
LONGITUDE
screen.
3. Set the current longitude as follows:
i.
Use the
+
and
-
softkeys to enter the required value for the
character above the cursor (underscore).
ii. Press the
INPUT
softkey to accept each correct character
and move the cursor to the next character.
iii. Repeat these steps until the correct longitude numeric value
has been entered and the cursor is under the longitude
direction indicator,
E
(east) or
W
(west).
iv. Use the
E
or
W
softkey to set the appropriate direction.
4. Press the
INPUT
softkey to proceed to the
LATITUDE
screen.
5. Set the current latitude as follows:
i.
Use the
+
and
-
softkeys to enter the required value for the
character above the cursor.
ii. Press the
INPUT
soft key to accept each correct character
and move the cursor to the next character.
iii. Repeat these steps until all correct latitude values have
been entered and the cursor is under the latitude direction
indicator,
N
(north) or
S
(south).
iv. Use the
N
or
S
softkey to set the appropriate direction
6. Press the
INPUT
softkey to proceed to the
SAVE?
screen.
7. Press either:
•
YES
to save your settings, or
•
NO
to cancel the operation and return to the
SETUP MODE?
screen.
Note:
If your system is connected to a GPS antenna, the position
will be updated in real time.
Satellite information
Important:
We recommend that you do NOT attempt to edit
satellite information. However, if you have to do so, contact the
Raymarine Customer Support Department for advice before
making any changes.
The editable parameters are typically, in sequence:
•
LONGITUDE
in degrees and minutes, plus E/W selector.
•
VER LOW/RHCP
. Vertical low band tracking frequency (in MHz)
and symbol rate (in kHz).
•
VER LOW NID
. Vertical low band network identity (NID).
•
HOR LOW/LHCP
. Horizontal low band tracking frequency (in
MHz) and symbol rate (in kHz).
•
HOR LOW NID
. Horizontal low band network identity (NID).
•
VER HIGH
. Vertical high band tracking frequency (in MHz) and
symbol rate (in kHz).
32
STV Gen2 installation and operation

