43
Lower Bead Seating
Before performing the mounting procedure, prepare the
machine.
1. Move the Upper Bead Breaker Roller to its highest
position.
2. Pivot the Upper Bead Roller arm out of the way.
3. Move the Lower Bead Breaker Roller to it’s lowest
position.
4. Move the Drop Center Swing Arm out of the way.
.
5. Retract the Tool Head Arm and raise it to it’s highest
position.
6. Check that rim is properly mounted and secure.
Refer to Demounting section Page 33 for review.
1. Place tire on Rim.
2. Lower Hook /Tab Arm till lower bead is below rim.
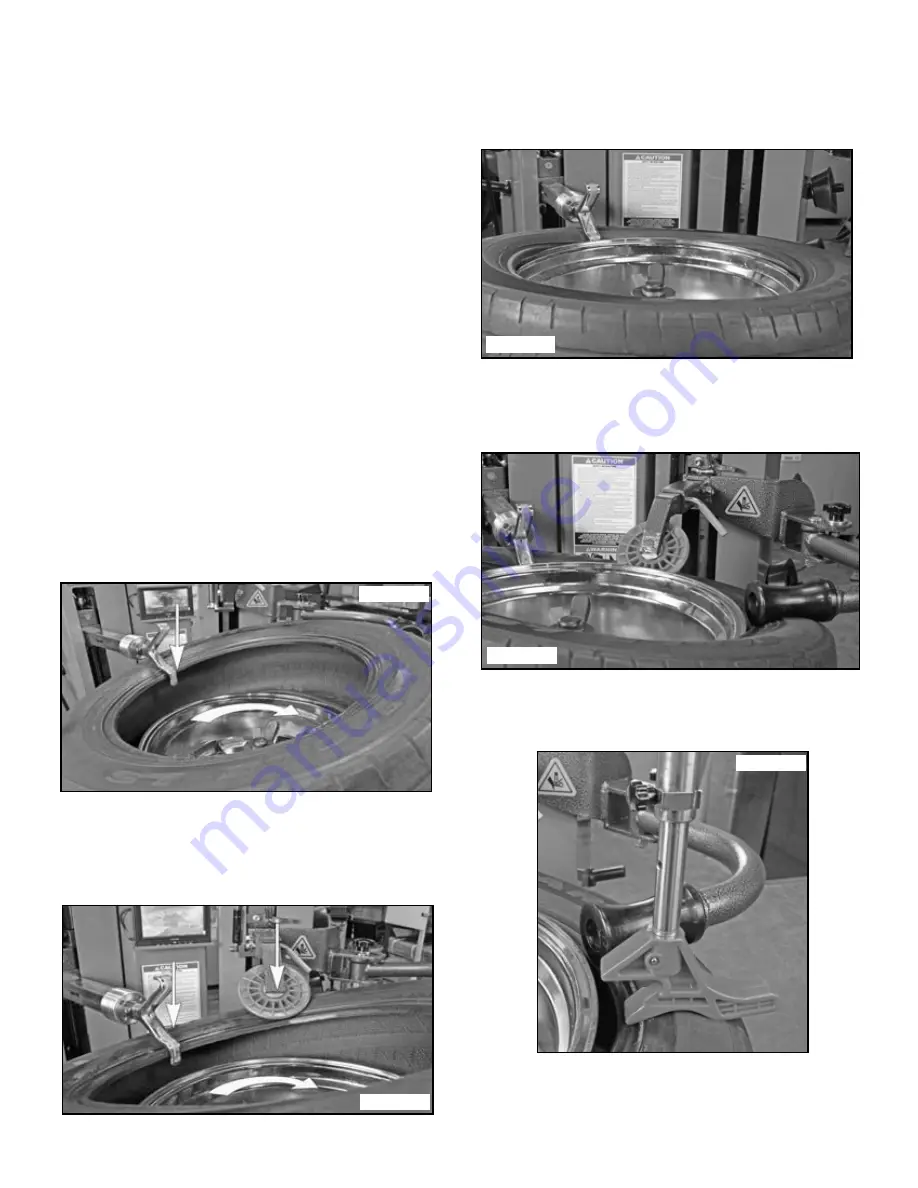
3. Rotate Turntable until Lower Bead drops below top
edge of Rim. (See Fig. 14.4)
4. If necessary, for some stiff sidewall tires, use the
Upper Bead Breaker Roller to help push the down on the
tire, to Push bead below rim lip. (See Fig. 14.5)
Upper Bead Seating
1. Lower the Tool Head with the Tab side down to bring
the upper bead below the upper rim edge. (See Fig. 14.6)
2. Lower The Upper Bead Breaker Roller and if
needed, position the Assist Arm Roller to press the Upper
Bead into the drop center of the Rim. (See Fig. 14.7)
3. Lower the Drop Center Tool with the “mouth” side
facing the rim and contact the tire just ahead of the Assist
Arm Roller. (See Fig. 14.8)
Fig. 14.4
Fig. 14.5
Fig. 14.8
Fig. 14.7
Fig. 14.6
Содержание RX3040
Страница 29: ...29 Fig 9 47 Fig 9 48...
Страница 58: ...58 CRITICAL SAFETY WARNINGS...
Страница 59: ...59 CRITICAL SAFETY WARNINGS...
Страница 61: ...61 Parts Breakdowns...
Страница 62: ...62...
Страница 63: ...63...
Страница 64: ...64...
Страница 65: ...65...
Страница 66: ...66...
Страница 67: ...67...
Страница 68: ...68...
Страница 69: ...69...
Страница 70: ...70 T I R E C H A N G E R X Electric Schematic Diagrams 12...
Страница 71: ...71 T I R E C H A N G E R All electric appliances must be installed by electricians 13...


