background image

13

Rain Bird Golf Rotors Operation and Maintenance Manual 

Aspersores de golf Rain Bird Manual de operación y mantenimiento

Rain Bird Golf Rotors Operation and Maintenance Manual

Aspersores de golf Rain Bird Manual de operación y mantenimiento

REPLACING THE STATOR

IMPORTANT NOTE: Make sure the sprinkler does not 

operate automatically while you are changing the 

stator. On electric models, turn the selector to OFF, as 

shown in “Manual Operation” on pg. 9. For SAM/

hydraulic and block case  models, turn off the water.
Required Tool: Flat-head screwdriver
NOTE: Before replacing the stator, you must remove the 

internal assembly, as shown on pg. 10.
NOTE: The purpose of the stator is to control the flow 

and the rotation speed of the rotor. When changing the 

stator, be sure to adjust to proper Stator and Poppet 

configuration.


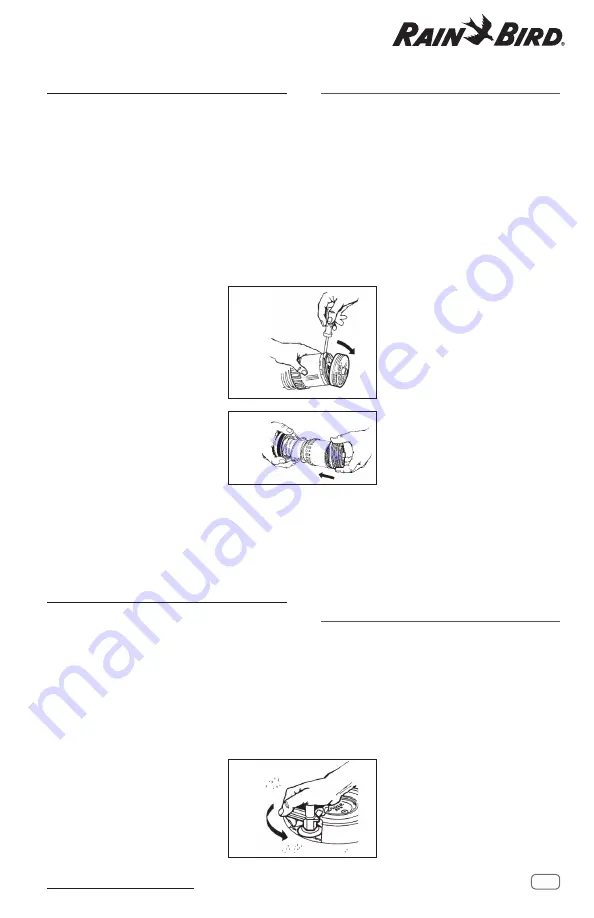
For 552/702/752 and 900/950 Series 

Rotors, use a flat-head screwdriver to 

pry the stator and/or internal screen 

from the internal assembly.


900/950 only, replace with the 

appropriate stator-poppet assembly. 

Snap the new stator/internal screen 

onto the rotor and place the internal 

assembly back in the case. See 

“Installing the Internal Assembly” on 

pg. 11.

NOTE: 

552/702/752 rotors are equipped 

with self-adjusting stators and DO NOT 

require modification when changing nozzles.  

IMPORTANT NOTE:

 DO NOT attempt to use a black colored 

self-adjusting stator/screen assembly on a rotor with a white 

turbine.  Failure to rotate may occur.

REPLACING THE SELECTOR STEM

IMPORTANT NOTE: Electric  and IC Model rotors only 
Turn off the water to the sprinkler before attempting 

to replace the selector stem. Make sure you relieve the 

pressure on the rotor by closing the isolation or main 

valve, then turning the rotor on.
Required Tool: Selector valve key
CLEAR DEBRIS, GRASS, SOIL AND OTHER POSSIBLE 

CONTAMINANTS BEFORE REMOVING SELECTOR CAP


Insert  the hexagonal end of the 

selector valve key into the selector 

cap on top of the rotor. Turn the tool 

counter-clockwise to loosen the 

selector cap. 

SUSTITUCIÓN DEL VÁSTAGO 

DEL SELECTOR

NOTA IMPORTANTE: Solo aspersores de modelos eléctricos e IC 
Cierre el agua del aspersor antes de reemplazar el vástago del 

selector. Asegúrese de aliviar la presión del aspersor cerrando 

la válvula principal o de aislamiento; a continuación, encienda 

el aspersor.
Herramienta necesaria: Llave de válvula de selector
LIMPIE LAS IMPUREZAS, HIERBA, SUCIEDAD Y OTROS POSIBLES 

CONTAMINANTES ANTES DE QUITAR EL CASQUILLO DEL SELECTOR

SUSTITUCIÓN DEL ESTATOR

NOTA IMPORTANTE: Asegúrese de que el aspersor no está en 

modo automático cuando cambie es estator. En los modelos 

eléctricos, gire el selector hasta la posición OFF, como se 

muestra en el manual de instrucciones en pág. 9. En los 

modelos SAM/hidráulicos, cierre el agua.
Herramienta necesaria: Destornillador de cabeza plana
NOTA: Antes de reemplazar el estator, saque el mecanismo 

interno como se muestra en la página pág. 10.
NOTA: La función del estator es controlar la velocidad 

del aspersor. Cuando cambie el estator, asegúrese de 

configurar correctamente el estator y el vástago.


En los aspersores de las series 

552/702/752 y 900/950, use un 

destornillador de punta plana para 

quitar el estator y/o el filtro integrado 

del mecanismo interno.


Solo para la serie 900/950, reemplácelo 

con el ensamble de estator-vástago 

apropiados.  Presione el nuevo estator/

filtro integrado contra el aspersor y 

vuelva a colocar el mecanismo interno 

dentro de la carcasa.  Consulte el 

apartado “Instalación del mecanismo 

interno” en pág. 11.

NOTA: 

Los Aspersores 552/702/752 estan 

equipados con Estator autoajustable y NO 

requieren modificación cuando se cambie la 

boquilla.  


Introduzca el extremo hexagonal de 

la llave de la válvula del selector en 

el casquillo del selector. Gire la llave 

en sentido antihorario para aflojar el 

casquillo del selector. 

NOTA IMPORTANTE:

 NO intente utilizar un ensamble 

de estator autoajustable/pantalla de color negro con una 

turbina blanca. Puede ocurrir una falla en la rotación.

Содержание 552 Series

Страница 1: ...Operations Maintenance Manual Aspersores de golf Rain Bird Manual de operaciones y mantenimiento DesertMountainGolfClub Scottsdale Arizona RainBird 552 702and 752SeriesGolfRotors Aspersoresdegolf Rain...

Страница 2: ...gtheInternalAssembly 11 ReplacingtheNozzle 12 ReplacingtheStator 13 ReplacingtheSelectorStem 13 RemovingtheValveAssembly 15 Removing InstallingtheTopServiceableRock ScreenAndReplaceableValveSeat 15 In...

Страница 3: ...tefl noselladordetuber as Noaprieteelaspersortopeconelacopledel codoarticulado Gireelaspersor devueltaen sentidoantihorariodesdelaposici napretada RainBirdrecomiendanousaracoplesmet licoscon losaspers...

Страница 4: ...del VT900NFor 702 752 552 Part B41710Model VT 700 HERRAMIENTASNECESARIAS PARAELMANTENIMIENTO Paraefectuarelmantenimientodelaseriede aspersoresRainBird necesitar lassiguientes herramientas Destornillad...

Страница 5: ...h Extension A10 25 4cm minimum extensionisrequiredfor 700 500seriescases and 12 30 5cm minimum extensionisrequiredfor900 seriescases Llavedeinstalaci ndelfiltro antigravillaRockScreen ydelasientodev l...

Страница 6: ...AdjustingStator Estatorautoajustable Screen Cedazo LowerDualSnapRings AnillosRetenedoresInferiores ValveAssembly EnsamblajedelaValvula ThreadofTopServiceableRockScreen RoscasdelCedazoconServicio enlaP...

Страница 7: ...CTOR Herramientanecesaria Destornilladordecabezaplana Enaspersoresdec rculocompleto parcialdelaserie552 752y aspersoresdec rculoparcialdelaserie 950 eltopeIZQUIERDOdelsectordel aspersoreseltopefijo Cu...

Страница 8: ...CULO COMPLETO PARCIAL Herramientanecesaria Destornilladordecabezaplana Arc A Sector A Arc A Sector A Arc A Sector A Arc A Sector A Enaspersoresdec rculocompleto parcial delaserie552 752 eltopeIZQUIERD...

Страница 9: ...r TochangeirrigationfromArcAtoArc B TurntheRotorrotationadjustment screwfromitsPARTCIRCLEtoFULL CIRCLEsetting AllowtheRotorto turnuntilthespraydirectionisinthe ArcBrange TurntheRotorrotation adjustmen...

Страница 10: ...ideO ringfor swelling Ifitisswelled orstretched allow ittodryoutorreplaceitwithanewone EXTRACCI NDELMECANISMO INTERNO NOTAIMPORTANTE Aseg resedequeelaspersor noest enmodoautom ticocuandosaqueel mecani...

Страница 11: ...circleinternal assemblyisthesameasthepart circle exceptthatyoudonot needtoadjustthearc INSTALACI NDELMECANISMO INTERNO ASPERSORESDEC RCULOPARCIAL Paraencontrareltopeizquierdo girelatorretadelatoberaha...

Страница 12: ...yfromthe case asshownonpg 10 andfollowthe steps1 6 SUSTITUCI NDELATOBERA NOTAIMPORTANTE Aseg resedequeelaspersornoest enmodoautom ticocuandocambielatobera Enlos modelosel ctricos IC gireelselectorhast...

Страница 13: ...erotor Turnthetool counter clockwisetoloosenthe selectorcap SUSTITUCI NDELV STAGO DELSELECTOR NOTAIMPORTANTE Soloaspersoresdemodelosel ctricoseIC Cierreelaguadelaspersorantesdereemplazarelv stagodel s...

Страница 14: ...erstartsto flowfromthecap WARNING Therotorwilllikelyturnon Afterafewseconds tightenthecapbackon SUSTITUCI NDELV STAGO DELSELECTOR CONT Retireelcasquillodelselectorde lacarcasa Retireelcartuchodelcasqu...

Страница 15: ...kwisetoremovetherock screenandclockwisetoinstalltherock screen ToremoveTSRSinstallationsocket rotatesocketextensionaroundcase interior RETIRADA INSTALACI NDEL FILTROANTIGRAVILLAROCK SCREENYASIENTODEV...

Страница 16: ...thesprinkler manually asshownonp g 9 INSTALACI NDELMECANISMO DELAV LVULA Herramientanecesaria Herramienta deinserci ndelav lvula Parainstalarelmecanismodela v lvula insertelosdosanillosde retenci nenl...

Страница 17: ...ng counterclockwisetoremoveand clockwisetoinstall ForICM ensurethe plungermovesfreelyinsidecoretube andmountingareaisclean REEMPLAZODELDISPOSITIVODE CONTROL GBS25ENSAMBLEDESOLE NOIDEOENSAMBLEDEMODULOI...

Страница 18: ...ingany liabilityfromanyone sinventoryofsuchpartsorproductsthat maybecomeobsolete POL TICADESATISFACCI N DELCLIENTEPROFESIONAL DERAINBIRD RainBirdreparar osustituir sincargoalguno cualquierproductoprof...

Страница 19: ...pedorpinched orblockagein tubes Makesuretubesarenotbentorpinched Check tubesforblockage Cleartubes ifneeded Controldevicenotworking Checksolenoidforproperoperation Replaceif needed 3 Failuretoturnon N...

Страница 20: ...ntinginternal retraction Removeinternalassemblyandwithout disassembling compressthespringdownuntilyou freeuptheendcoil Reseattheendcoilandreinstall theinternalassembly Sandorrockparticlesmayhavewedged...

Страница 21: ...lucionesalproblema6 Presi nbaja Mecanismodelselectorbloqueado oatascado Limpieodesatasqueelv stagooreemplace elmecanismodelselector Tubodoblado pinzadootubosobstruidos Aseg resedequelostubosnoest ndob...

Страница 22: ...Limpieel reaalrededordelacarcasaydel mbolo delselector Juntadelav lvularota faltaTSRS Reemplacelajuntadelav lvulaoelTSRS 5 Da osporcongelaci n Losaspersoreshidr ulicos noseabren Saleagua constantemen...

Страница 23: ...masiadalentitud Presi ndeaguainsuficiente Consultelassolucionesalproblema6 Presi nbaja Combinaci ndeboquillayestator inadecuada Compruebequelasconfiguracionesdelestatory lascombinacionesdetobera estat...

Страница 24: ...Black N R SNP SPR SPR SPR 65 Brown N R SPR SPR SPR SPR 950 18C White SPC SPC SPC SPC SPC 20C Gray SPC SPC SPC SPC SPC 22C Blue SPC SPC SPC SPC SPC 24C Yellow SPC SPC SPO SPO SPO 26 Orange SPO SPO SPO...

Страница 25: ...R N 65 Marr n N R SPR SPR SPR SPR 950 N 18C Blanco SPC SPC SPC SPC SPC N 20C Gris SPC SPC SPC SPC SPC N 22C Azul SPC SPC SPC SPC SPC N 24C Amarillo SPC SPC SPO SPO SPO N 26 Naranja SPO SPO SPO SPO SPO...

Страница 26: ...26 Rain Bird Golf Rotors Operation and Maintenance Manual Aspersores de golf Rain Bird Manual de operaci n y mantenimiento THIS PAGE INTENTIONALLY LEFT BLANK...

Страница 27: ...27 Rain Bird Golf Rotors Operation and Maintenance Manual Aspersores de golf Rain Bird Manual de operaci n y mantenimiento THIS PAGE INTENTIONALLY LEFT BLANK...

Страница 28: ...ird Technical Services 800 RAINBIRD 1 800 724 6247 U S and Canada Rain Bird Corporation 970 West Sierra Madre Avenue Azusa CA 91702 Phone 626 812 3400 Fax 626 812 3411 Specification Hotline 800 458 30...

Отзывы: