Page 15 of 22
IN052 Rev. K 0613
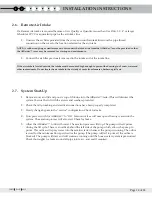
2.8 System Check
1. Run the system through a couple of
cycles to ensure all components are
working properly.
2. The blower operates for the duration
of the fill cycle. The blower should
shut off when the fill cycle ends.
3. If the blower fails to operate, the
alarm buzzer will sound. The alarm
buzzer will also sound if the lower
float fails to operate. The function
of the alarm buzzer can be checked
by removing the blower fuse on the
rear of the blower enclosure while the
blower is running.
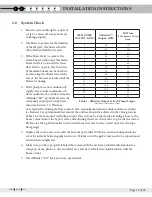
4. If the pump does not continuously
supply water under maximum out-
flow conditions, the outflow from the
AIRaider™ EZ
95
probably exceeds the
well pump output previously deter-
mined in Section 1.2. This may
be remedied by closing the flow control valve, at maximum demand, until continuous output
is obtained. For optimum radon removal the outflow should be adjusted to the value given in
Table 1 for the measured well pump output. This is done by temporarily attaching a hose to the
house connection of the bypass valve and adjusting the flow control valve to provide the correct
fill time for the 5 gallon bucket used to determine flow rate (or the correct flow rate if using a
flow gauge).
5. Replace the cover and secure with the fasteners provided. With the system running check the
cover for air leaks between gasket and cover. If leaks occur the gasket may need to be repositioned
and fasteners retightened.
6. Make sure you have properly labeled the system with the necessary installer information (i.e.
company, name, phone #, date installed, etc.) and have left all system information with the
home owner.
7. The AIRaider™ EZ
95
System is now operational.
WELL PUMP
OUTPUT, GPM
AIRaider™
Output, GPM
Fill Time
(5 Gal Bucket EZ
95
Out)
Secs.
2
1.8
171
3
2.6
114
4
3.5
86
5
4.4
69
6
5.3
57
7
6.1
49
8
7.0*
43
9
7.9
38
10
8.8
34
11
9.6
31
12
10.5
29
13
11.4
26
14
12.3
24
15
13.1
23
16
14.0
21
INSTALLATION INSTRUCTIONS
1
2
Table 1 - AIRaider Output vs. Well Pump Output
*Maximum recommended output


