


© Copyright QVIS ®. All documentation rights reserved.
75
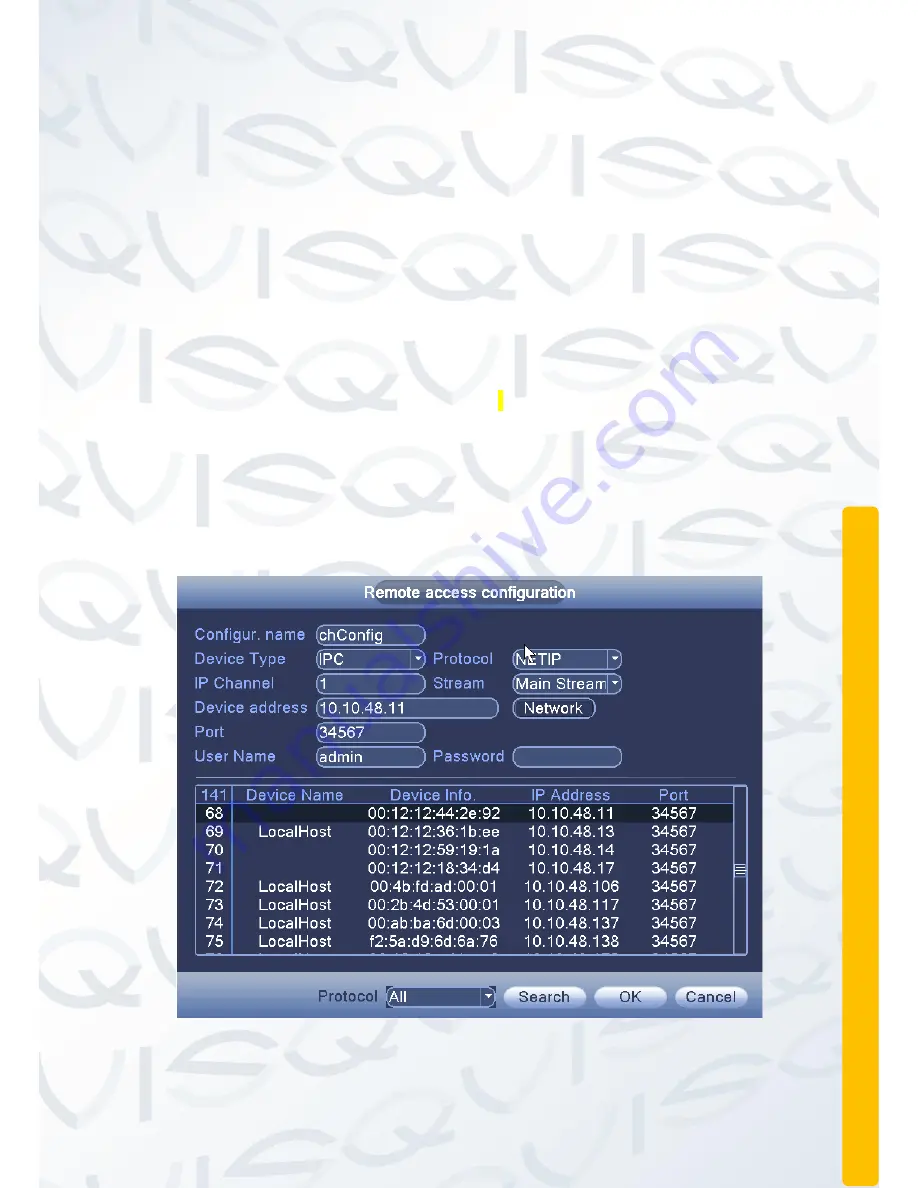
Note:
1.
In Figure 3.45, the protocol search drop-down box found on
the left side, contains three options, NETIP, ONVIF, the whole.
The user can select a protocol type according to specification
of the IP camera.
2.
Click ‘Search’ and the device will search for the online device
with the corresponding protocol.
3.
When the search is complete, any found device will appear as
shown in Figure 3.36. The user can double-click the device IP
address in the list to add the device. At this point in Figure 3.35
device address and port the appropriate changes, and the user
name and password is still the default parameters, the user
must be entered manually.
4.
When you double-click any of the discovered devices, the
network setup window will appear, see Figure 3.37. You can
either auto assign the network details to the IP camera, by
clicking on the ‘Auto assigned’ button, or you can manually
input the details if you already know them. Click ‘OK’ to
confirm and save network details.
Figure 3.36 the device showing the searched and found IP cameras
Содержание PIONEER 3
Страница 1: ...Copyright QVIS All documentation rights reserved i MAIN USER S MANUAL V1 0 04 2016...
Страница 14: ...Copyright QVIS All documentation rights reserved 7 8 Channel NVR...
Страница 15: ...Copyright QVIS All documentation rights reserved 8 16 Channel NVR...
Страница 17: ...Copyright QVIS All documentation rights reserved 10 NVR NVR...
Страница 18: ...Copyright QVIS All documentation rights reserved 11...
Страница 99: ...Copyright QVIS All documentation rights reserved 92 Figure 3 58 LOG...


