


EN
.
22
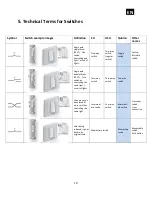
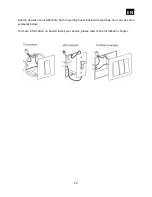
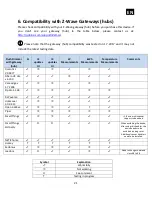
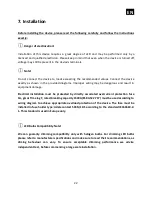
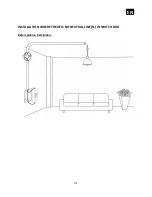
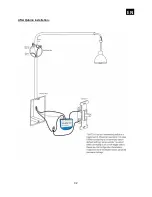
7. Installation
Before installing the device, please read the following carefully and follow the instructions
exactly:
ⓘ
Danger of electrocution!
Installation of this device requires a great degree of skill and may be performed only by a
licensed and qualified electrician. Please keep in mind that even when the device is turned off,
voltage may still be present in the device
’s terminals.
ⓘ
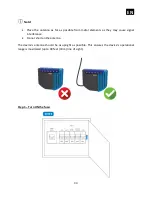
Note!
Do not connect the device to loads exceeding the recommended values. Connect the device
exactly as shown in the provided diagrams. Improper wiring may be dangerous and result in
equipment damage.
Electrical installation must be protected by directly associated overcurrent protection fuse
1A, gG or Time lag T, rated breaking capacity 1500A (ESKA 522.717) must be used according to
wiring diagram to achieve appropriate overload protection of the device
.
The fuse must be
installed in fuse holder type: Adele contact 503Si/1 DS according to the standard IEC60669-2-
1. This standard is used in Europe only.
ⓘ
LED Bulbs Compatibility Note!
We can guaranty dimming compatibility only with halogen bulbs. For dimming LED bulbs
please refer to manufacturer specifications and make sure to read their recommendations, as
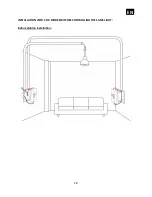
diming behaviour can vary. To ensure acceptable dimming performance we advise
independent test, before commencing a large scale installation.
Содержание ZMNHDD2
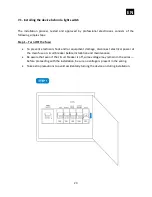
Страница 18: ...EN 18 4 Package Contents Flush Dimmer Device Installation Manual...
Страница 25: ...EN 25 After Qubino installation Wiring with one switch...
Страница 26: ...EN 26 INSTALLATION WITH ON OFF SWITCH AND SCENE SWITCHES...
Страница 27: ...EN 27 INSTALLATION WITH 3 WAY SWITCH...
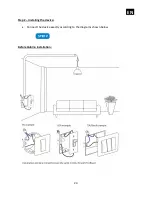
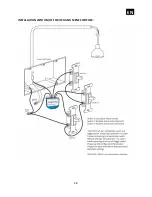
Страница 28: ...EN 28 INSTALLATION WITH 2 OR MORE SWITCHES CONTROLLING THE SAME LIGHT Before Qubino installation...
Страница 29: ...EN 29 2 WAY SWITCH...
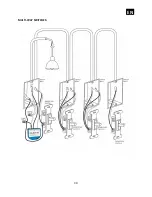
Страница 30: ...EN 30 MULTI WAY SWITCHES...
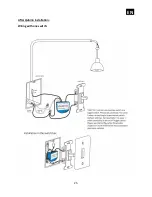
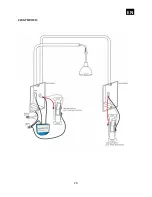
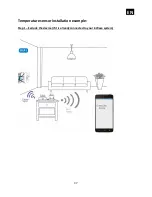
Страница 31: ...EN 31 INSTALLATION WHERE THERE IS NO NEUTRAL LINE N IN SWITCH BOX Before Qubino installation...
Страница 32: ...EN 32 After Qubino installation...
Страница 38: ...EN 38 Step 2 Switch of the power supply Step 3 Connect the temperature sensor as shown below...
Страница 39: ...EN 39 Step 4 Place the temperature sensor in the switch box Step 5 Turn the fuse on...
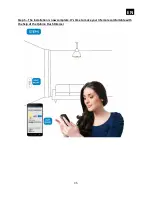
Страница 40: ...EN 40 Step 6 Re include the device to your network...
Страница 41: ...EN 41 Step 7 Start using the temperature sensor in connection with your device...


