Quantum TIER1-AR2, Руководство пользователя
"Quantum TIER1-AR2" - это инновационный продукт, предназначенный для улучшения производительности. Владельцы могут легко ознакомиться с функциями устройства, загрузив Бесплатное Руководство пользователя с {веб-сайта}. Эта инструкция поможет вам максимально эффективно использовать все возможности этого устройства.
Поделиться
Скачать


Отзывы:
Нет отзывов
Похожие инструкции для TIER1-AR2

605
Бренд: lancer Страницы: 36

XWH 150
Бренд: A.O. Smith Страницы: 44

01884
Бренд: CASO DESIGN Страницы: 139

PUBLIC A818019
Бренд: Roca Страницы: 4

N-0751M
Бренд: Noritz Страницы: 26

ENFRIADOR-AGUA
Бренд: DOCRILUC Страницы: 31

del and del
Бренд: A.O. Smith Страницы: 16

IBD 22
Бренд: lancer Страницы: 40

EVERPURE Insurice PF Series
Бренд: Pentair Страницы: 4

FDFD10501
Бренд: kbice Страницы: 19

EIWH electronicVED pro Series
Бренд: Vaillant Страницы: 12

TC 200-1/ZBR
Бренд: Gorenje Tiki Страницы: 120

AVANT 23 A
Бренд: AVANT Страницы: 24

Hydroheat A650YRRTL5
Бренд: Apollo Страницы: 24

DJ 30 E
Бренд: STIEBEL ELTRON Страницы: 6

FRS20ZSGB3
Бренд: Frigidaire Страницы: 21
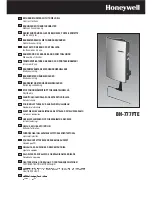
BH-777FTE
Бренд: Honeywell Страницы: 78

WPU-8900C
Бренд: Shopnsave Страницы: 7


