Page 18
October 24, 2011
Castile & Santa Fe CE Pellet Stove
R
7068-112B
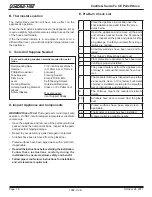
B. Thermostat Location
The thermostat’s location will have some effect on the
appliance’s operation.
When the thermostat is located close to the appliance, it may
require a slightly higher temperature setting to keep the rest
of the house comfortable.
If the thermostat location is in an adjacent room or on a
different floor level, you will notice higher temperatures near
the appliance.
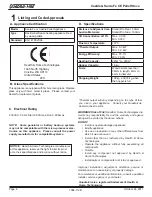
7/16 inch Socket Wrench
(or 10mm 6 pt or 11mm 6
pt socket)
Framing Square
Electric Drill & Bits
Self-Tapping Screws
Outside Air Required
Class L or PL Pellet Vent
May also need:
Vent Support Straps
Reciprocating Saw
Hammer
Phillips Screwdriver
Tape Measure
Plumb Line
Level
Framing Material
Hi-temp Caulking Material
Gloves
Safety Glasses
Tools and building supplies normally required for instal-
lation.
C. Tools And Supplies Needed
D. Inspect Appliance and Components
WARNING! Risk of Fire!
Damaged parts could impair safe
operation. Do NOT install damaged, incomplete or substitute
components.
• Open the appliance and remove all the parts and articles
packed inside the Component Pack. Inspect all the parts
and glass for shipping damage.
• Report to your dealer any parts damaged in shipment.
• All labels have been removed from the glass door.
• Plated surfaces have been wiped clean with a soft cloth,
if applicable.
• Read all the instructions before starting the installation.
Follow these instructions carefully during the
installation to ensure maximum safety and benefit.
• Follow pipe manufacturer instructions for installation
and air clearance requirments.
E. Pre-Burn Check List
1.
Place the appliance in a location near the
final installation area and follow the proce
-
dures below:
2.
Open the appliance and remove all the parts
and articles packed inside the Component
Pack. Inspect all the parts and glass for ship
-
ping damage. Contact your dealer if any irregu
-
larities are noticed.
3.
All safety warnings have been read and fol
-
lowed.
4.
This Owner’s Manual has been read.
5.
Floor protection requirements have been met.
6.
Venting is properly installed.
7.
The proper clearances from the appliance and
chimney to combustible materials have been
met.
8.
The masonry chimney is inspected by a profes
-
sional and is clean, or the factory built metal
chimney is installed according to the manufac
-
turer’s instructions and clearances.
9.
The chimney meets the required minimum
height.
10.
All labels have been removed from the glass
door.
11.
Plated surfaces have been wiped clean, if
applicable.
12.
Thermostat or remote has been installed.
13.
A power outlet is available nearby.

