205
3. Enter the host name and specify the folder (under Web or Qweb) where the web
files will be uploaded to.
4. Specify the protocol (HTTP or HTTPS) for connection. If you select HTTPS, make
sure the option "Enable Secure Connection (SSL)" in Web Server has been enabled.
5. Specify the port number for connection.
6. Click "Apply".
7. Continue to enter the information for the rest of the sites you want to host on the
NAS.
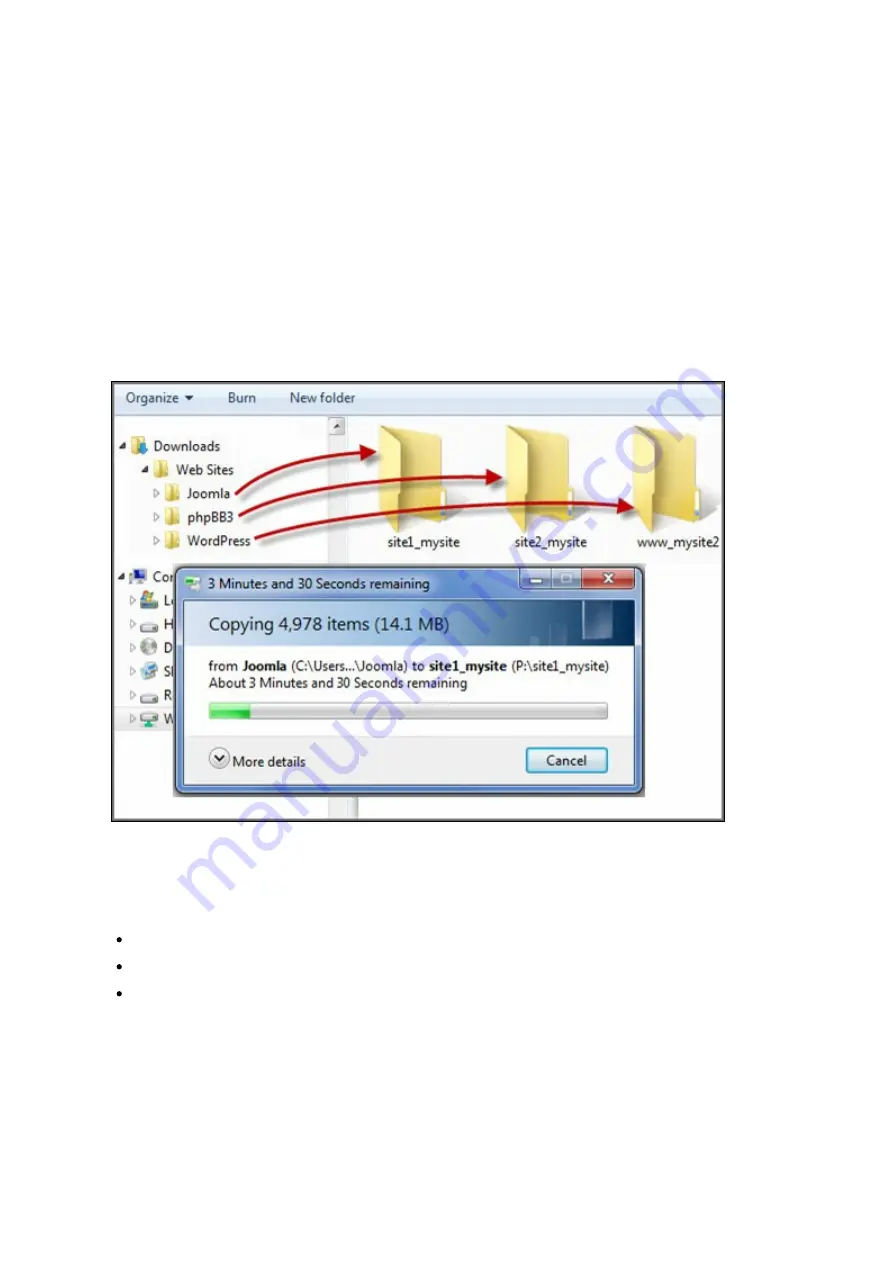
8. Create a folder for each website (site1_mysite, site2_mysite, and www_mysite2)
and start transferring the website files to the corresponding folders.
Once the files transfer is complete, point your web browser to the websites by http://
NAS_host_name or https://NAS_host_name according to your settings. In this example,
the URLs are:
http://site1.mysite.com
http://site2.mysite.com
http://www.mysite2.com
Using the above example, you would see the Joomla!, phpBB3, and WordPress sites
respectively.
Содержание TS-110
Страница 18: ...18 1 1 The NAS is turned off by force shutdown hardware shutdown 2 The NAS has been turned on and is ready...
Страница 157: ...157 o AFP o FTP o File Station...
Страница 326: ...326...
Страница 354: ...354 Vol1 Unmounted The disk volume 1 is unmounted Vol1 Nonactivate The disk volume 1 is inactive...
Страница 369: ...369...


