


Installation
Bringing Up the System For the First Time
1-52
D000140-001
B
S
• If the IP addresses are not unique, collisions will occur, causing IP operations to
fail.
To update the IP address on a management module, do the following:
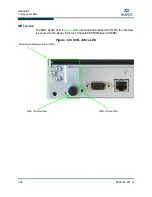
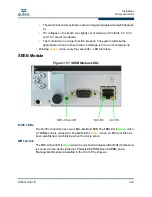
1. Ensure that the module is connected to a COM port on a serial terminal device
via the RS-232 port (12200/12300) or DB-9 port (12800 series).
2. Get to a
[boot]:
prompt by following Step a or b.
a. If the management module is running and displays the
->
prompt, enter the
following command at the console:
reboot now
Then press
Enter
.
b. If the module is not running, power on the switch.
3. When the system displays
image1
or
image2
, press the
Spacebar
to interrupt
the auto load sequence before the counter expires (within 5 seconds).
4. At the
[boot]:
prompt type the following:
moduleip <NEW IP ADDRESS>
Then press
Enter
.
NOTE:
For versions previous to 5.0.2, use the command
spineip
.
NOTE:
This command changes the IP address for
image1
and
image2
on each
module.
5. At the
[boot]:
prompt enter
reboot
, and press
Enter
. Upon reboot the IP
address is changed. Repeat for the second Management Module.
Enabling 8X Ports
Users can enable 8X (10 Gbps) ports by combining two (2) 4X ports together (also
known as a “DUO”). The first port in a DUO is known as the master port; the second
port is the partner or slave port.
The following CLI commands can enable 8x ports:
ismPortSetWidth
: sets the supported link width for an individual IB port.
ismChassisSetWidth
: sets the supported link width for all chassis IB
ports.
ismIslSetWidth
: sets the supported link width for all interswitch link (ISL)
IB ports. This command is only available 12800-series switches.
NOTE:
This section focuses on enabling 8x external cable ports. For details on
Содержание QLogic 12000 Series
Страница 1: ...D000140 001 B QLogic 12000 Hardware Installation Guide...
Страница 42: ...Installation 12800 360 Installation 1 34 D000140 001 B S Figure 1 27 12800 360 Front and Rear Cabling...
Страница 53: ...Installation 12800 360 Installation D000140 001 B 1 45 A Figure 1 37 Fasten the Chassis to the Back of the Rack...
Страница 92: ...QLogic 12000 Series Product Specifications 12800 Series A 8 D000140 001 B S Notes...
Страница 97: ...Safety and Regulatory Compliance Information Safety Information D000140 001 B 5 A 2...
Страница 108: ...Safety and Regulatory Compliance Information Safety Information B 16 D000140 001 S 7 QLogic 12000 MPFD EMI...
Страница 109: ...Safety and Regulatory Compliance Information Safety Information D000140 001 B 17 A...
Страница 110: ...Safety and Regulatory Compliance Information Safety Information B 18 D000140 001 S Notes...
Страница 113: ...Serial Port Pinouts D000140 001 B C 3 A...
Страница 114: ...Serial Port Pinouts C 4 D000140 001 B S Notes...
Страница 125: ......


