


www.pulsar.pl
INTRW
8
In order to facilitate the further use of the devices online, change the IP address assignment from
automatic into manual. To make such adjustments, click the right button of the mouse on the line with selected
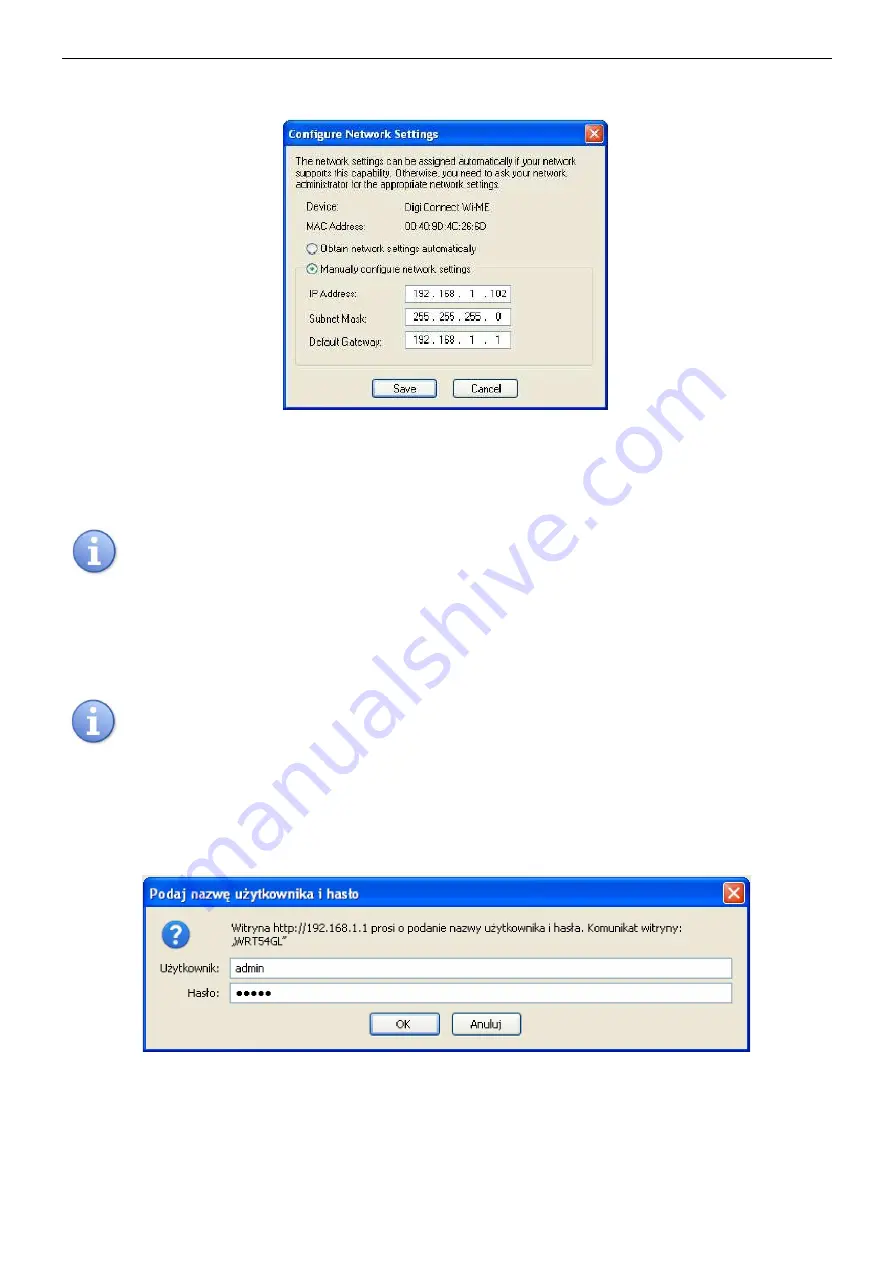
interface and choose: ‘Configure network settings’.
Fig. 6. The window of network settings.
Select the option: ‘Manually configure network settings’ in the window of network settings. From now on,
the automatically assigned IP address will maintain the same on each connection. The automatically assigned IP
connection may be left unchanged or be altered. If altered, be sure that the new address is not already taken and
will not cause conflicts.
Before setting the network address, make certain that none of the devices working in the network is
using it and no address conflict is caused due to that fact.
.
Click the ‘Save’ button to approve the changes. The ‘Digi Device Discovery’ application will display a
message about a required interface restart which shall be approved by clicking the ‘OK’ button. Next, the window of
device’s resetting progress will appear.
4.5 STEP 3 – Assigning the SSID identifier for Wi-Fi network.
In this manual, the configuration of the Wi-Fi interfaces has been based on a wireless 'LinkSys
WRT54GL’ Wi-Fi router.
To make certain that the RS485-WiFi interface will be connected only to an appointed router, enter the
network identifier. To do that, log into the interface’s router configuration as follows: open the window of a web
browser, type 192.168.1.1 in the address field (router’s default address after a reset) and approve with the ‘ENTER’
button. The page will load and the following window will appear:
Fig. 7. The login window of the Wi-Fi router.
To have access to the router’s configuration, type:
Username:
admin
Password:
admin
Approve your entries with the ‘Login’ button. In no time, the window that enables adjustments will appear.


