


Calibration modes
Please see section 8
“Operation”
for details.
Press and hold down the
“MODE”
(12)
button for two seconds to enter the
menu.
Press briefly navigation buttons -
“LEFT” (10)
and
“RIGHT” (11)
to select
icon
Select brightness level (1 to 10) with navigation buttons.
To exit the main menu, hold down the
“MODE”
button for two seconds or wait
10 seconds to exit automatically.
Press and hold down the
“MODE” (12)
button for two seconds to enter the
menu.
Press briefly navigation buttons -
“LEFT” (10)
and
“RIGHT” (11)
to select
icon . Press
“MODE”
.
Select time format
“24”
or
“AM/PM”
with navigation buttons.
Press
“MODE”
to proceed to hour setup. Set with navigation buttons.
Press
“MODE”
again to proceed to minute setup. Set with navigation buttons.
To exit the main menu, hold down the
“MODE”
button for two seconds or wait
10 seconds to exit automatically.
Remote control activation
The wireless remote control duplicates activation of unit, color inversion and
image calibration.
It has three buttons:
When operating the thermal imager, there is a possibility of defective (dead)
pixels (bright or dark dots with constant brightness) appearing on the
detector which are visible on the image.
Thermal unit
CORE
allows you to repair defective pixels on the detector
(microbolometer) using a software-based method.
Press and hold down the
“MODE” (12)
button for two seconds to enter the
menu.
Press briefly navigation buttons -
“LEFT” (10)
and
“RIGHT” (11)
to select
icon , press
“MODE”
.
Select icon in the pop-up submenu and press
“MODE”
.
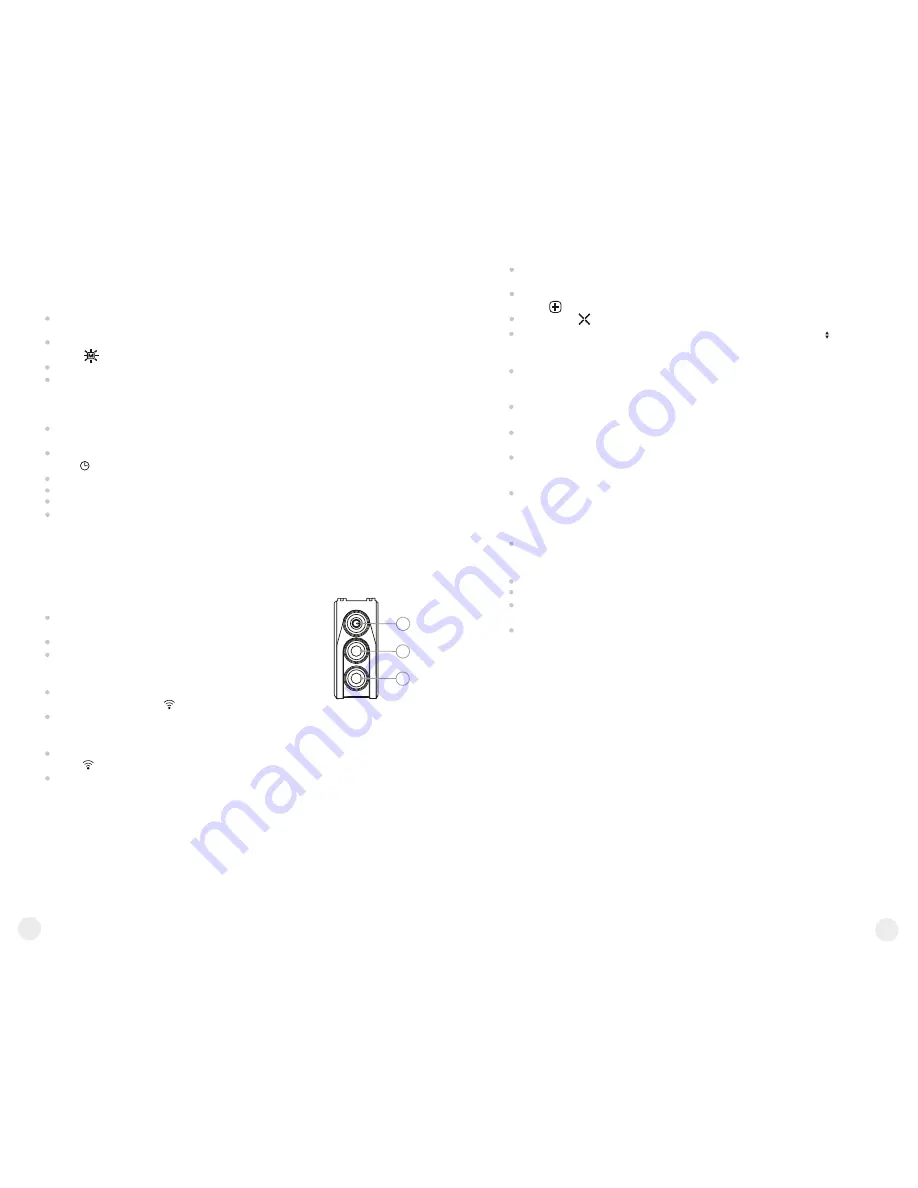
The remote control
has three buttons:
Button
“ON” (22)
– turning on/off the unit
(on – brief
press/off – long press (2 sec)).
Button
(23)
- color inversion
Button
“CAL” (24)
–
image
calibration
To start using the wireless remote control you will need
to activate it:
Turn on the scope and select menu option
“RC activation”
(icon ).
Press
“MODE” (12)
button, message
“WAIT”
will appear and countdown
will start within which you need to press and hold for two seconds any RC
button.
If the activation is successful, message
“Complete”
will appear next to
icon . The RC is ready for use.
If the RC does not work, replace the battery. To do this, unscrew the screws
on the rear panel of the RC, remove the cover, pull out the old battery and
insert a new CR2032 battery.
24
23
22
If you wish to return to the default defective pixel pattern (i.e. restore all
defective pixels previously repaired), select icon in the pop-up submenu
and press the
“MODE”
button.
Options
“Yes”
and
“No”
appear on the right of the
“MODE”
button.
Use navigation buttons to select
“Yes”
and press the
“MODE”
button.
If you choose not to return to default pixel pattern, select “No” and press
“MODE”
button.
To exit the main menu, press and hold down the
“MODE”
button for two
seconds or wait 10 seconds to exit automatically.
Attention! One or two pixels in the form of bright white or black 1-2
pixels dots are allowed on the display of thermal imager. These pixels
cannot be repaired and are not a defect.
A red cross appears in the centre of display, coordinates (X; Y) of the
cross relative to the centre of display appear in the place of pop-up icons,
icons disappear.
Use navigation buttons to align the center of the cross with a defective
pixel (defective pixel should go out). Switch direction of the cross from
horizontal to vertical by a short press of the
“MODE”
button.
After the centre of the cross is aligned with a defective pixel, press the
“ON/OFF” (9)
button to repair the pixel.
In case of success a short
“OK”
message appears
next to
the
coordinates.
Further on, move the cross to repair another defective pixel. When moving
the cross to the coordinates area, the latter goes to the lower right portion
of the display.
To exit menu option
“Defective pixel repair”
, press and hold button
“MODE”
for two seconds.
Return to default defective pixel pattern
X=50
Y=50
12
13
Brightness setting of menu icons
Clock setup
Defective pixel repair


