background image


28 

Route Map 
 

By tapping ‘Route Map’ an overview map appears showing your route, indicating the start and end points. This map can be zoomed in/out 

and panned around.  

 
Stop Navigating


This stops the Drive Mode and returns the user to the main menu. 


Volume 
 

Tap the 

‘Volume’ button if you wish to change the volume. Use the “+” and “-“ buttons to adjust the volume to your desired level.  Please Note: 

Even with ‘Mute’ selected, the safety camera warning will still make a notification sound. 


Night/Day Colours 
 

This changes the background colour of the map screen for better visibility at night. It also reduces glare. 


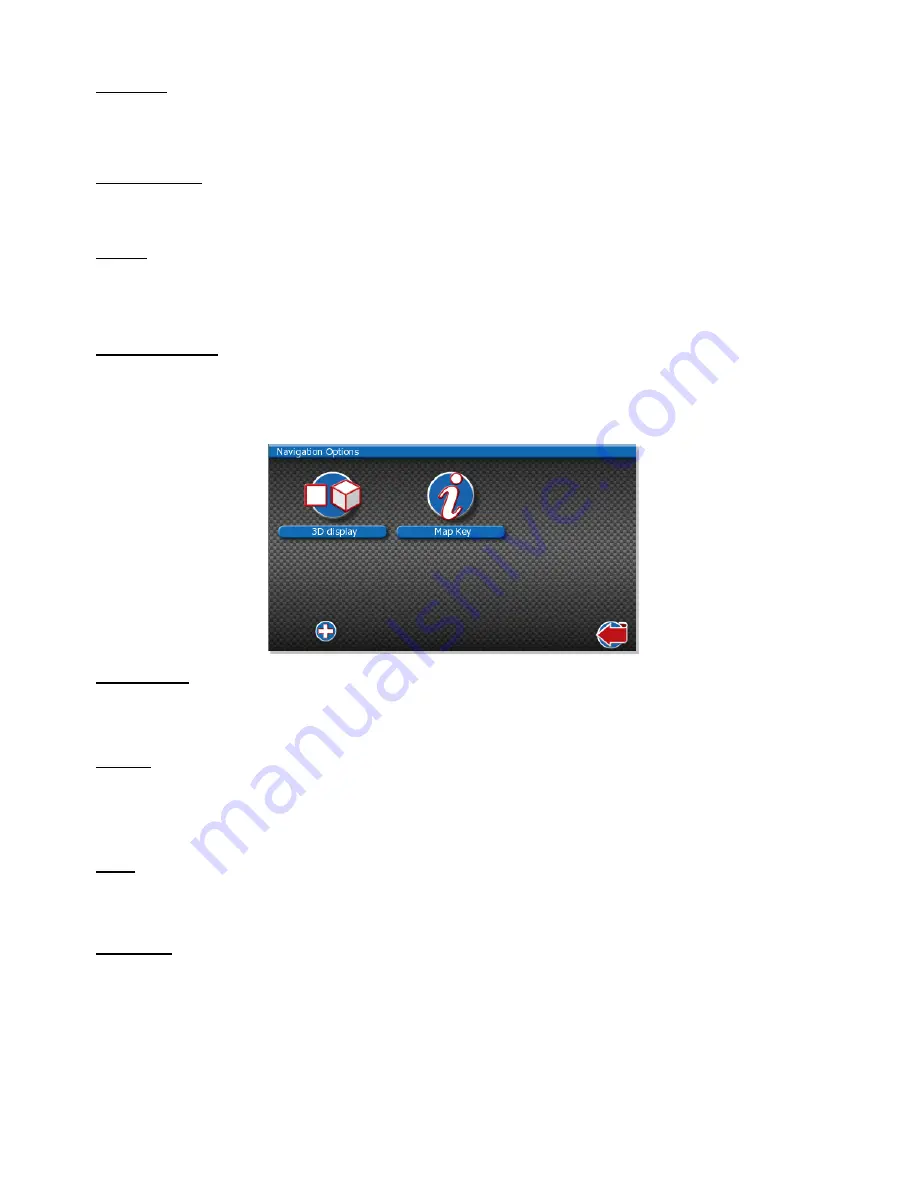
Additional options can be accessed using 

“+” button. 


2D/3D Display 


You can select the map view to display in either 2D or 3D map mode. Tap on the display button to change.


Map key 

The map key will provide you with detailed information about the icons used for restrictions, warnings and parking. Tap the back arrow button 

to return to the Drive Options screen. 

Setup


Tapping the '

Setup

' button takes you to the Setup main menu which has a number of options. 


Route Type 
 

Select required type of routing: 

Fastest Route 

(Not advisable for use with HGV’s) 

Tapping this box provides the fastest route  

Prefer Main Roads 

Tapping this box provides a route which prefers use of motorways and main roads.  

Avoid Highway 

Содержание PNN350

Страница 1: ...Navigation Software Models ProNav PNN350 PNN400 PNN350 WE PNN420...

Страница 2: ...igation Path settings 12 Default settings 12 GPS Information 12 Using the GPRS 13 Restrictions icons 19 Launching your ProNav software 20 Entering your vehicle details 21 Navigation options 21 Navigat...

Страница 3: ...drive screen and options before starting your journey For safety reasons DO NOT interact with your device until you have reached your destination or you have pulled over and it is safe to do so All r...

Страница 4: ...irect sun light Do not pierce or break the battery casing Failure to follow these cautions will invalidate the warranty and may cause the battery to leak acid become hot explode or ignite and cause in...

Страница 5: ...5 What s in the box 1 ProNav Personal Navigation Device PND 2 Windscreen Mount 3 In Vehicle Charger 4 Back Plate 5 USB Cable 6 Support Card...

Страница 6: ...6 Hardware Overview 1 Power Button 2 Headphone Jack 3 SD MMC Card Slot 4 AV IN 5 Mini USB Power Port 6 LCD Touch Screen 7 Sim Card Slot 8 Stylus 9 Reset Installing the ProNav into your vehicle...

Страница 7: ...Fig 2 Fig 3 Next connect the windscreen mount to the glass in your vehicle Flick the lever and it will then be secured shown in fig 4 Attach the ProNav bottom first using the mounting guides and clip...

Страница 8: ...If you do not press it the ProNav will turn itself off automatically after 5 seconds To put your ProNav in sleep mode press the Sleep button When using the Power off Mode as opposed to Sleep the batte...

Страница 9: ...ansmitter Turn FM on off function Set the received frequency System info Show the system version and serial number etc Language Select the language for the system Navigation path Set navigation path D...

Страница 10: ...reen The calibration setting allows you to change the alignment of the touch screen It will move in a sequence off the centre use your stylus and press in the centre of the cross hair You need to pres...

Страница 11: ...mplifier system of the radio System information The system information includes the firmware version APP version and the system ID Language Setting Simply single click your favourite language and then...

Страница 12: ...will cause the ProNav software to stop functioning Default set This setting will change all of your preferred settings back to how they originally were i e Volume and backlight GPS Info The GPS info w...

Страница 13: ...der with the cut off corner of SIM positioned in the bottom right hand corner When the SIM is locked into place you will hear a small click sound To release the SIM gently push it in and it will then...

Страница 14: ...e user will be presented with the screen shown below Back Back to message list interface Keyboard Click to pop up or hide the keyboard Send Send the current edited text Linkman Select a contact number...

Страница 15: ...l Click Call Phonebook Click the phonebook icon Digital display Shows current phone number Keypad Is made up of 10 numbers from 0 to 9 and Contacts can be called by selecting them from the phonebook o...

Страница 16: ...up Single click to hang up Phone Book The feature allows the user to add contact information The contacts can then be accessed through the Phone Dial feature and will be listed To add a contact press...

Страница 17: ...ime provider are different A network can also have different access points for business Pay As You Go accounts etc Configuring an APN To access the APN Information tap the GPRS button under the GPRS m...

Страница 18: ...NT If a GPRS network is detected as available the system should automatically connect to it however if the network has a poor signal strength then GPRS might not connect and you may have to wait until...

Страница 19: ...appropriate route for your vehicle to take ProNav allows you to save unlimited truck profiles so if you have a fleet of trucks you do not need to keep entering all the vehicle details each time you mo...

Страница 20: ...e disclaimer and tap the Accept button You will then be presented with the main navigation screen as shown in the image below Select the Vehicle Details button and enter all of the attributes of your...

Страница 21: ...to the navigation menu Navigation Options Drive To Tapping the Drive To button takes you to the Select Place menu This allows you to set your end point destination When an end point has been selected...

Страница 22: ...choice On the navigation menu select the Drive To option You will then be presented with the Select Place page this is where you choose your preferred navigation method Navigating using a Post Code I...

Страница 23: ...at the top tap it to continue Once London appears in the top box tap it You will then be given the option to navigate to POI s within London or to navigate to the town centre To navigate to a street n...

Страница 24: ...a full list of POI s that you can travel to In this example we will be navigating to the A40 North Bound Service Station From the POI list select the Rest Area button Then begin to type the name of th...

Страница 25: ...the navigation menu Favourites and Recent Your ProNav will save all locations you have previously entered and automatically add them into the Recent list If you wish to navigate to a destination you...

Страница 26: ...n the second box on the Plan Route next to the chequered flag On the far right of the box where the post code is displayed you will notice a Star Icon This is used to add the location to the favourite...

Страница 27: ...o view the Navigation Options on this page press the Stop Navigating button and the ProNav will exit the drive screen Drive Options Point of Interest POI Tapping this button will allow you to find a P...

Страница 28: ...better visibility at night It also reduces glare Additional options can be accessed using button 2D 3D Display You can select the map view to display in either 2D or 3D map mode Tap on the display but...

Страница 29: ...Keyboard Select whether you prefer an alphabetic or QWERTY keyboard Voice Select from the available voices by tapping the box next to your selection Volume Use the and buttons to adjust the volume to...

Страница 30: ...l display information on the software version Colour Scheme There are five colour schemes for you to choose from Just tap the button and choose from the list to enable the colour scheme you require Th...

Страница 31: ...era at a speed above the known speed of the camera a sharper ping warning will sound for a preset number of seconds up to and through the camera zone along with the visual warning shown above The warn...

Страница 32: ...o ON this will warn you about safety cameras on your side of the road only When set to OFF the safety camera software will warn you about cameras on both sides of the road Show on Map When this is ena...

Страница 33: ...ProNav will automatically connect to your computer and you will be presented with the image shown below Once you have finished installing any necessary updates please be sure to safely remove your Pro...

Страница 34: ...nav co uk support html Support To view a list of FAQ s Frequently Asked Questions please also visit http www pronav co uk support html If you believe your device is faulty or you simply require any as...

Страница 35: ...the FM button under the Settings menu accessed from the main screen of the device If you are not receiving voice commands when driving please ensure that the speaker icon is not muted this is located...

Страница 36: ...e main menu and then tap the Safety Cameras button Ensure that the safety cameras are enabled and Show on Map needs to be selected and warning sounds need to be switched to On To check that your licen...

Отзывы: