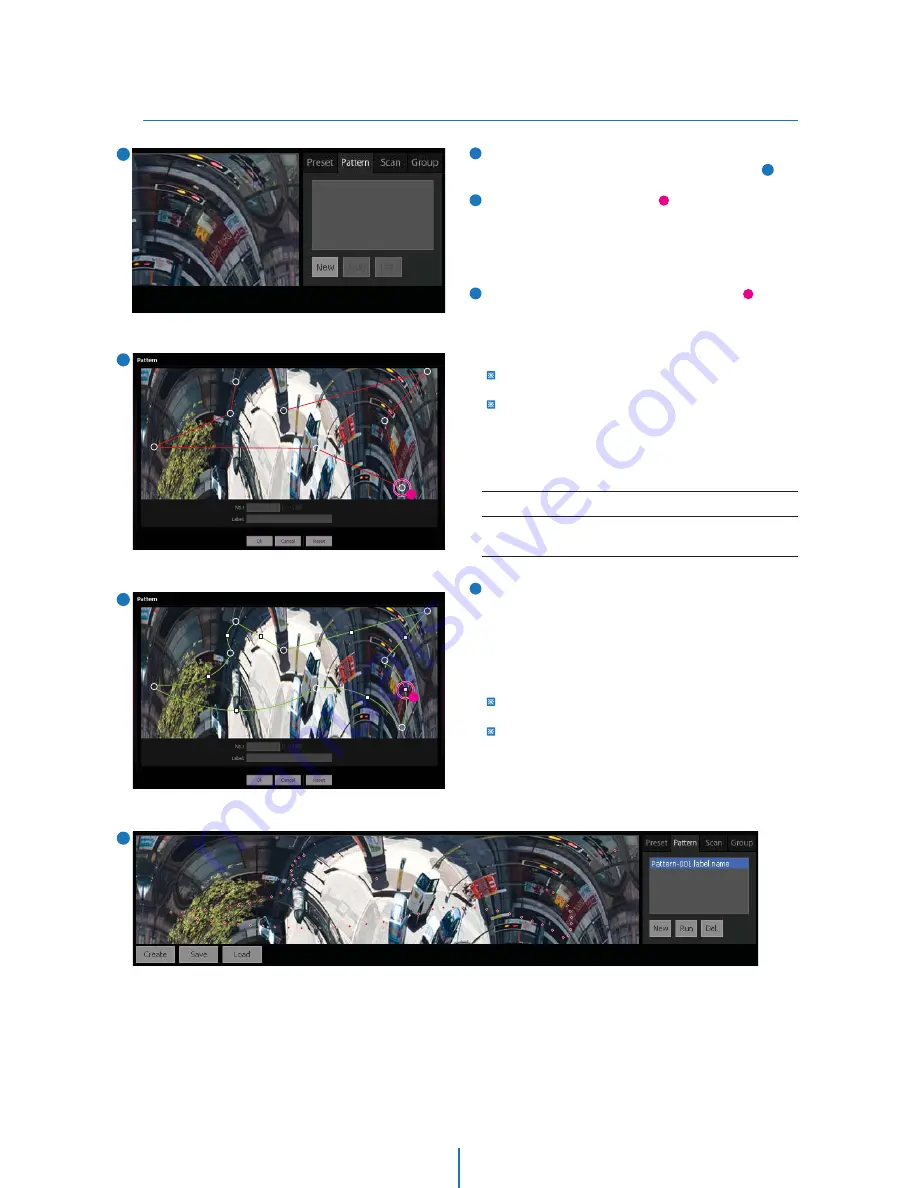
Auto-map > Pattern
Web Viewer Screen -
4
If you click the ‘New’ button, the Pattern Edit Window will
display expanded auto map as shown in the picture( ).
By clicking the desired positions( ) on the map repeatedly,
you can draw a polygon similar to the trajectory of pattern
desired. To close the polygon, please, click the starting point.
It is adviced that even 5~10 points is sufficient to make general
pattern since you can adjust the path in curve editing stage.
The polygon finished is consist of several nodes( ) and
segments. If you drag a node inward or outward, the line
segment can be changed to Curved segments. You can
change the zoom ratio and pan tilt speed for each segments
of trajectory.
To change zoom ratio, right click node and type zoom ratio
desired.
To change the pan tilt speed, right click the grey square on the
segment and select appropriate speed.
If you think the pattern is finished, type the pattern number
and its label. Click the ‘Ok’ button to save this pattern in the
camera.
If you select a pattern in the Pattern List, a series of dots
representing the pattern is displayed. After you select a
Pattern in the list, if you click the ‘Run’ button, the camera
will follow the trajectory of the pattern. The pattern will be
continued repeatedly untill there is the other actions by
operator. After you select a Pattern in the list, if you click the
‘Del’ button, the selected will be erased.
If trajectory is crossing or neighboring nodes are too close,
motion will not work properly.
You can simply double click a pattern in the list to move to the
corresponding pattern.
1
2
3
4
4
1
2
3
2
a
a
b
b
PATTERN No.
Label
Max. 9 alphabets/numbers are allowed(Including space).
1 ~ 128


