PreSonus 1Box
™
16
Recording Made Easy with AudioBox
™
and Studio One
™
Artist
17
Getting Ready to Record
D
D
Installing Extras
2
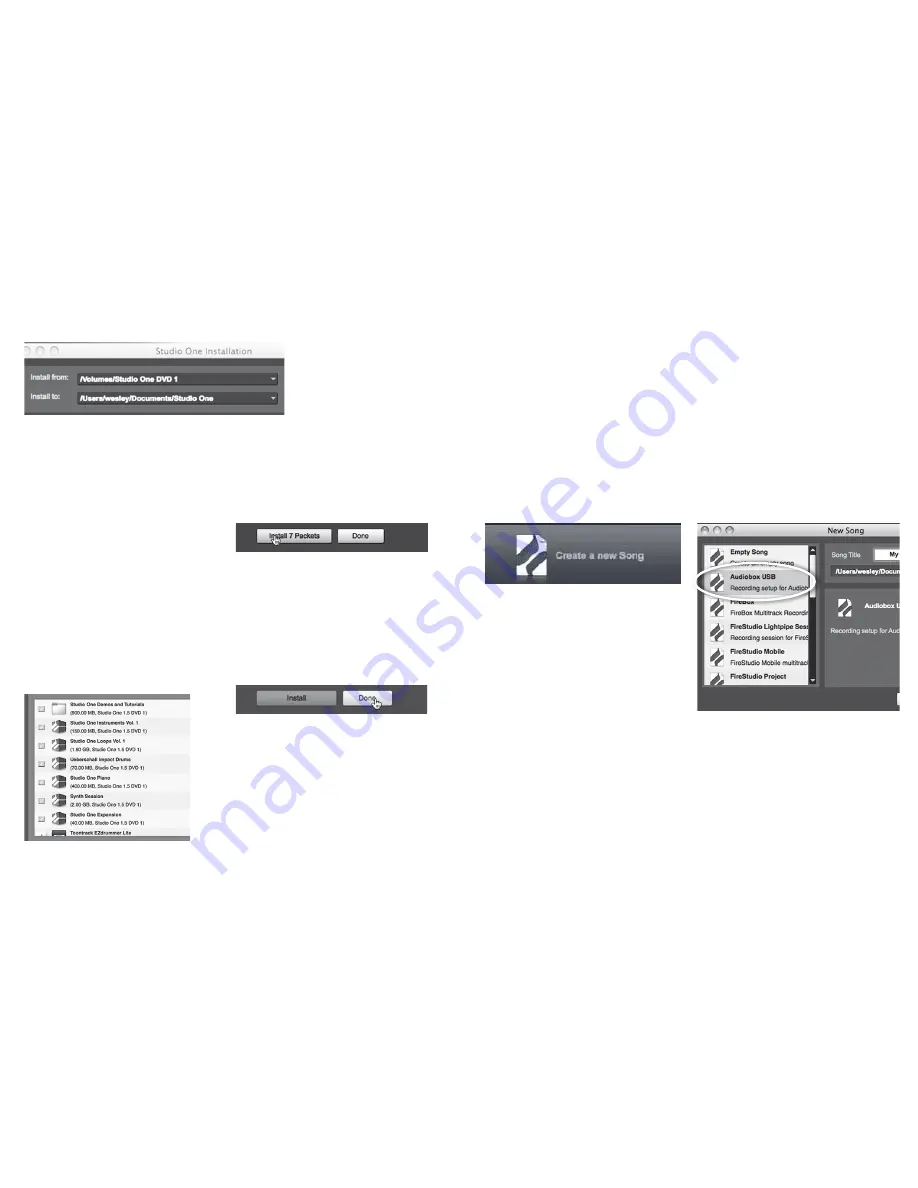
At the top of the installation menu, select the source
from which the content will be installed, as well as the
location where you wish to install the content. The
source of the content will be the same DVD from which
you installed Studio One Artist. By default, Studio One
Artist will point to your DVD drive as the content source.
En la parte superior del menú de instalación, seleccio-
ne la fuente desde la que se instalará el contenido, así
como la ubicación en donde quiere instalar dicho conte-
nido. La fuente del contenido será el mismo DVD desde
el que instaló Studio One Artist. Por defecto, Studio One
Artist apuntará a su unidad de DVD como fuente del
contenido.
En haut du menu d'installation, sélectionnez la source
à partir de laquelle le contenu sera installé, ainsi que
l'emplacement où vous voulez l'installer. La source de
contenu sera le même DVD que celui avec lequel vous
avez installé Studio One Artist. Par défaut, Studio One
Artist pointera vers votre lecteur de DVD comme source
de contenu.
Wählen Sie im oberen Teil des Installationsmenüs die
Quelle, von der die Inhalte installiert werden sollen,
sowie den Ort, an dem die Installation erfolgen soll. Die
Quelle ist die DVD, die Sie auch für die Installation von
Studio One Artist verwendet haben. Von Studio One
Artist wird standardmäßig Ihr DVD-Laufwerk als Quelle
angegeben.
3
Listed in the installation menu are
separate entries for each available
item. Click in the checkbox next to
each item you wish to install.
En el menú de instalación aparece
un listado con distintas entradas
para cada artículo disponible. Mar-
que la casilla de verificación junto a
cada artículo que desee instalar.
Des rubriques séparées sont listées dans le menu d'ins-
tallation pour chaque élément disponible. Cochez la
case située en face de chaque élément que vous désirez
installer.
Im Installationsmenü sind separate Einträge für jedes
verfügbare Element aufgelistet. Klicken Sie in das Käst-
chen neben den Elementen, die Sie installieren möch-
ten.
4
Click on the "
Install Packets
" button at the bottom left
of the menu to install the selected content.
Pulse en el botón “
Install Packets
” en la parte inferior
izquierda del menú para instalar el contenido seleccio-
nado.
Cliquez sur le bouton
Install Packets
(installer paquets)
en bas à gauche du menu pour installer le contenu
sélectionné.
Klicken Sie auf „
Install Packets
“ (Pakete installieren) am
linken unteren Rand des Menüs, um den ausgewählten
Inhalt zu installieren.
5
When finished installing content, click on the "
Done
"
button to exit the menu.
Cuando termine de instalar el contenido, pulse sobre el
botón “
Done
” para salir del menú.
Une fois le contenu installé, cliquez sur le bouton
Done
(terminé) pour quitter le menu.
Nach der Installation des Inhalts klicken Sie auf „
Done
“
(Fertig), um das Menü zu schließen..
Getting Ready
to Record, Part
2: AudioBox,
Studio One
Artist, and Your
Computer Meet
and Greet
Let’s create a new Song and
get ready to record.
Preparándose
para grabar,
2ª Parte —
AudioBox,
Studio One
Artist y su
ordenador
se conocen y
saludan.
Vamos a crear una nueva can-
ción (new Song) y a preparar-
nos para grabar.
Préparation à
l'enregistre-
ment, Partie
2 — AudioBox,
Studio One
Artist et votre
ordinateur font
connaissance.
Créons un nouveau morceau
(Song) et préparons-nous à
l'enregistrement.
Bereit zum Auf-
nehmen, Teil
2 — AudioBox,
Studio One
Artist und Ihr
Computer neh-
men Kontakt
miteinander
auf
Beginnen wir gleich mit dem
Aufnehmen eines neuen
Songs.
1
From the Start page, select “
Create a new Song
.”
Desde la página “Start” (Inicio) seleccione “
Create a new
Song
.”
Dans la page de démarrage, sélectionnez “
Create a new
Song
” (créer un nouveau morceau).”
Wählen Sie auf der Startseite die Option „
Create a new
Song
“ (Neuer Song).
2
To begin a new Song, select “
AudioBox USB
” from the
Templates list.
Para iniciar una nueva canción, seleccione “
AudioBox
USB
” desde la lista de plantillas (“Templates”).
Pour commencer un nouveau morceau, sélectionnez
“
AudioBox USB
” dans la liste des modèles (Templates).
Dann wählen Sie zunächst aus der Liste mit den Vorla-
gen „
AudioBox USB
“.


