


page 34
C
O
M
M
E
R
C
I
A
L
P
R
O
D
U
C
T
S
D
I
V
I
S
I
O
N
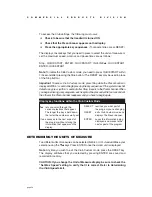
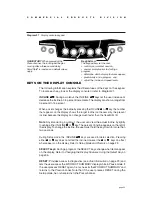
QUICKSTART:
This key lets the user bypass the Setup prompts and start
working out immediately using the Manual program.
Default values apply.
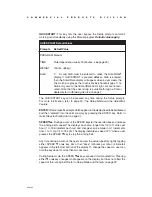
QUICKSTART Default Values
Prompts
Default Value
PROGRAM Manual
TIME
Club dependent (usually 30 minutes - see page 25.)
WEIGHT
150 lbs. (68 kg.)
AGE
0 : A valid AGE must be entered to utilize the SmartRate
®
display. If QUICKSTART is pressed
after
an AGE
is entered,
then the SmartRate display will appear when a user wears the
chest strap or grasps the touch-sensitive handrail grips. If no
AGE
entry occurs, then SmartRate
LED’s light, but are not acti-
vated. Note that the chest strap is available through a Precor
dealer. Refer to
Obtaining Service on page 7.
The QUICKSTART key can be pressed any time during the Setup prompts.
For more information, refer to page 30,
The Setup Mode and the QuickStart
Feature.
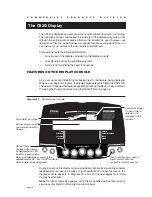
ENTER:
Workout specific prompts which appear on the display need to be addressed
and then “entered” into the unit's memory by pressing the ENTER key. Refer to
Quick Steps to Working Out on page 37.
SPEED
▼▲
:
During a workout, the SPEED keys let the user decrease or increase
the running belt’s speed. The display can show a range from 0.5 to 11 miles per
hour (1 to 18 kilometers per hour) and changes can be made in 0.1 increments
from 1 to 11 mph (1 to 18 kph). The display indicates a speed of “0” when a user
presses the SPEED
▼
key to stop the running belt.
Any time during a workout, the user can view the actual speed by lightly tapping
either SPEED
▼
or
▲
key. His or her “pace” (minutes per mile or kilometer)
appears in the left-most portion of the display. To change the speed, a user can
hold the key down for more than two seconds.
During Setup mode, the SPEED
▼▲
keys are used for data selection. Pressing
either
▼
or
▲
key changes what appears on the display, but does not affect the
speed of the running belt. Refer to
Setup Mode and Prompts on page 29.


