AVH-P5200BT/XNUC
99
5
6
7
8
5
6
7
8
C
D
F
A
B
E
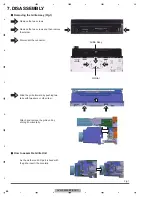
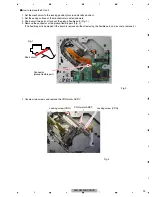
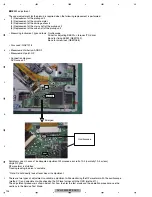
Fig. 2
Fig. 1
Connector
(pickup flexible part)
Short circuit
-
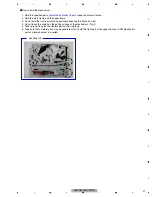
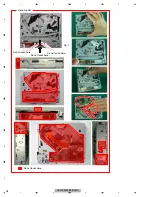
How to remove the PU unit
1. Set the mechanism to the locking position (disc load standby position).
2. Set the ceiling surface of the mechanism module downward.
3. Short-circuit two parts of lands of the pickup flexible part. (Fig. 1)
4. Remove the connector of the pickup flexible part. (Fig. 2)
(The flexible part is damaged if the board is removed without removing the flexible part, so be sure to remove it.)
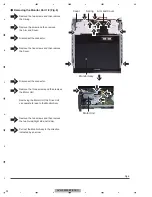
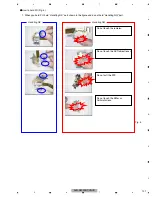
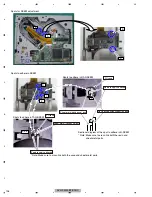
1. Unscrew two screws and remove the CRG motor ASS'Y.
Fig. 3
Locking screw (CRG)
Locking screw (CRG)
CRG motor ASS’Y
Содержание Super Tuner IIID AVH-P5200BT
Страница 29: ...AVH P5200BT XNUC 29 5 6 7 8 5 6 7 8 C D F A B E ...
Страница 64: ...AVH P5200BT XNUC 64 1 2 3 4 1 2 3 4 C D F A B E ...
Страница 65: ...AVH P5200BT XNUC 65 5 6 7 8 5 6 7 8 C D F A B E ...
Страница 102: ...AVH P5200BT XNUC 102 1 2 3 4 1 2 3 4 C D F A B E ...
Страница 116: ...AVH P5200BT XNUC 116 1 2 3 4 1 2 3 4 C D F A B E 9 3 EXTERIOR 2 D E C B H G Drive Unit A A B C E D ...
Страница 157: ...AVH P5200BT XNUC 157 5 6 7 8 5 6 7 8 C D F A B E ...
Страница 161: ...AVH P5200BT XNUC 161 5 6 7 8 5 6 7 8 C D F A B E ...
Страница 171: ...AVH P5200BT XNUC 171 5 6 7 8 5 6 7 8 C D F A B E ...
Страница 172: ...AVH P5200BT XNUC 172 1 2 3 4 1 2 3 4 C D F A B E 10 14 DRIVE UNIT K K MAIN PCB UNIT CN2001 2 5 A ...
Страница 173: ...AVH P5200BT XNUC 173 5 6 7 8 5 6 7 8 C D F A B E M L K L SWITCH PCB UNIT M VOLUME PCB UNIT CXC6638 CXC6639 ...
Страница 187: ...AVH P5200BT XNUC 187 5 6 7 8 5 6 7 8 C D F A B E ...

